3D Modelling
11. Bowling Tutorial Part 3 - Rendering
Introduction
This documentation is intended as a text guide to accompany the third video in the 'Bowling' set of videos. It will cover rendering your final bowling video.
Step 1 - Camera
The camera is the point of view from which your final render will be viewed from.
Make sure that the camera is selected.
Using G (move), R (rotate), and S (scale), adjust the position of your camera.
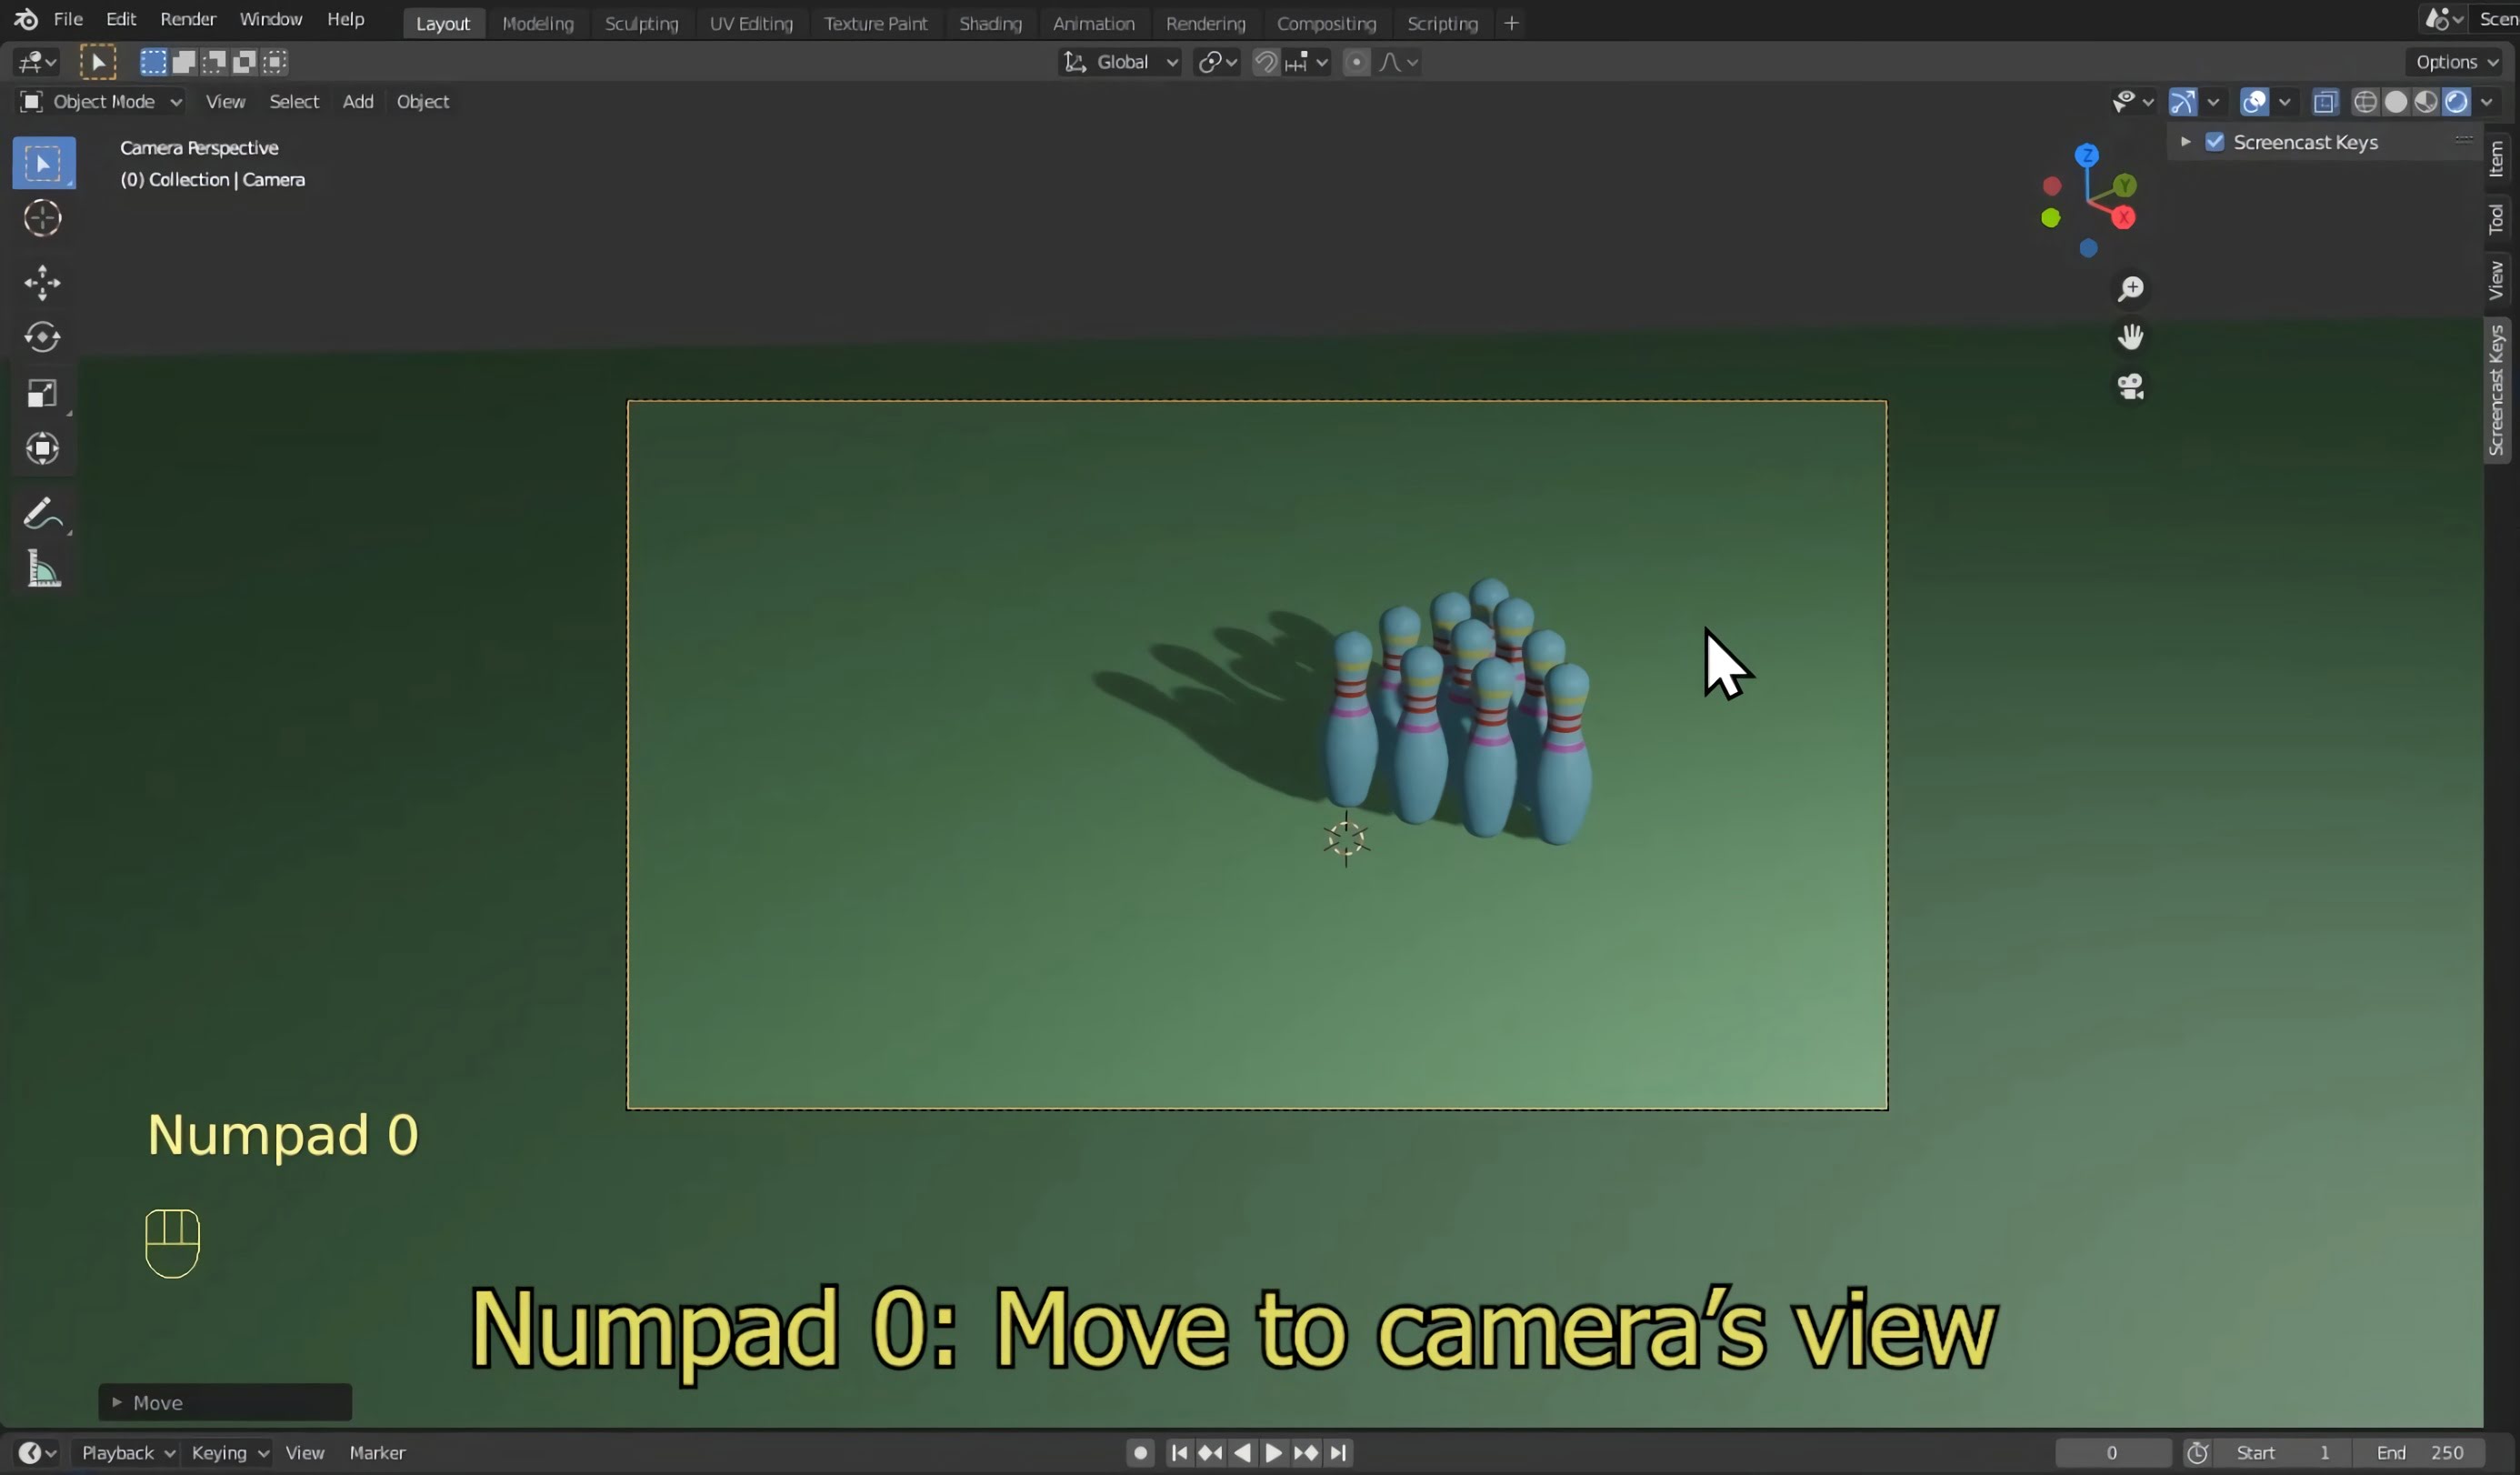
Press numpad 0 to move to the camera's point of view.
Open the view menu in the top-right of the viewport and click the box beside lock camera to view. This will allow your camera to orbit with your view and make positioning easier.
Orbit the camera's view using MMB.
Pan the camera's view using Shift+MMB..
(MMB = scroll-wheel)
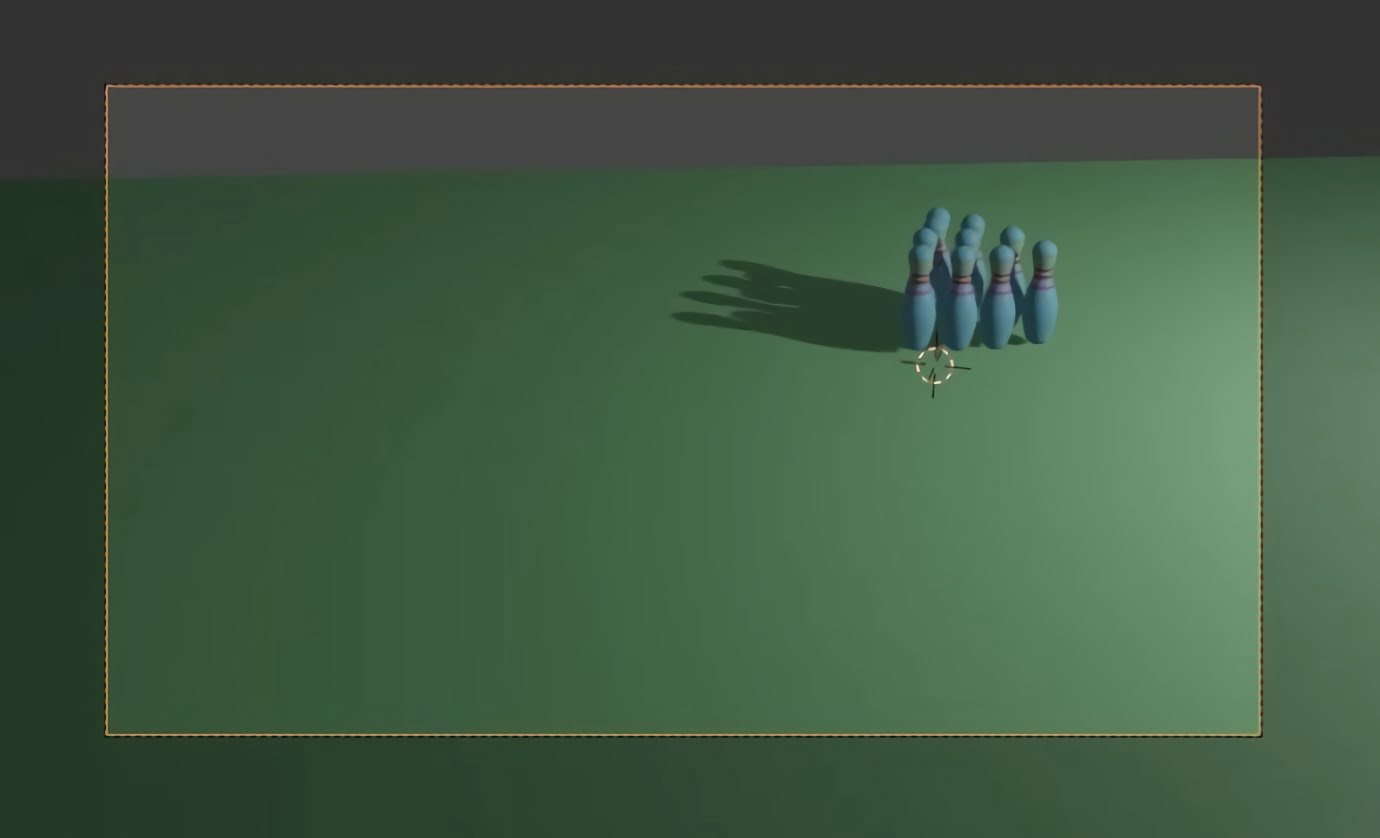
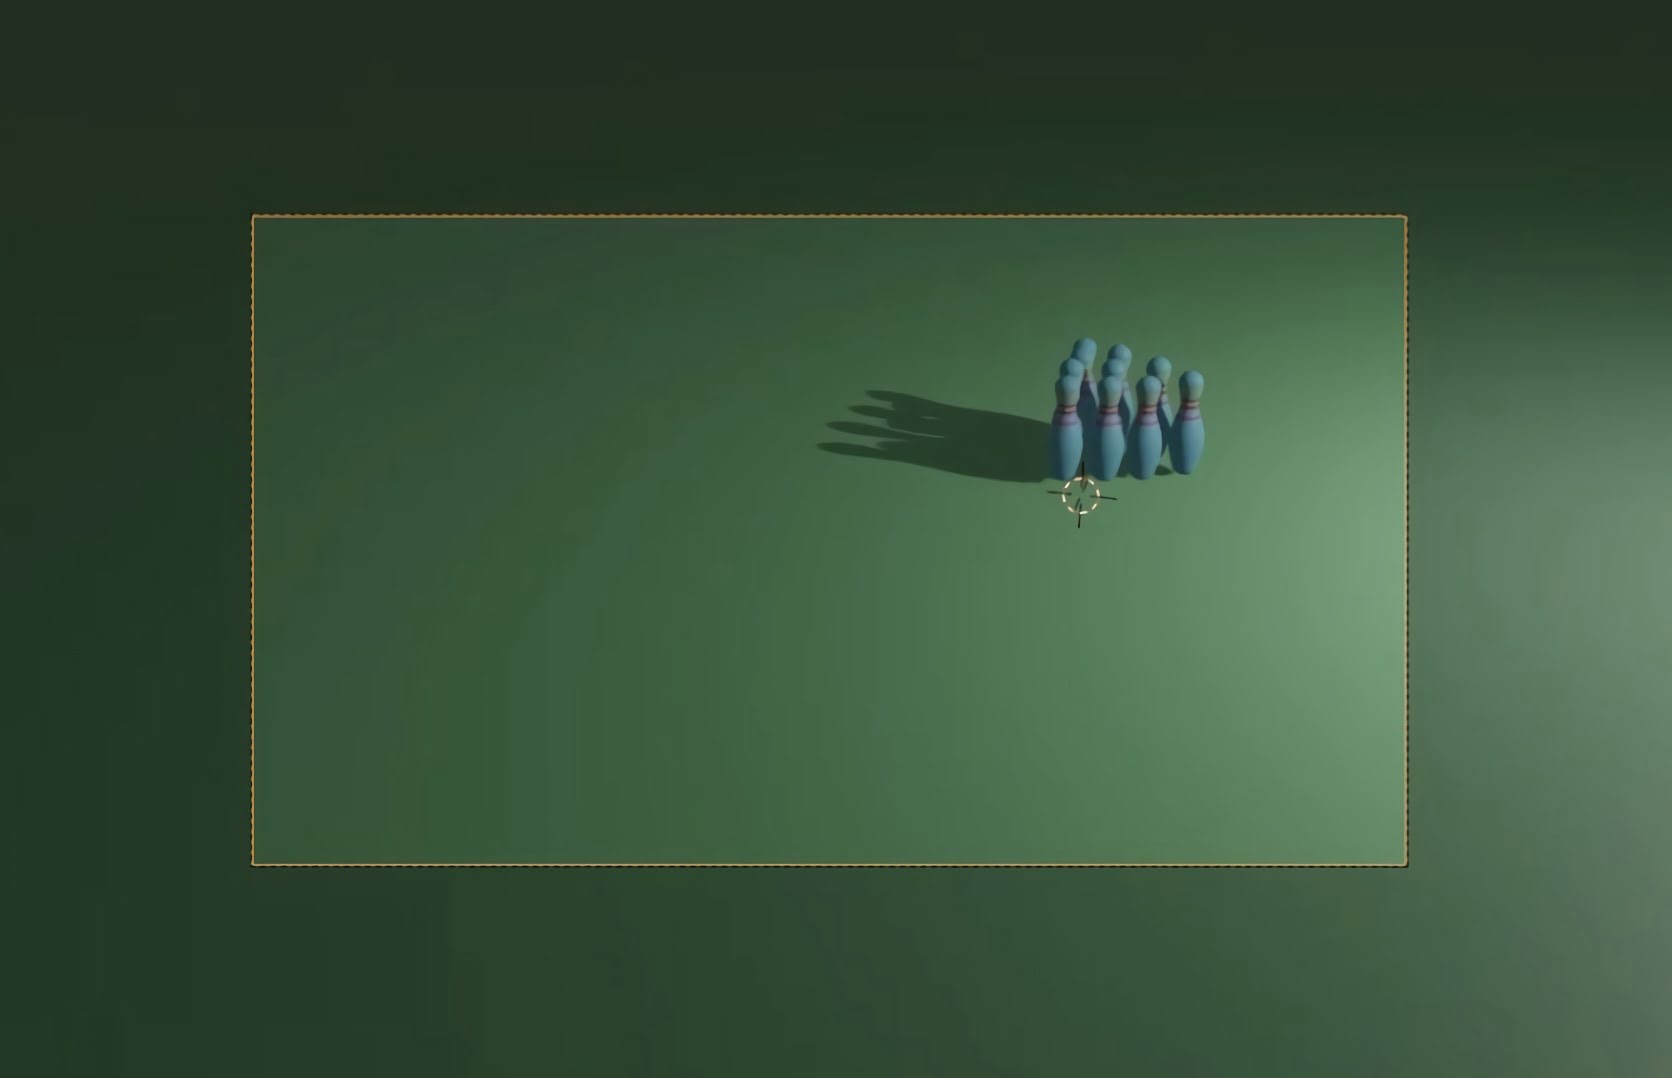
You may encounter an issue where a grey wall appears as seen below.
To resolve this, make sure that your camera is selected and then go to the camera properties tab.
Change clip end to 500 or above.
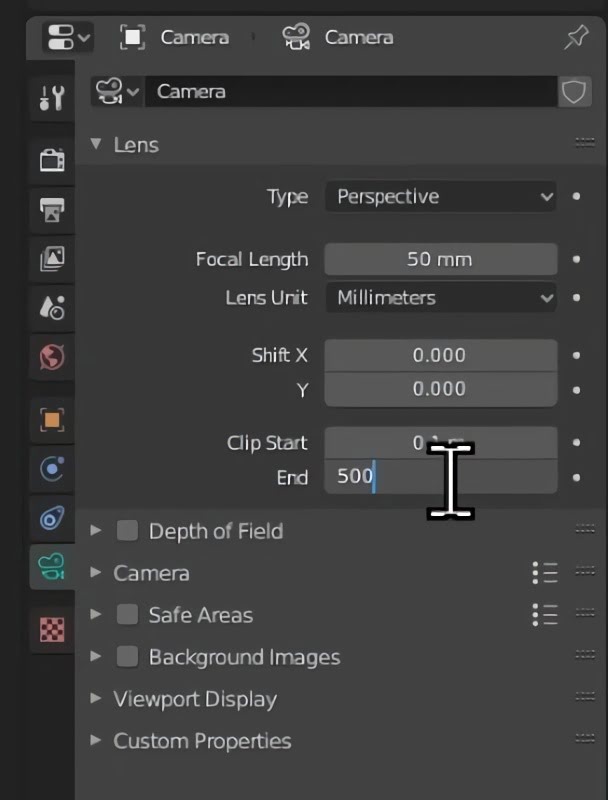
This will remove the grey wall.
Before moving onto the next step, adjust the camera until you're happy with its position.
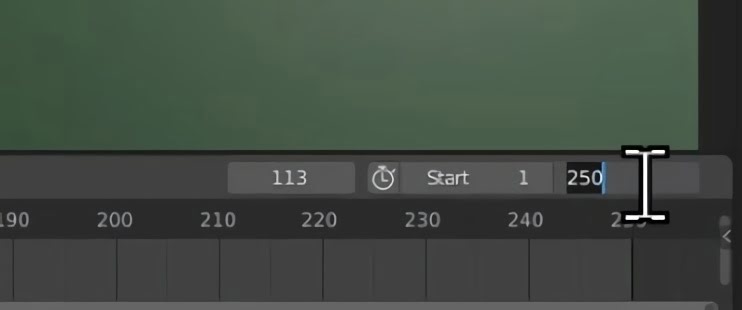
Step 2 - Length of animation
Press spacebar and watch your animation play. At the moment, it probably appears to be very long.
To change this, modify the end value on your timeline. This can be found in the bottom right hand corner of the 3D viewport.
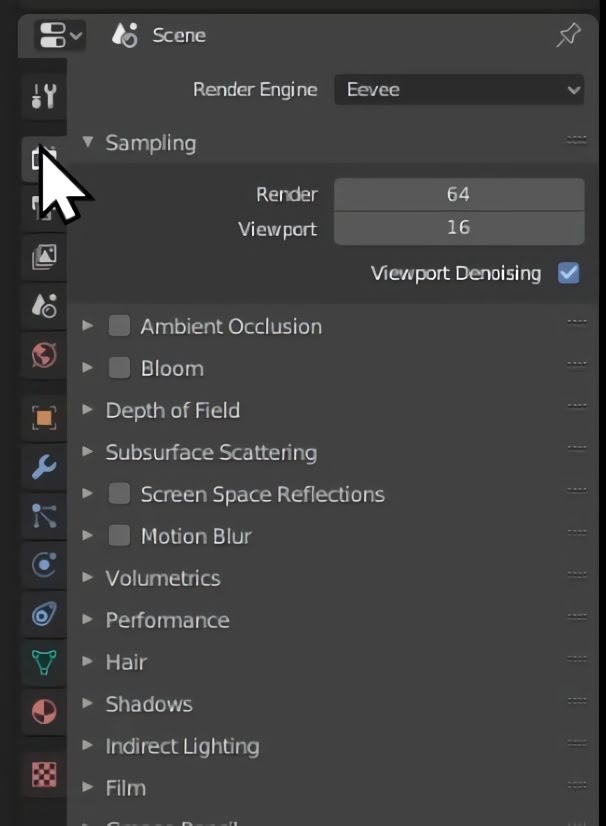
Step 3 - Render engine
Blender uses two very different render engines.
Eevee is fast and efficient & produces good lighting quality.
Cycles is slow but accurate & produces excellent lighting quality.
For more information, refer to the system requirements page.
To change render engine, go to the render properties tab. At the top, use the dropdown menu to switch between Eevee and Cycles.
Step 4 - Final preparations
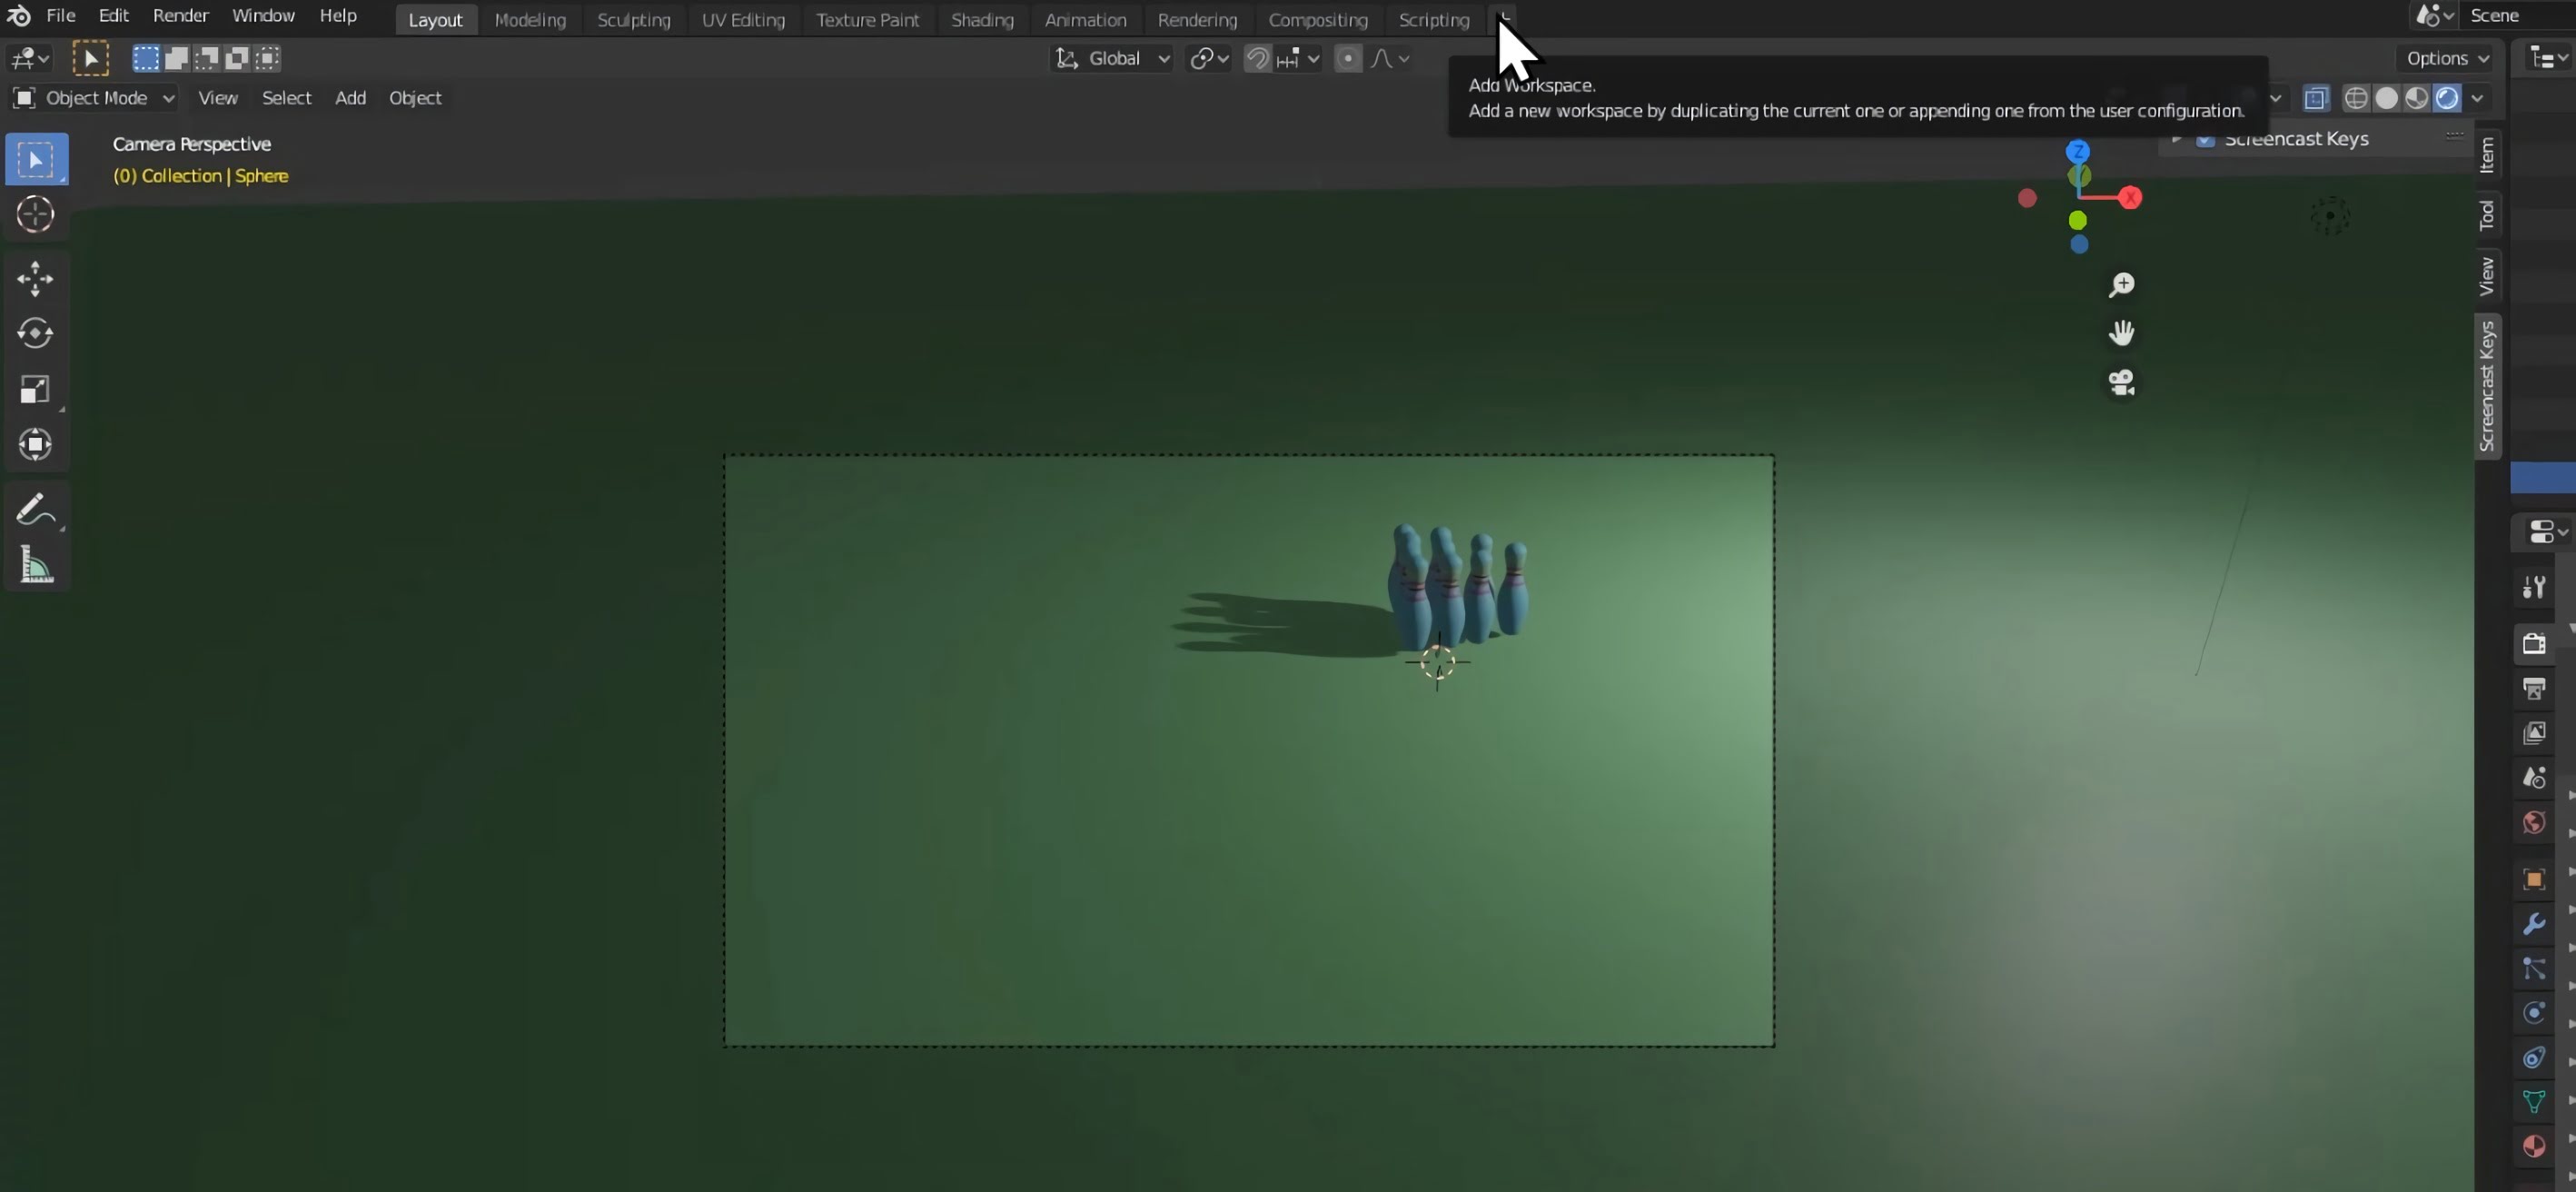
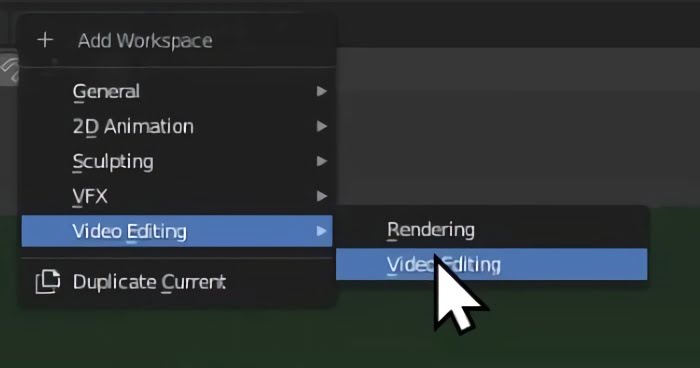
Click the plus icon at the top of the screen to add a new workspace.
Go to video editing and then select video editing.
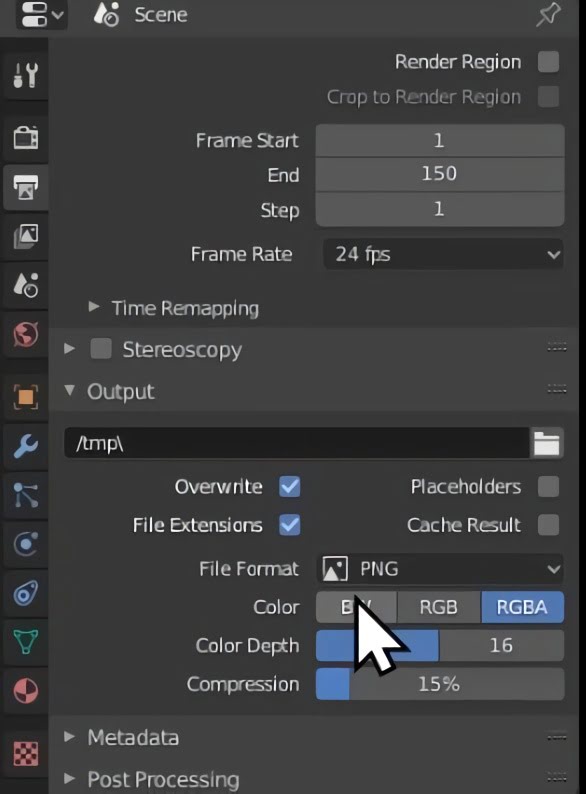
Go to the right side of the screen and scroll down to output. If you want, adjust the output folder. The default is the tmp folder on your C drive.
Open the file format menu.
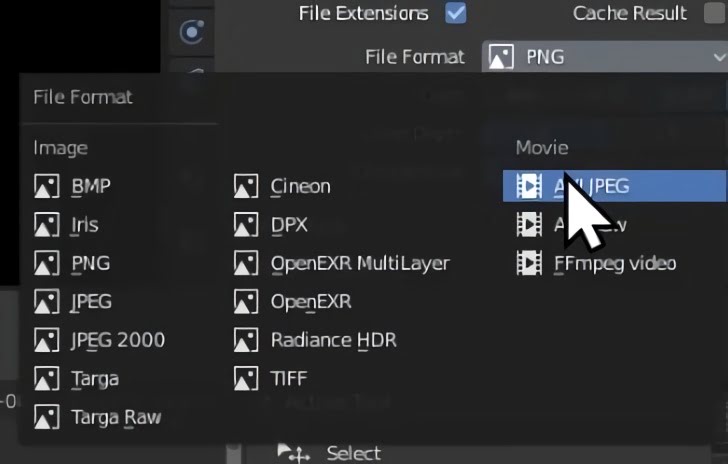
Change the file format to AVI JPEG or your preferred output format.
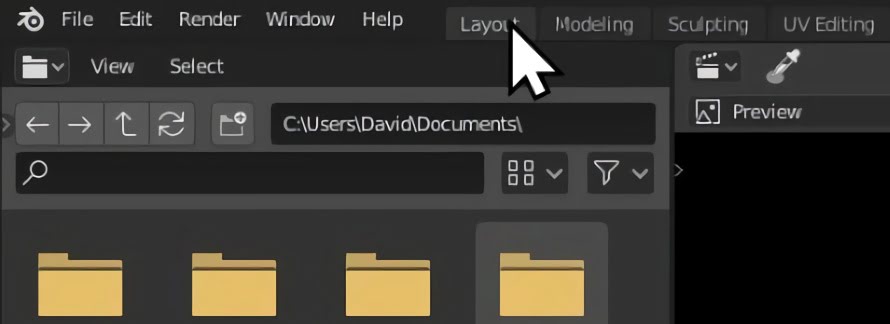
Return to the layout tab.
Step 5 - Rendering!
Press spacebar to let your animation play one more time. This will bake the data to ensure that it does not glitch during rendering.
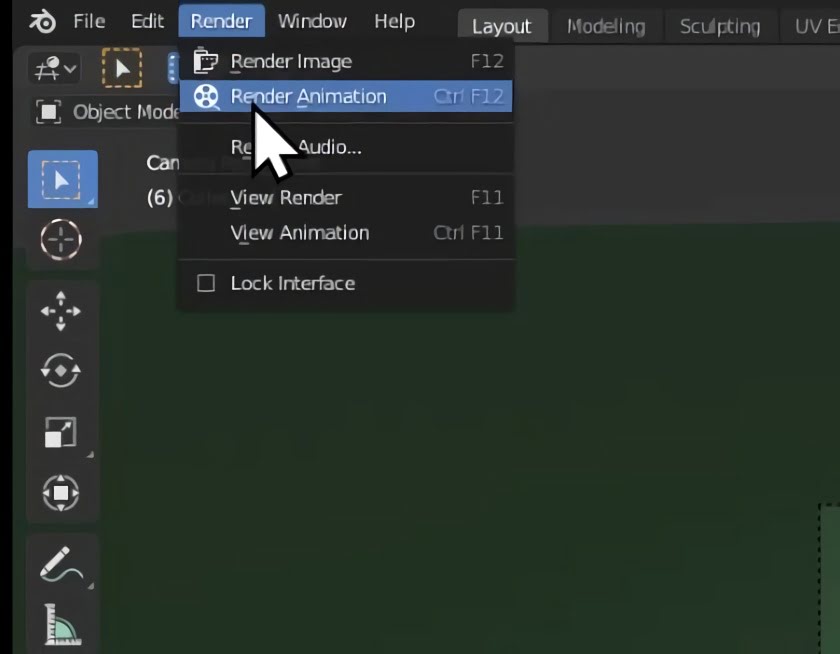
Go to the top-left and select render. Select render animation.
Wait for your machine to finish rendering all of the frames. This can take some time.
Step 6 - Viewing your final videos
Open file explorer. Open your C drive.
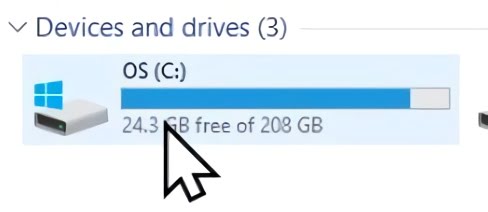
Locate tmp folder by typing tmp in the search box in the top-right.
Your final video will be in this folder! Enjoy.
Conclusion
You should now have a fully rendered bowling animation. Thank you for reading this text guide and I hope you enjoyed!
Created by: David Corish