TurtleStitch
07. How to Create a Star and a Star Spiral
How to Create a Star and a Star Spiral
How to create a Star
-
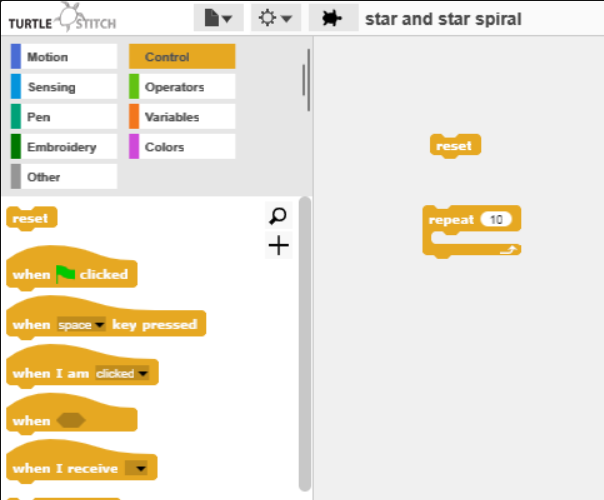
To start off, you are going to open a new project. You are going to go to the control section and drag the reset and repeat 10 buttons to the middle section. See image below:
-
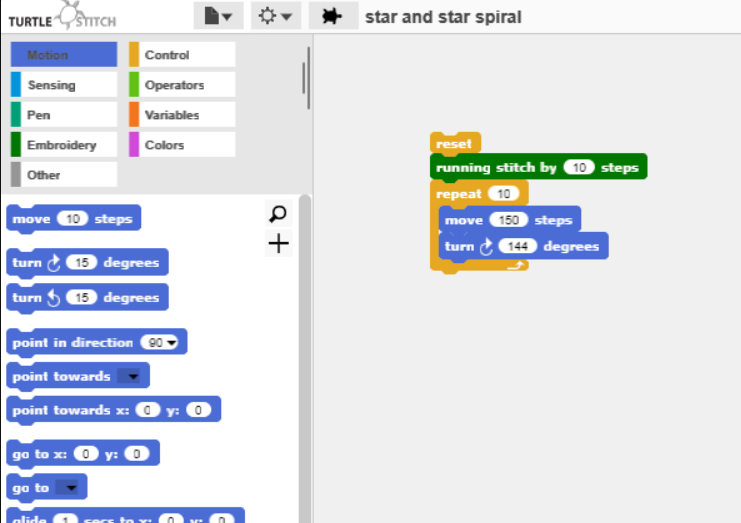
Then you are going to go to the embroidery section and drag the running stitch by 10 button to the middle section.
-
After that, you will go to the motion section and grab the move 10 steps and turn degrees button and drag those buttons into the repeat loop.
-
Change the move 10 to 150 steps and change turn 15 to 144 degrees.
-
Connect all the buttons together like so:
-
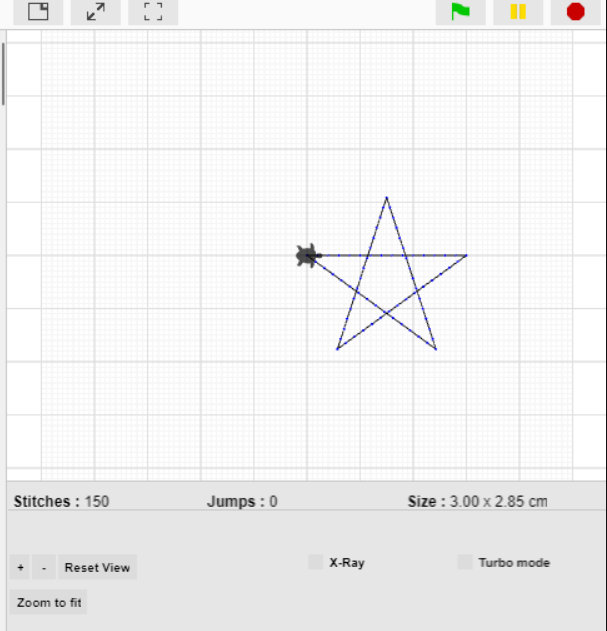
Click on the block and a star will be stitched. This is what it should look like:
How to create a spiral of stars
-
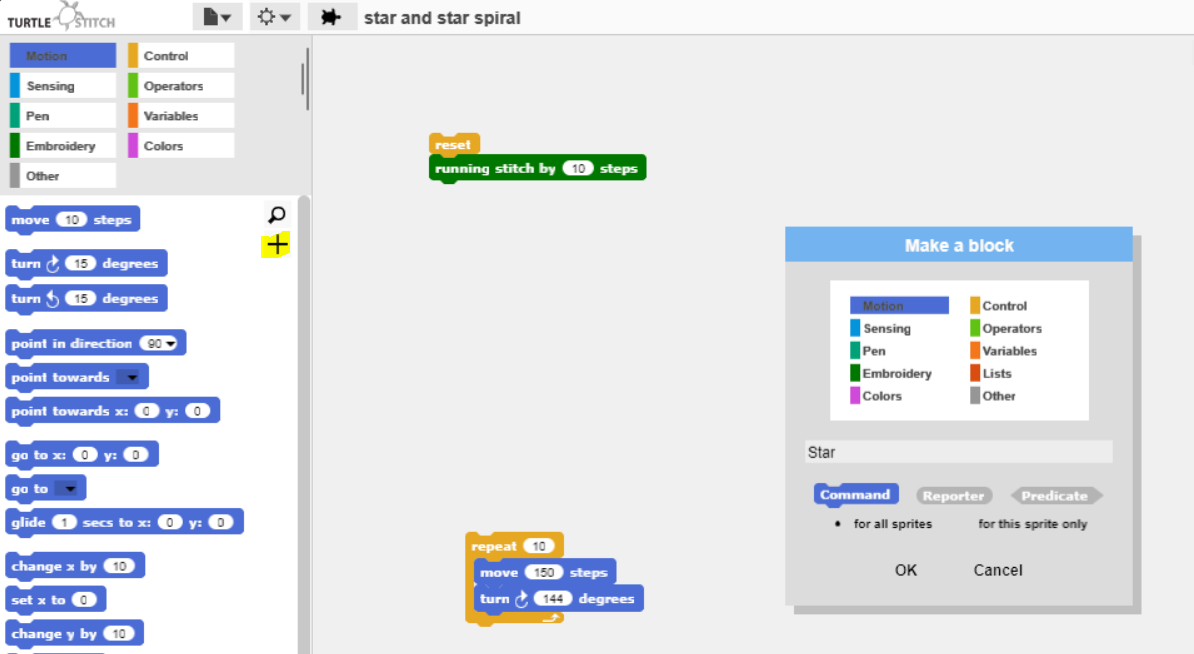
Keep your code from the star project. You are going to click on the + button on the left hand-side.
-
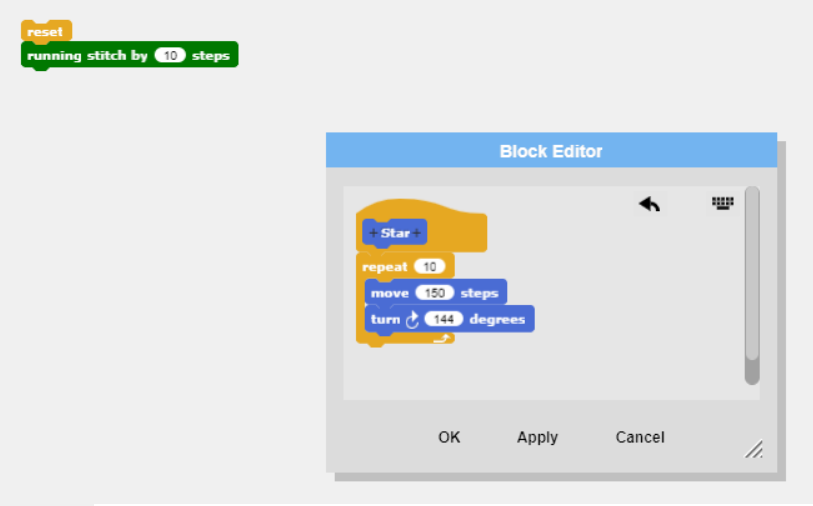
This allows you to make your code neater, we are going to keep the block in the motion section and call it star. Look at image bellow:
-
Click ok and then add you code that creates a star to the star block.
-
Once you have done this, click ok and now when you scroll down in the motion section you will see your star shortcut. Drag this over to the middle section and start creating your star spiral.
-
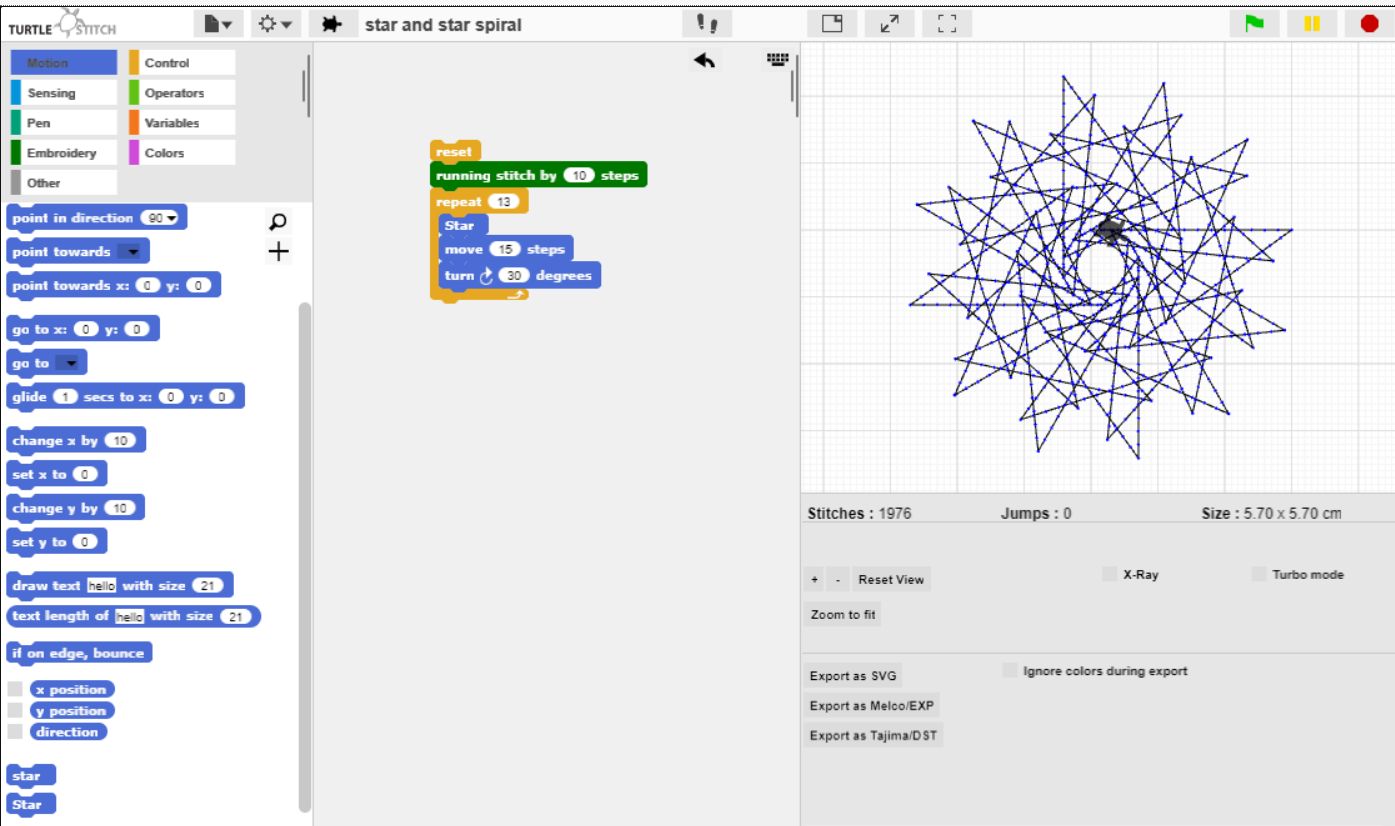
To create a star spiral, you need another repeat loop and put the star block inside it.
-
Underneath the star code in the loop, you will need to add a move 10 steps and a turn degrees button. You can mess around with these numbers to create different spirals. I will show you the code and the pattern I created as an example.
Created by: Hope Boyle