Gaming in Unity
10. Unity 2D Game 6 - Health User Interface

In this guide, we will use UI Builder to create the User Interface for HealthBar!
Step 1 - UI Builder Set-up
To add a health bar, we're going to make use of Unity's UI Builder.
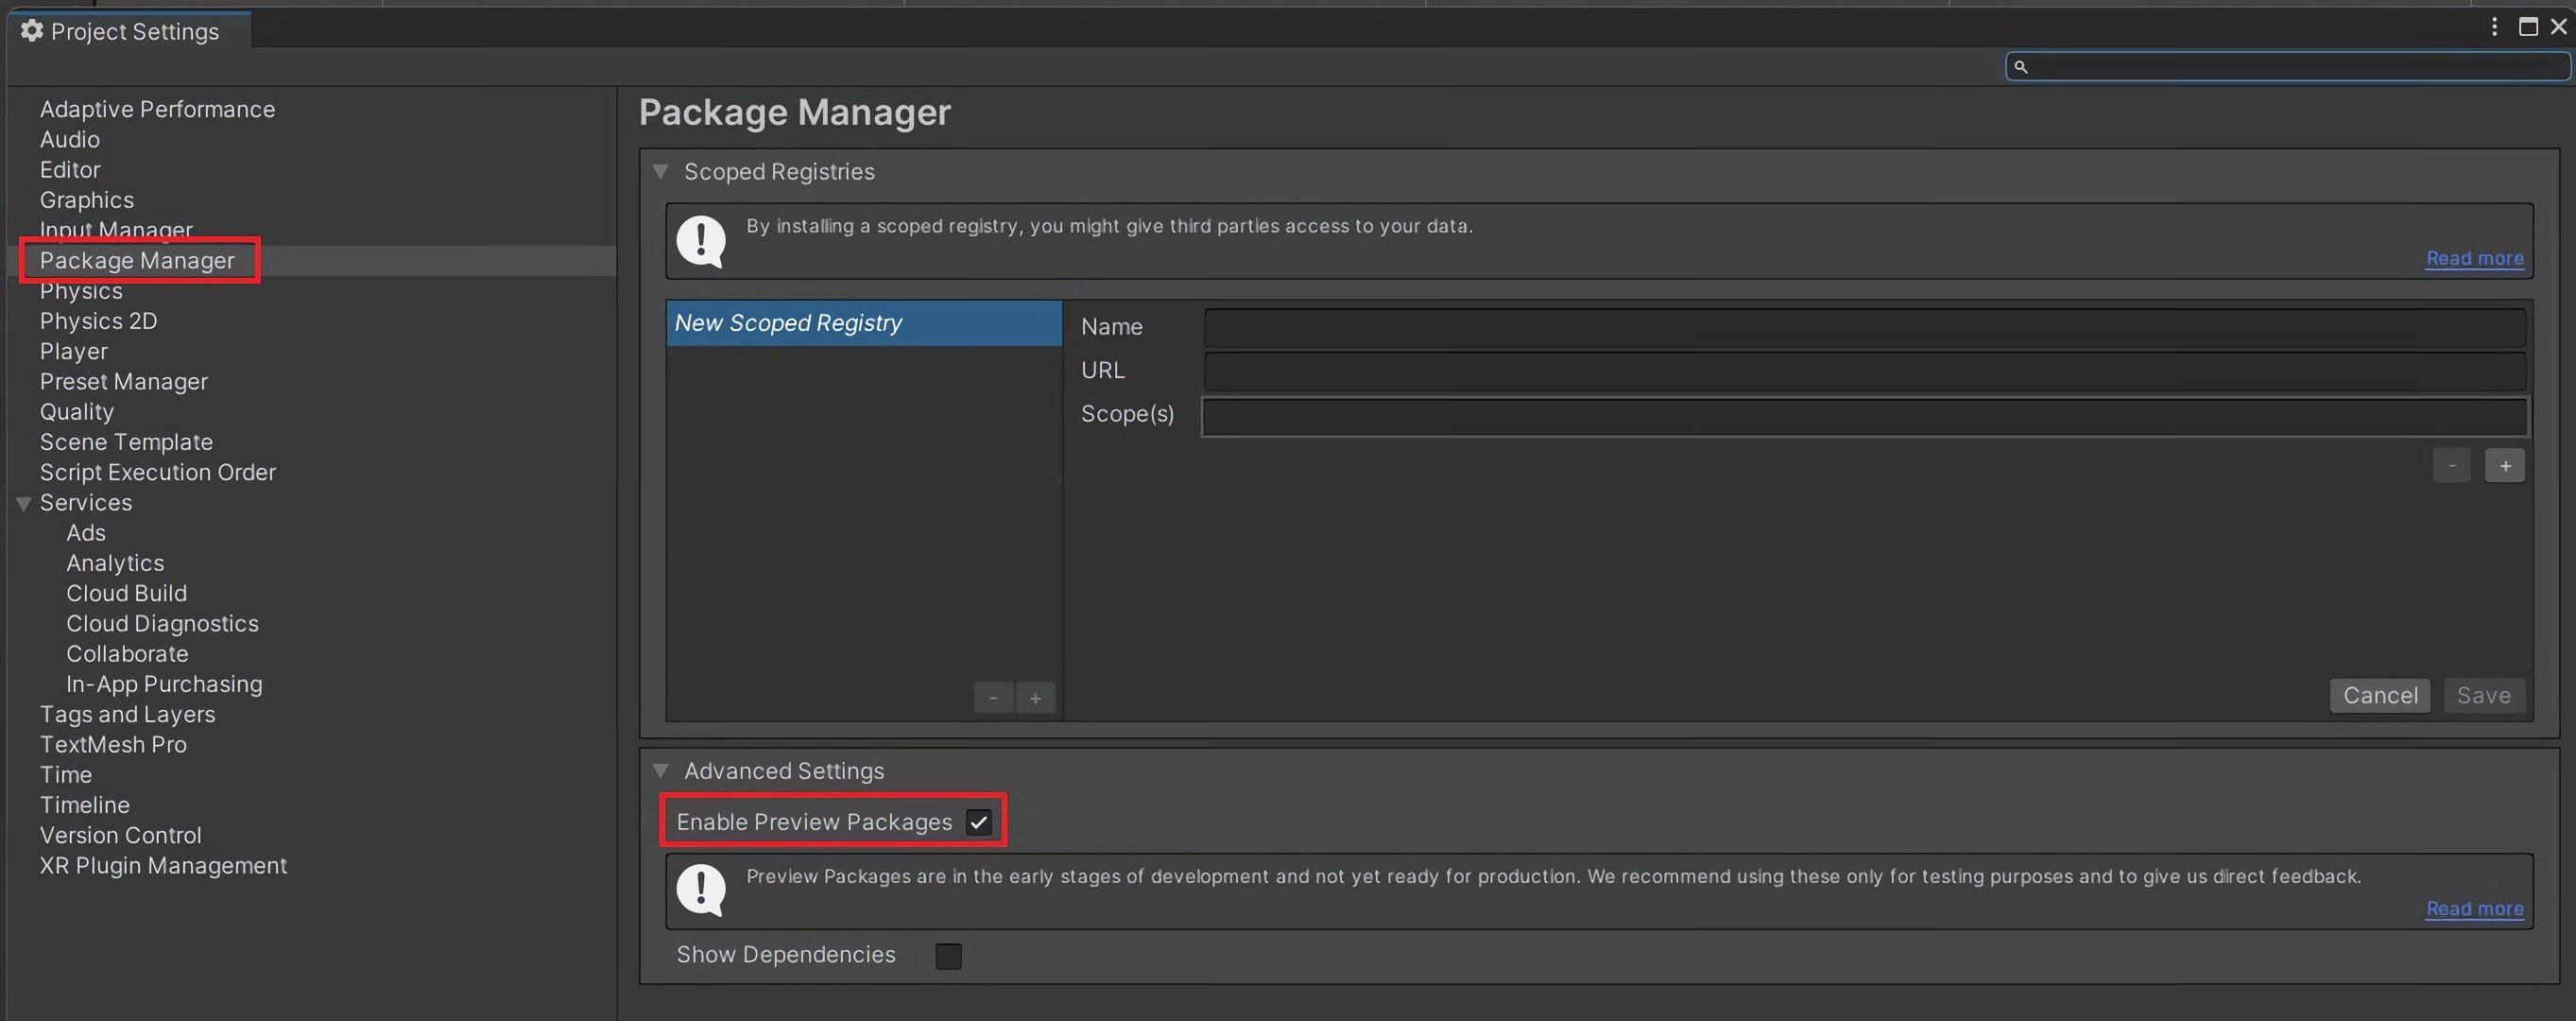
UI Builder is currently in pre-release so we need to open Edit -> Project Settings -> Package Manager and then tick Enable Preview Packages.
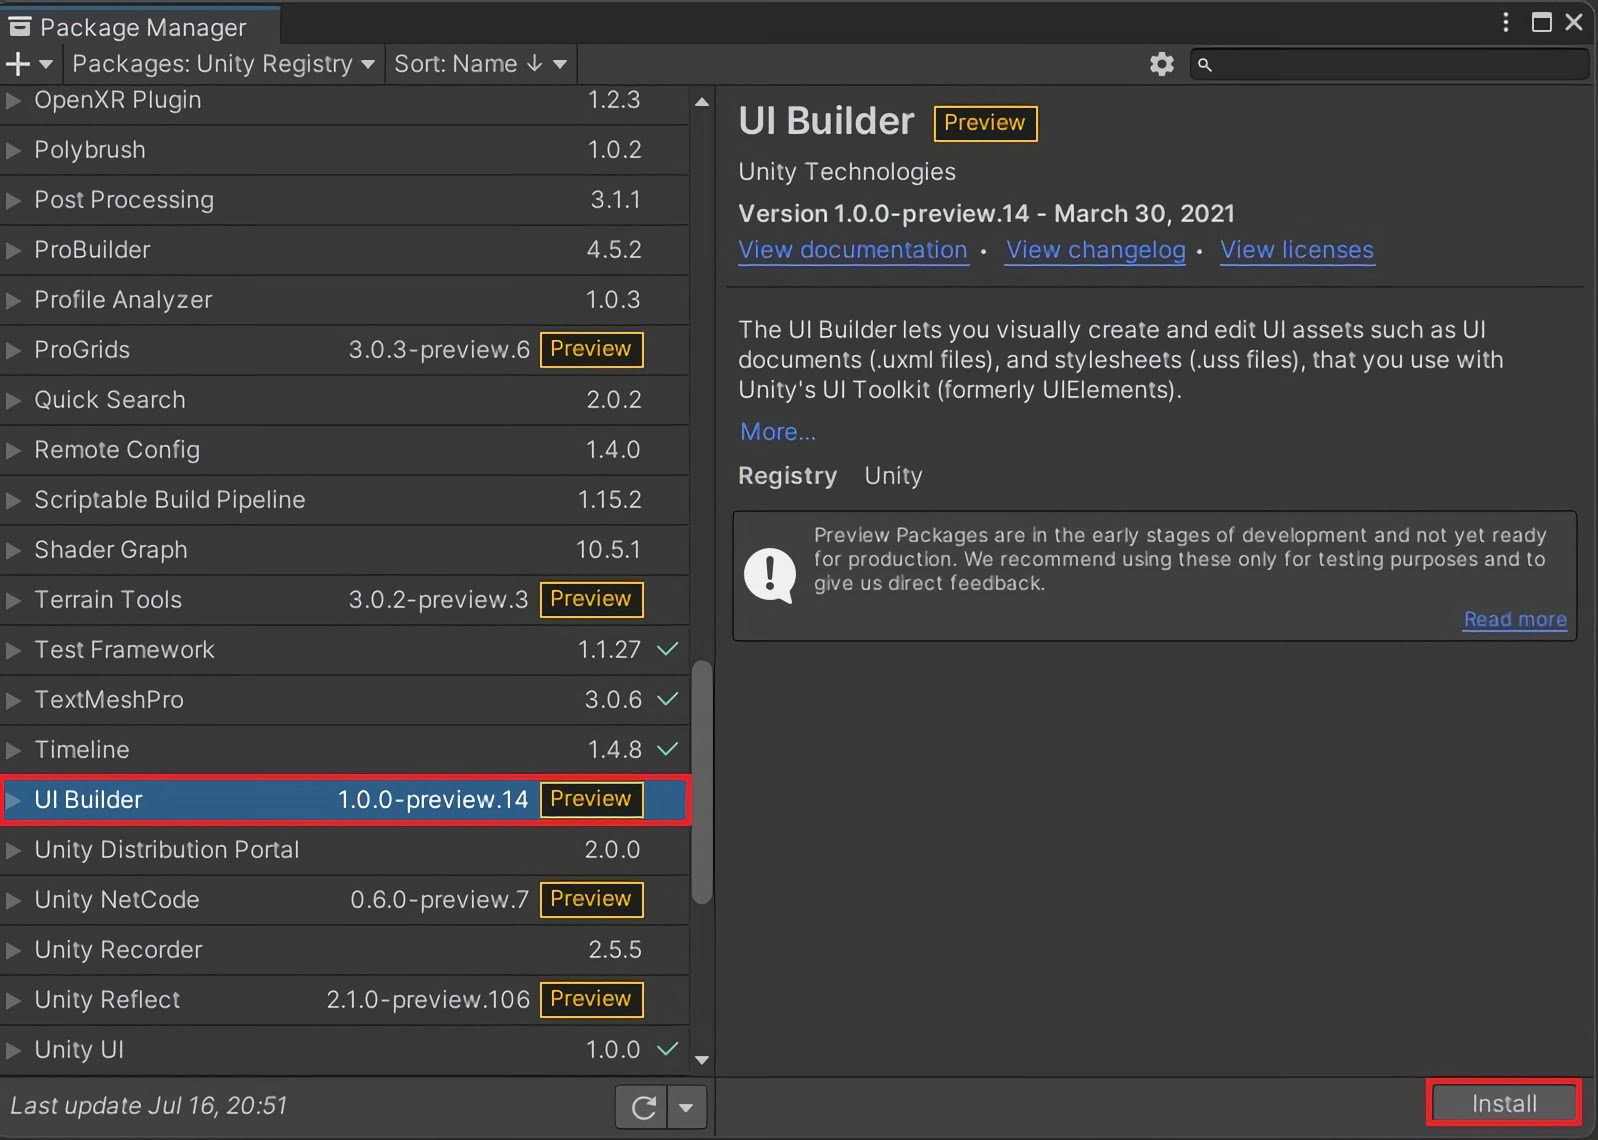
Open Window -> Package Manager and then install UI Builder.
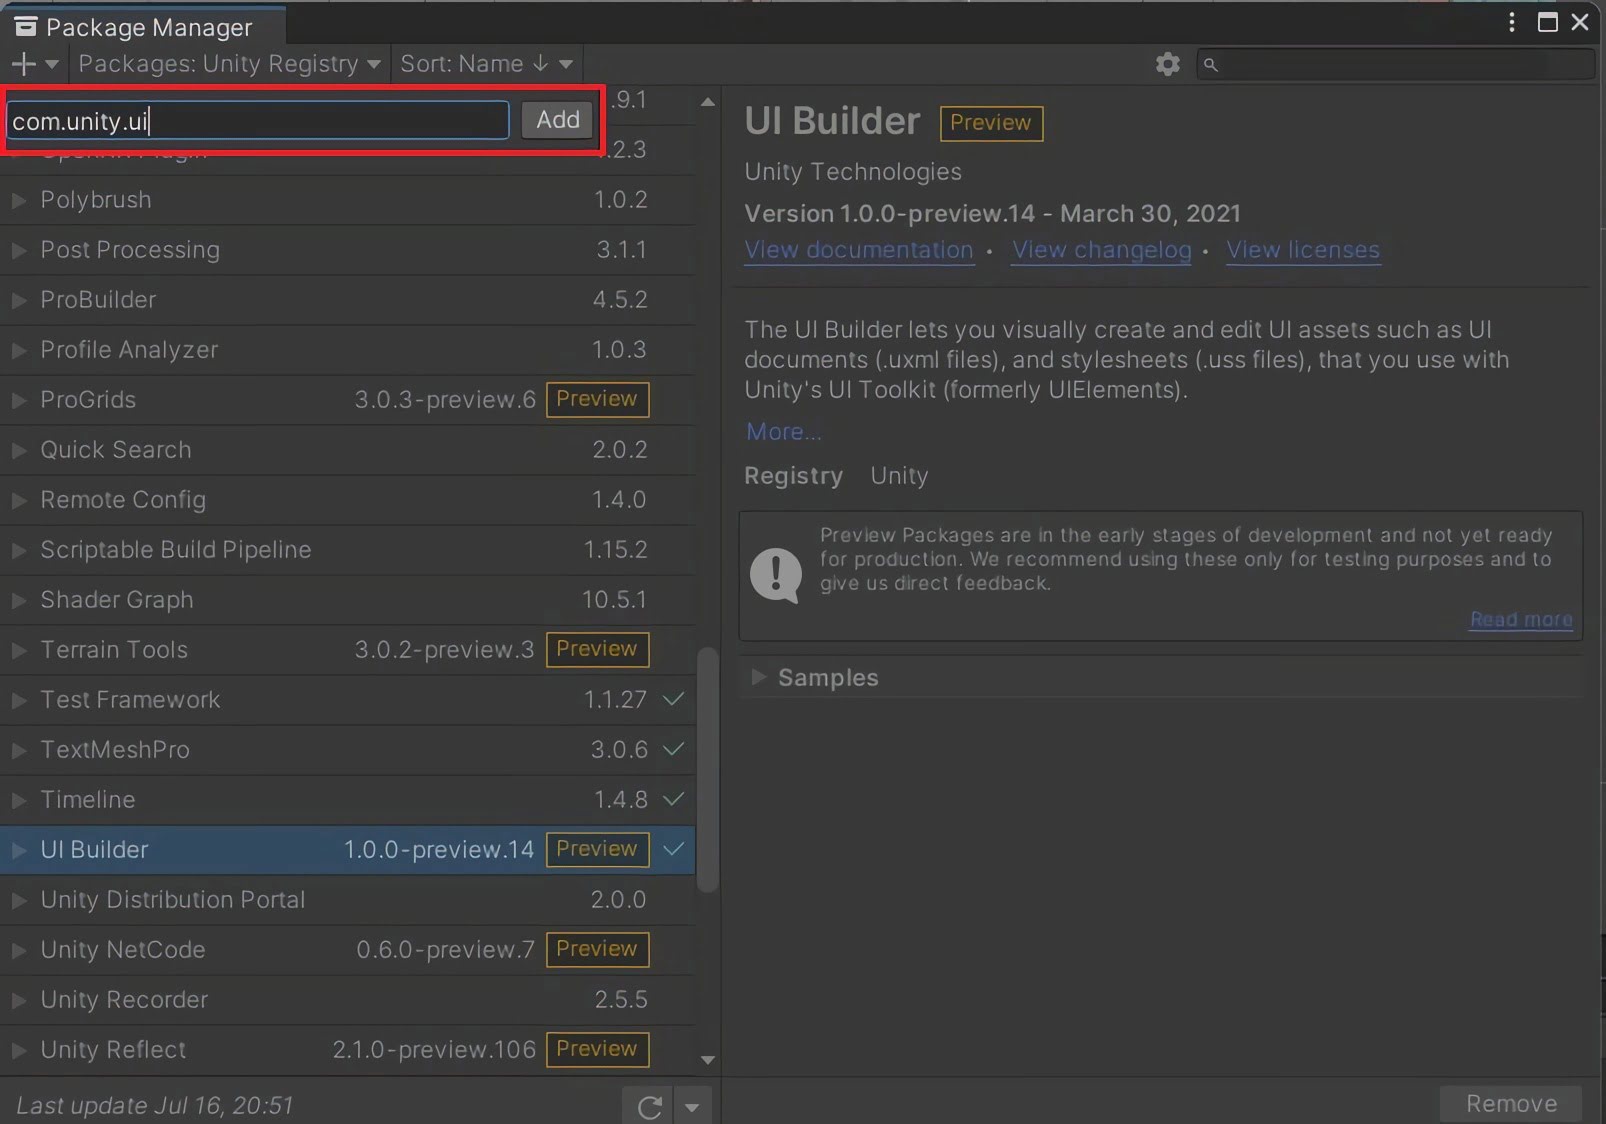
We also need to add UI Toolkit.
Click the plus in the top left and then type com.unity.ui
Click add.
Step 2 - Building UI
Open UI Builder by going to Window -> UI Toolkit -> UI Builder.
This is the UI Builder layout.
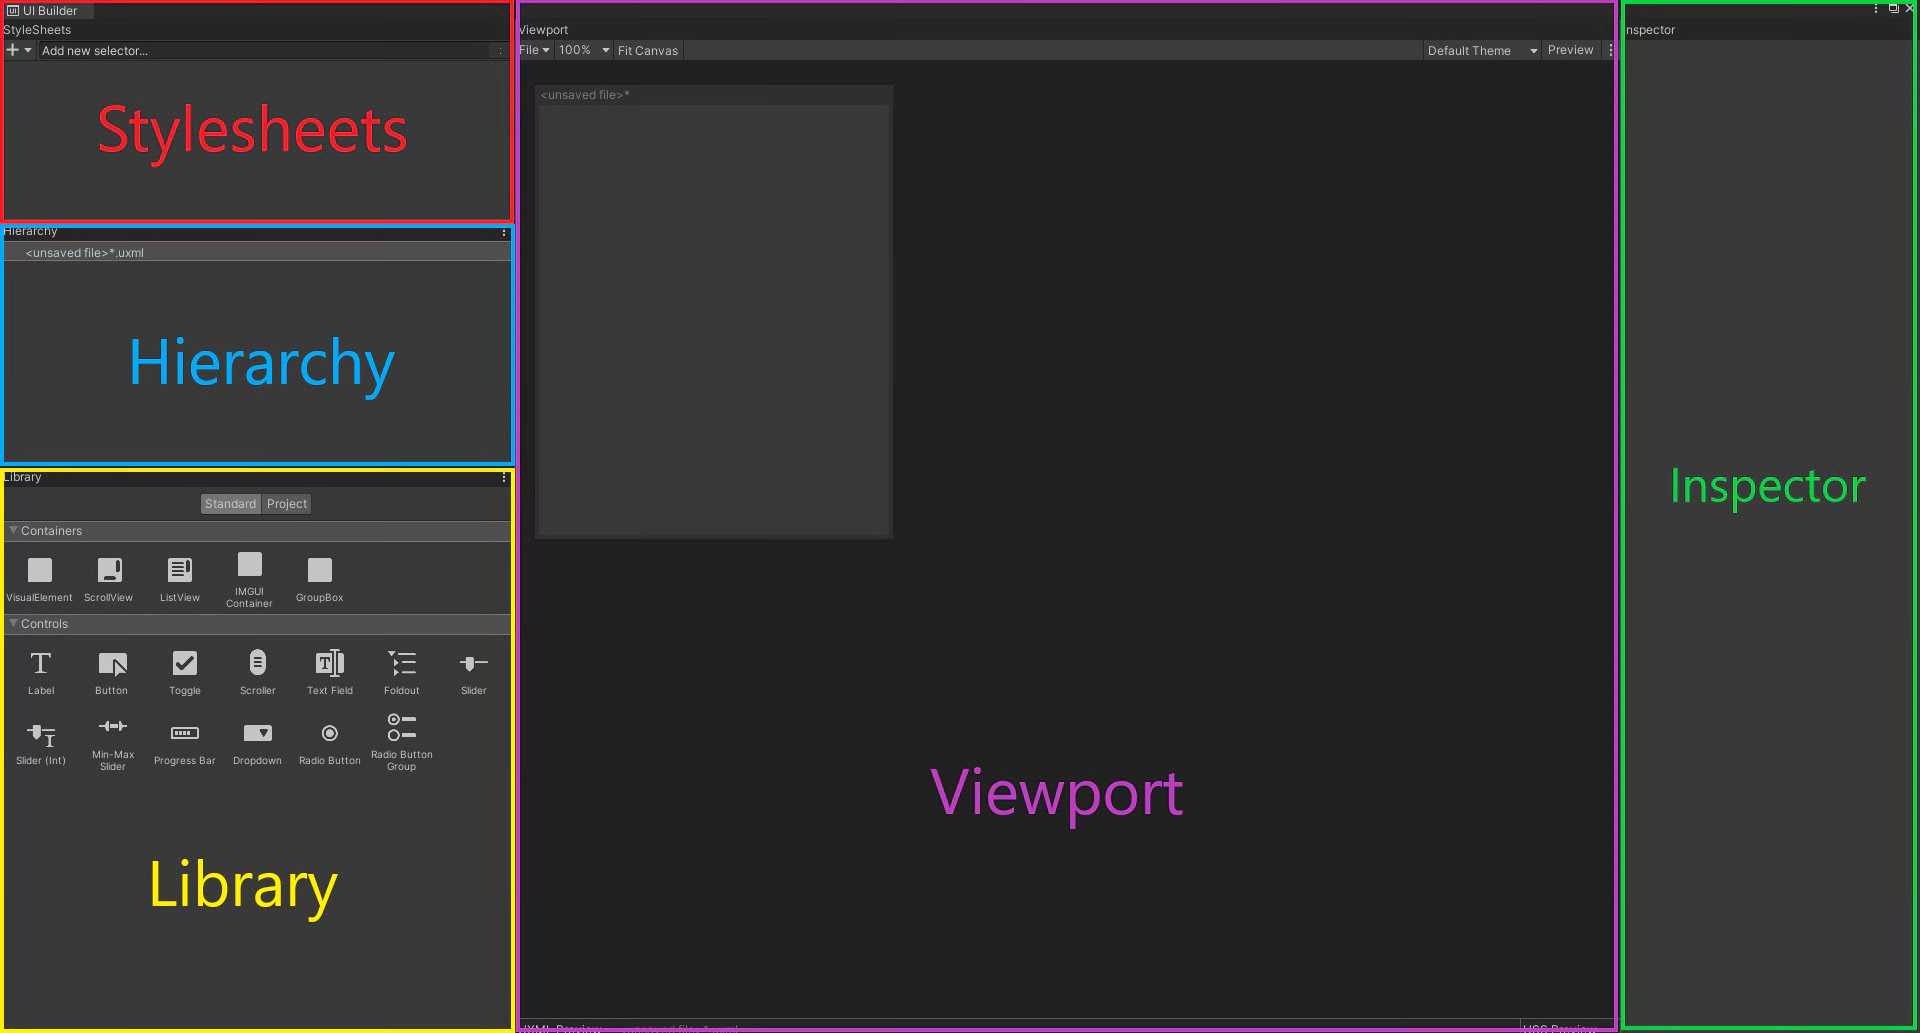
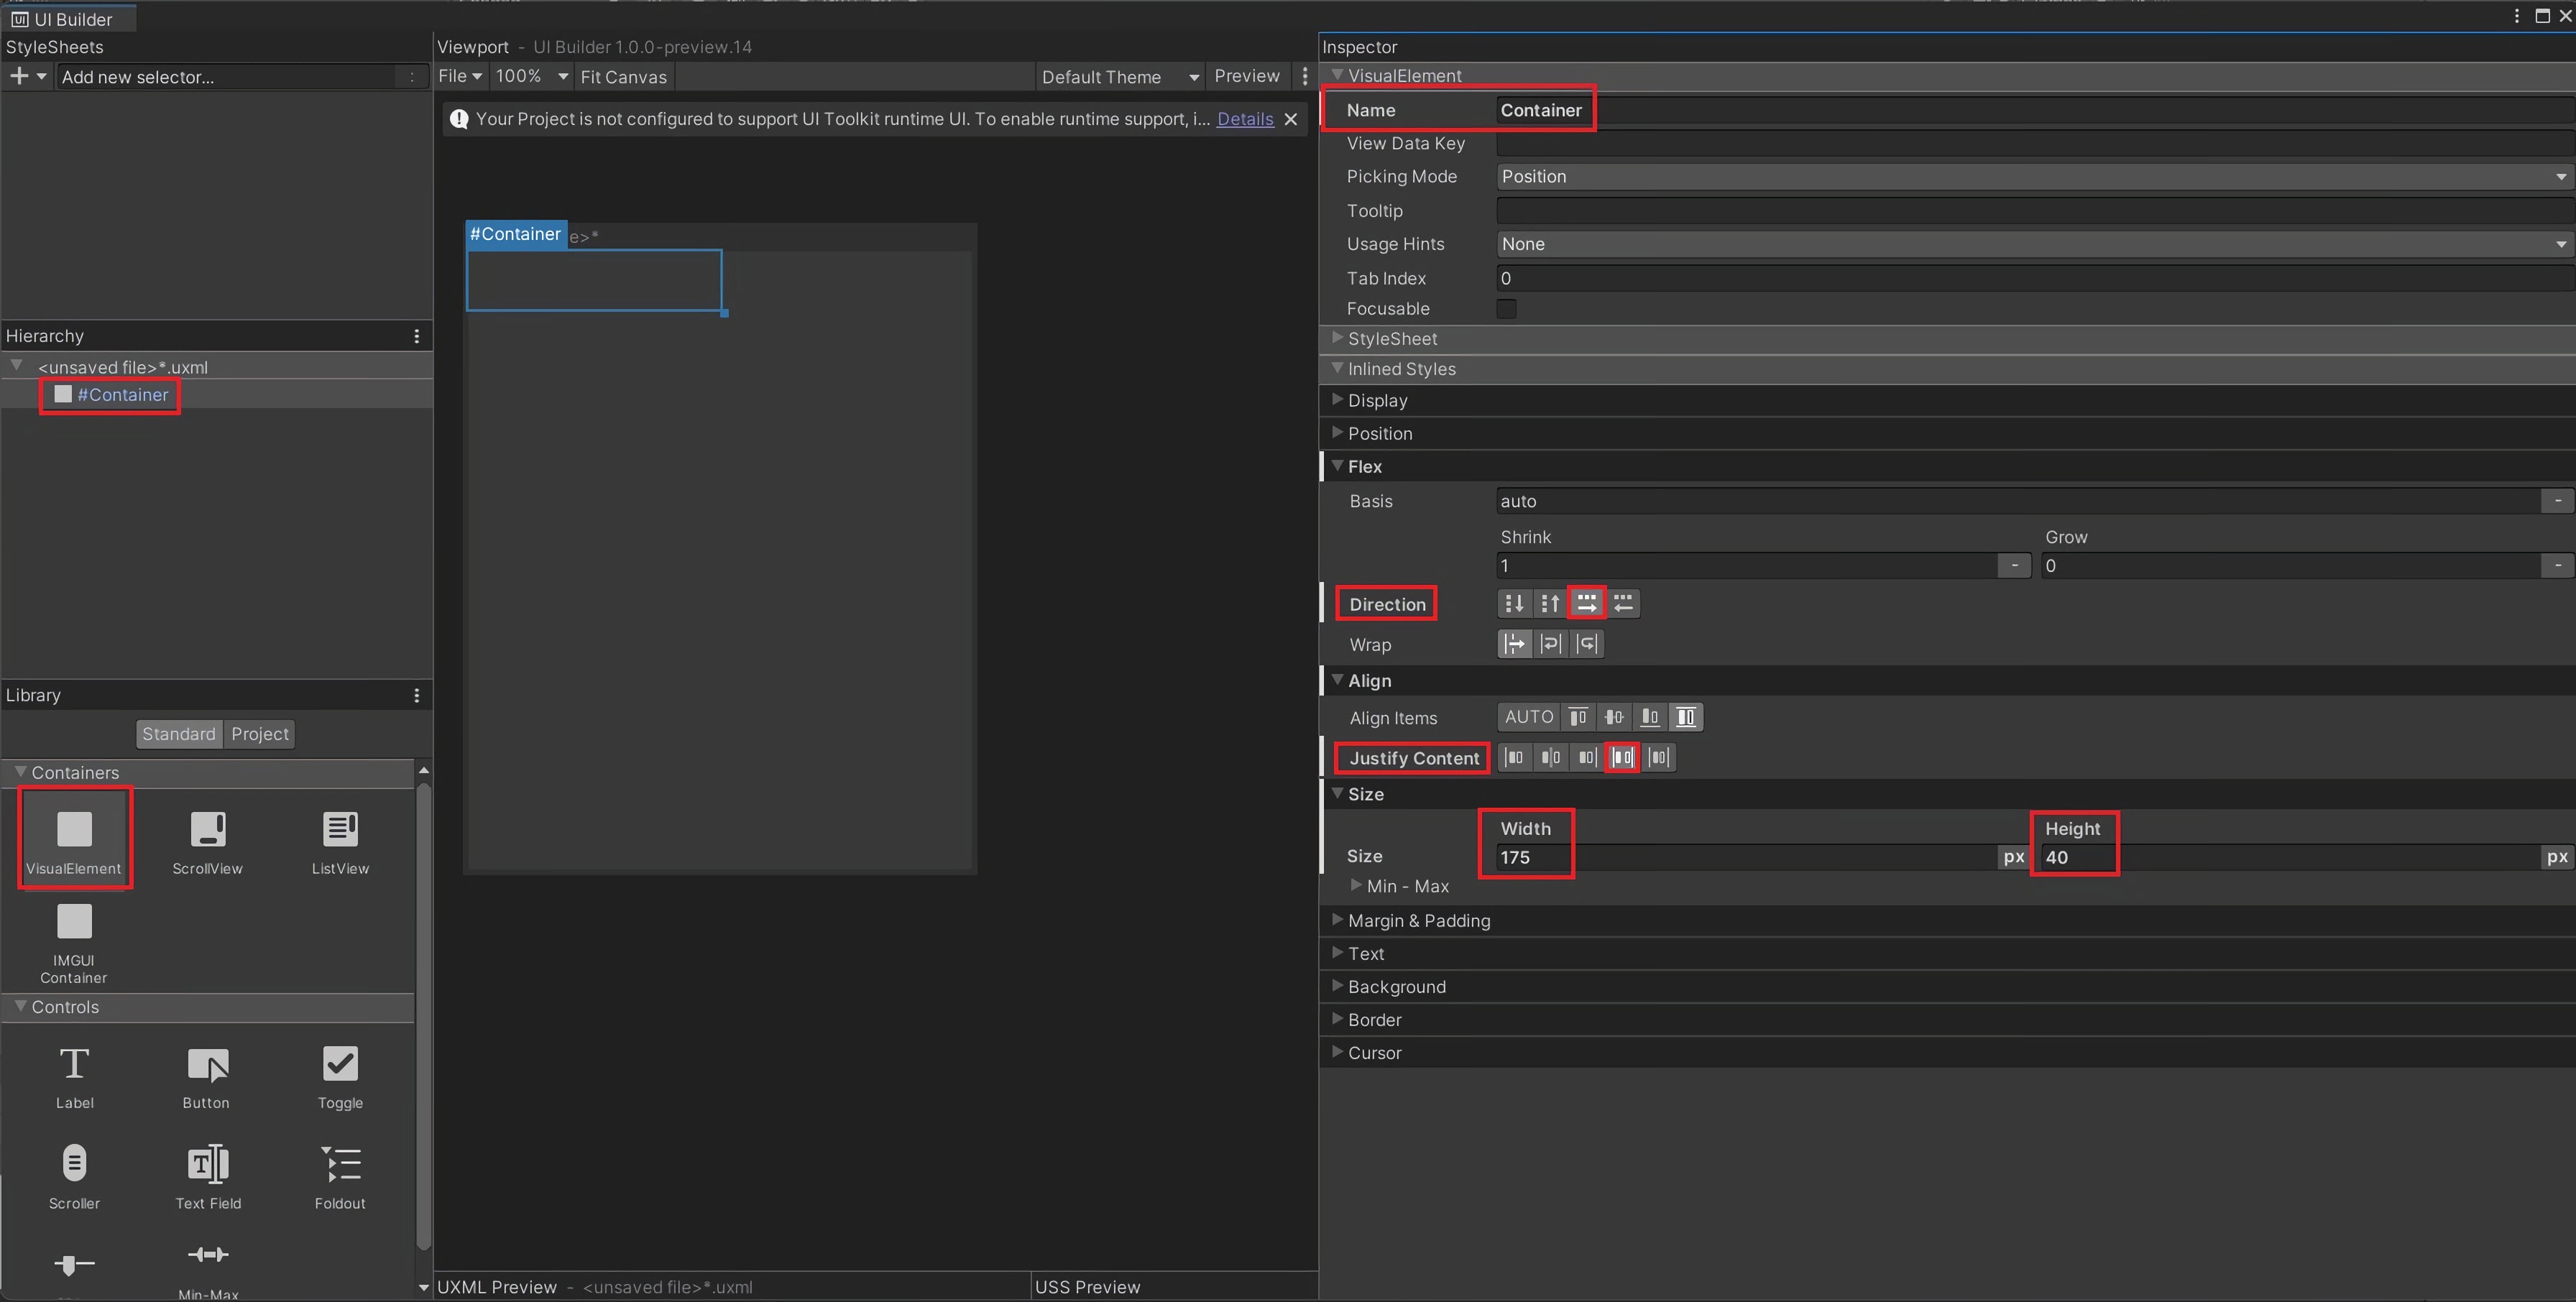
To start with, drag a VisualElement from the Library and place it in the Hierarchy window.
Click on the VisualElement to open its properties in the Inspector.
Change the following:
Name: Container
Flex -> Direction: Row
Align -> Justify Content: Space-between
Size -> Width: 175px
Size -> Height: 40px
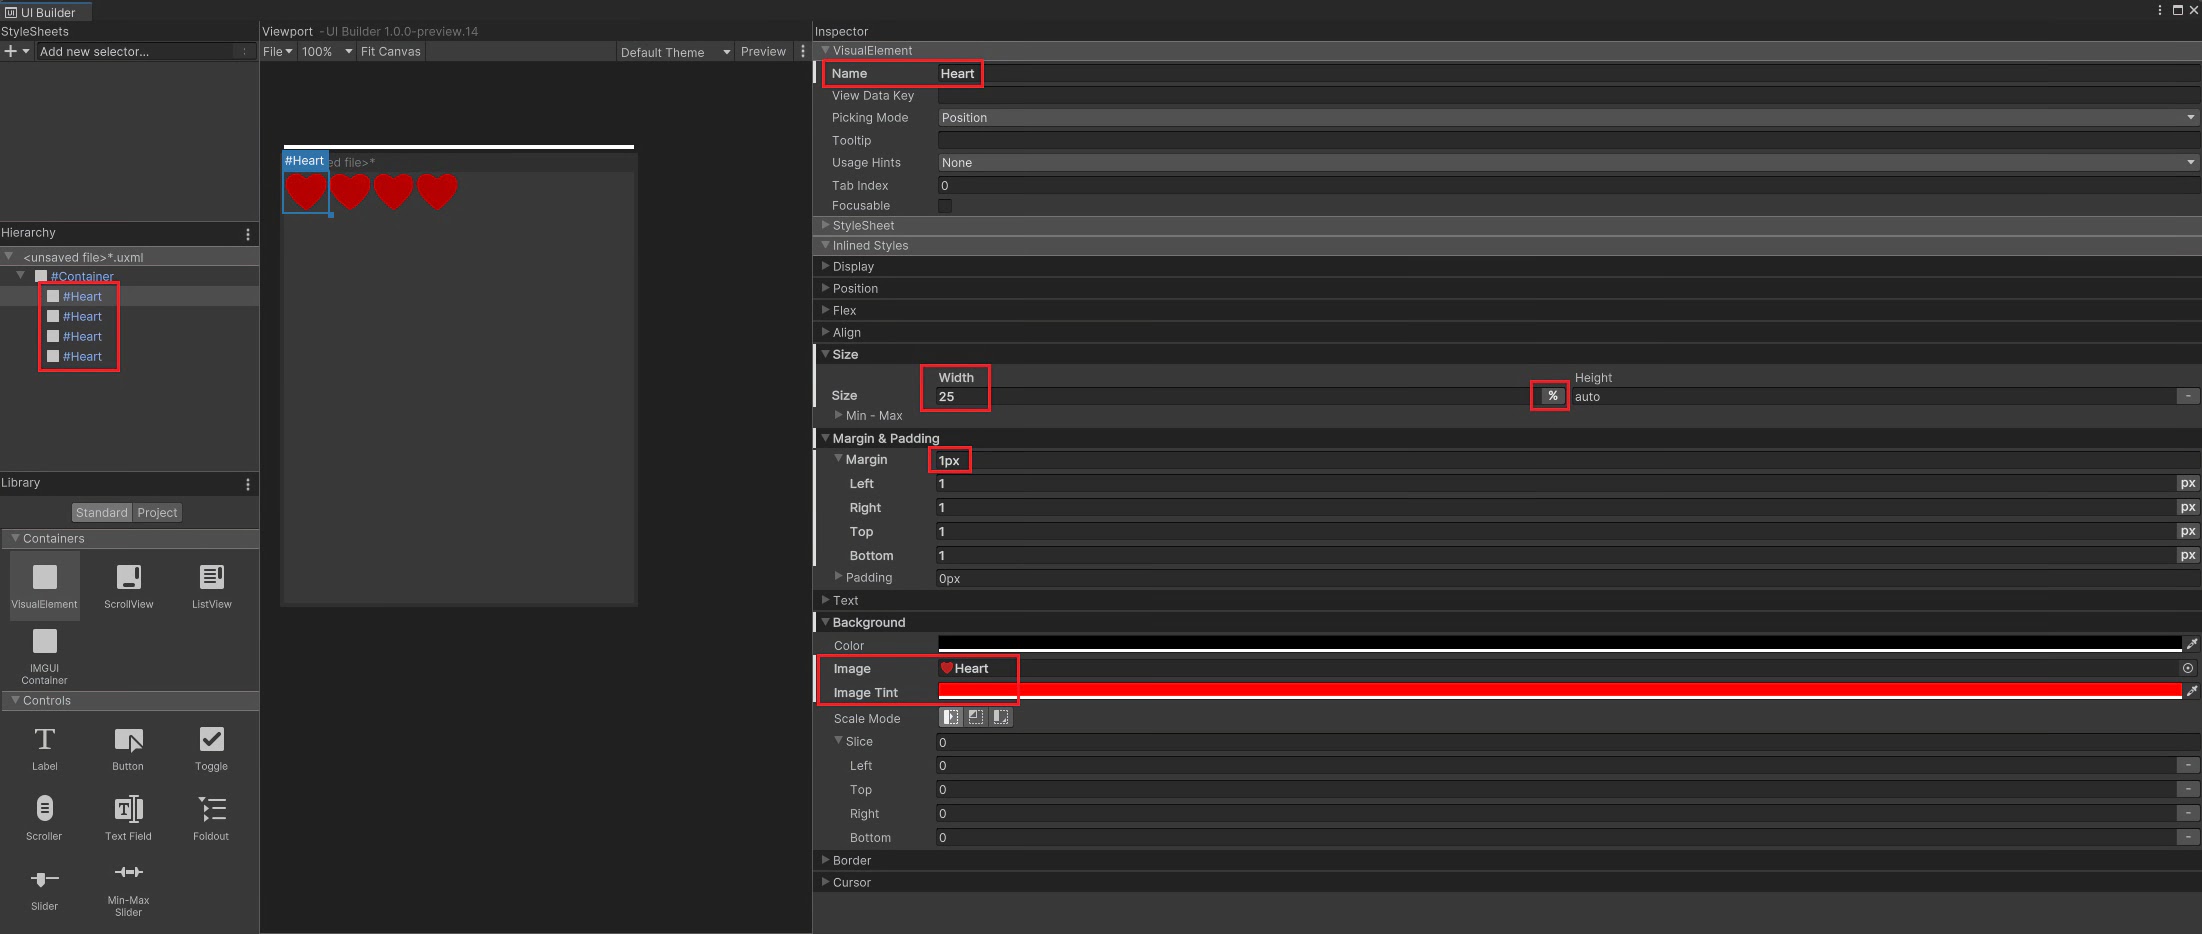
Drag another VisualElement and make it a child of Container. Change the following:
Name: Heart
Size -> Width: 25%
Margin & Padding -> Margin: 1px
Background -> Image: Heart.png
Background -> Image Tint: #FF0000
Copy and paste the heart four times.
Save by going to File -> Save As at the top of Viewport.
Save in Assets -> UI as HealthBar.uxml
Step 3 - Adding UI to Game
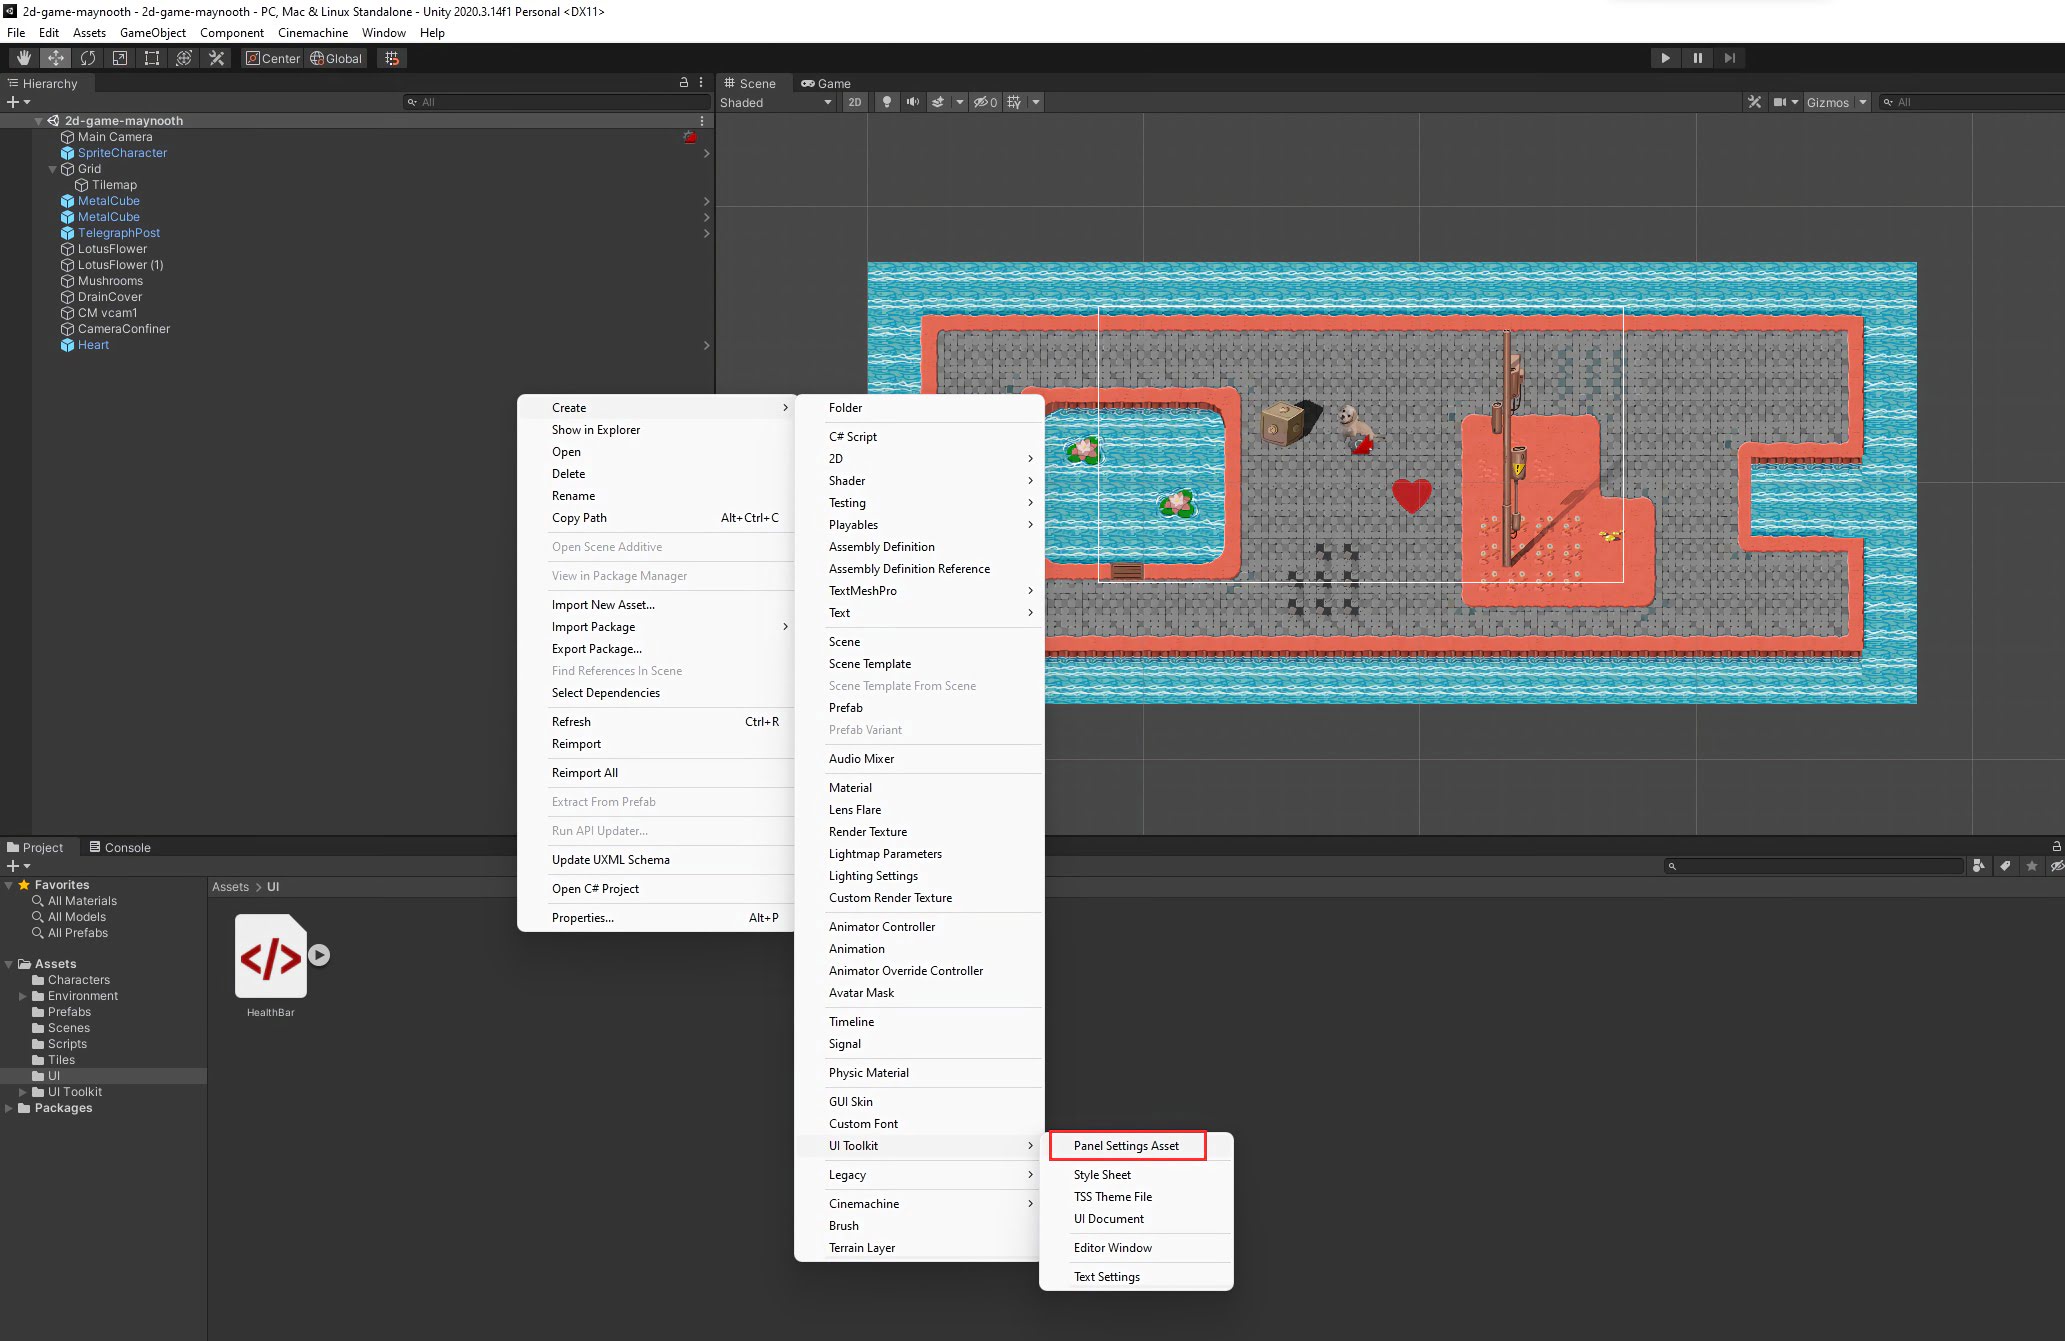
Create a Panel Settings Asset file.
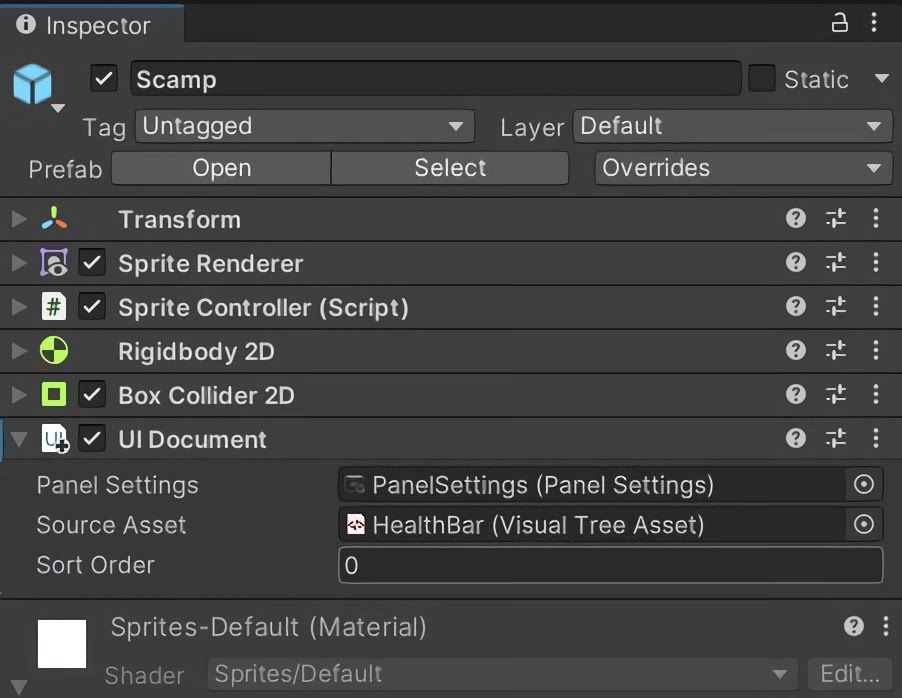
Add a UI Document component to SpriteCharacter.
Set the Panel Settings to be the PanelSettings Asset you just created.
Set Source Asset to HealthBar.
Your HealthBar should now appear in-game!
Created by: David Corish