Gaming in Unity
14. Unity 2D Game 10 - Animation

Let's add a Walking Animation to the Robot!
Step 1 - Animation Set-up
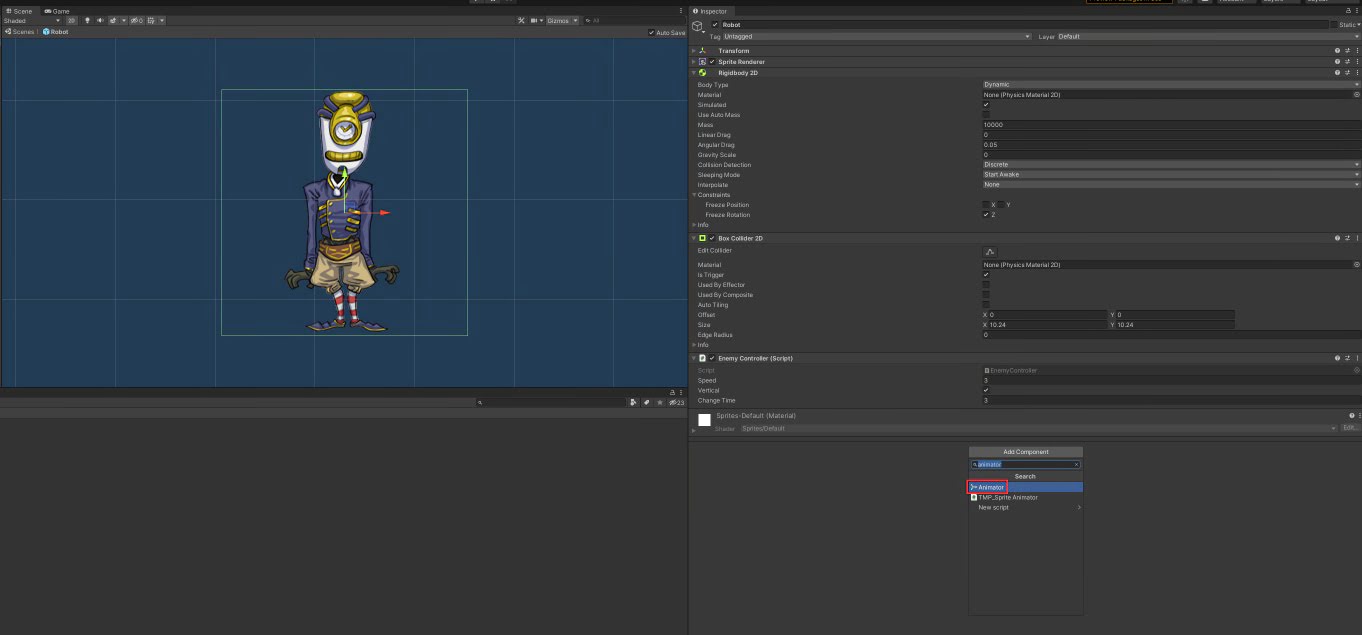
Double-click on the Robot prefab and add an Animator component.
In the Assets Window, right-click and create an Animations folder.
In this folder, right-click and Create -> Animator Controller. Call this Robot.

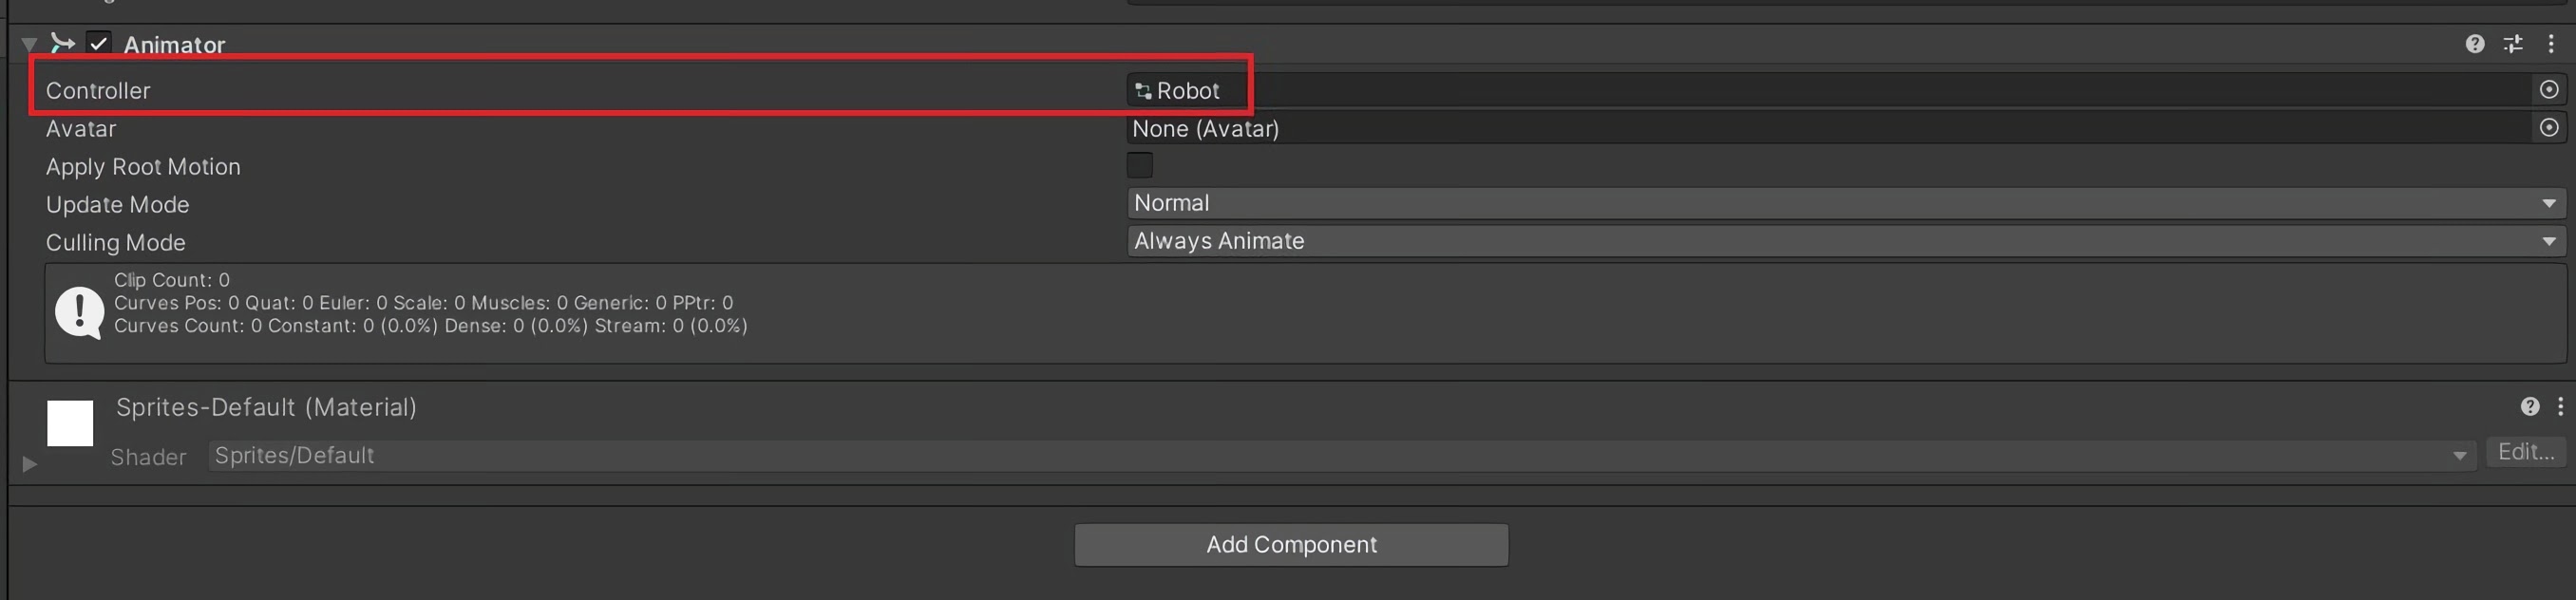
Add this Controller to the Animator you added to the Robot Prefab.
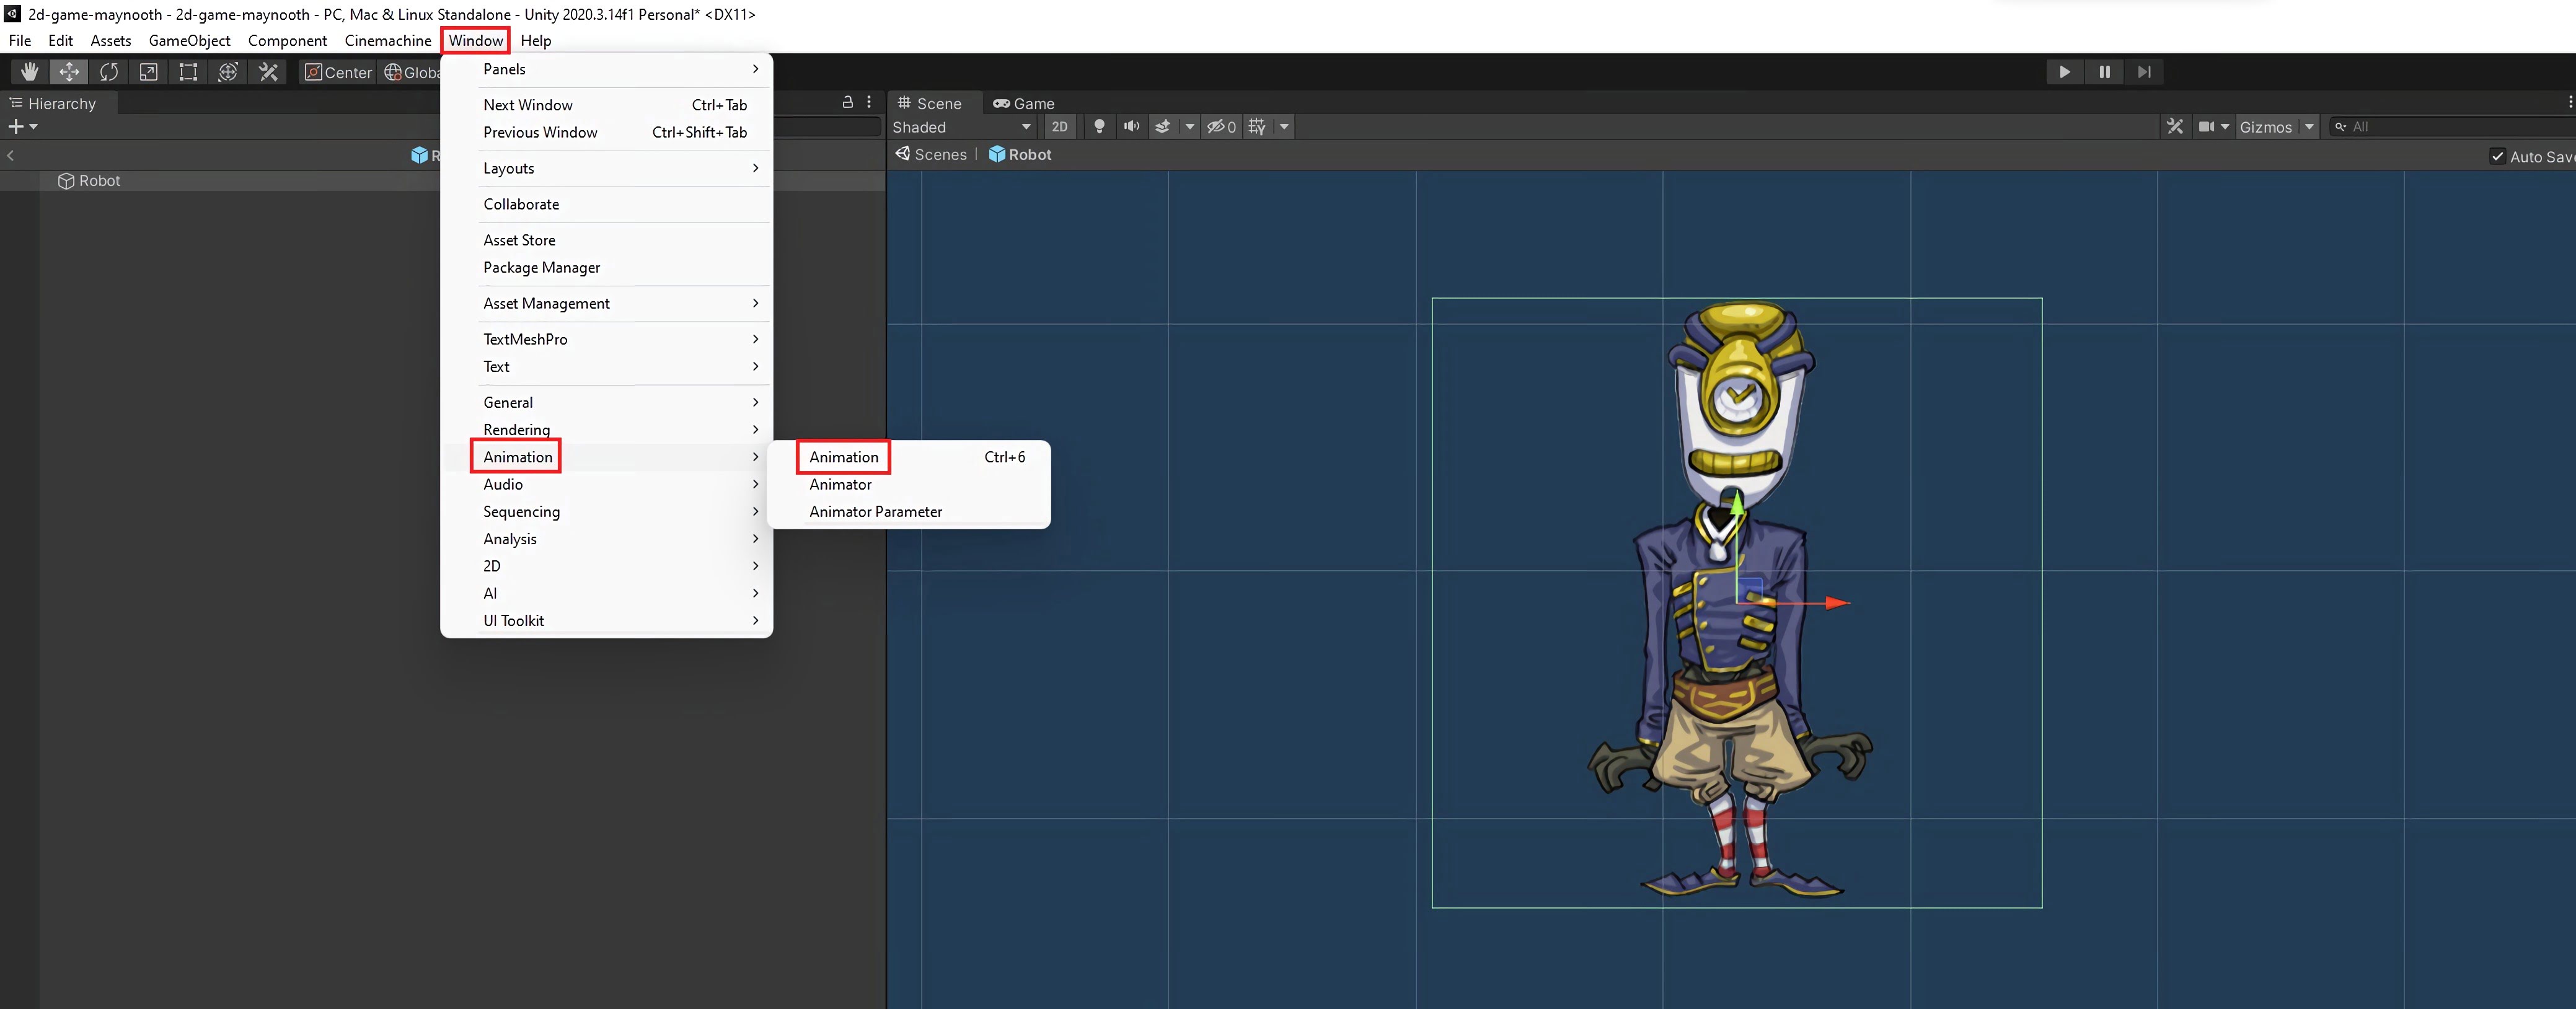
Open the Animation window. Window -> Animation -> Animation.
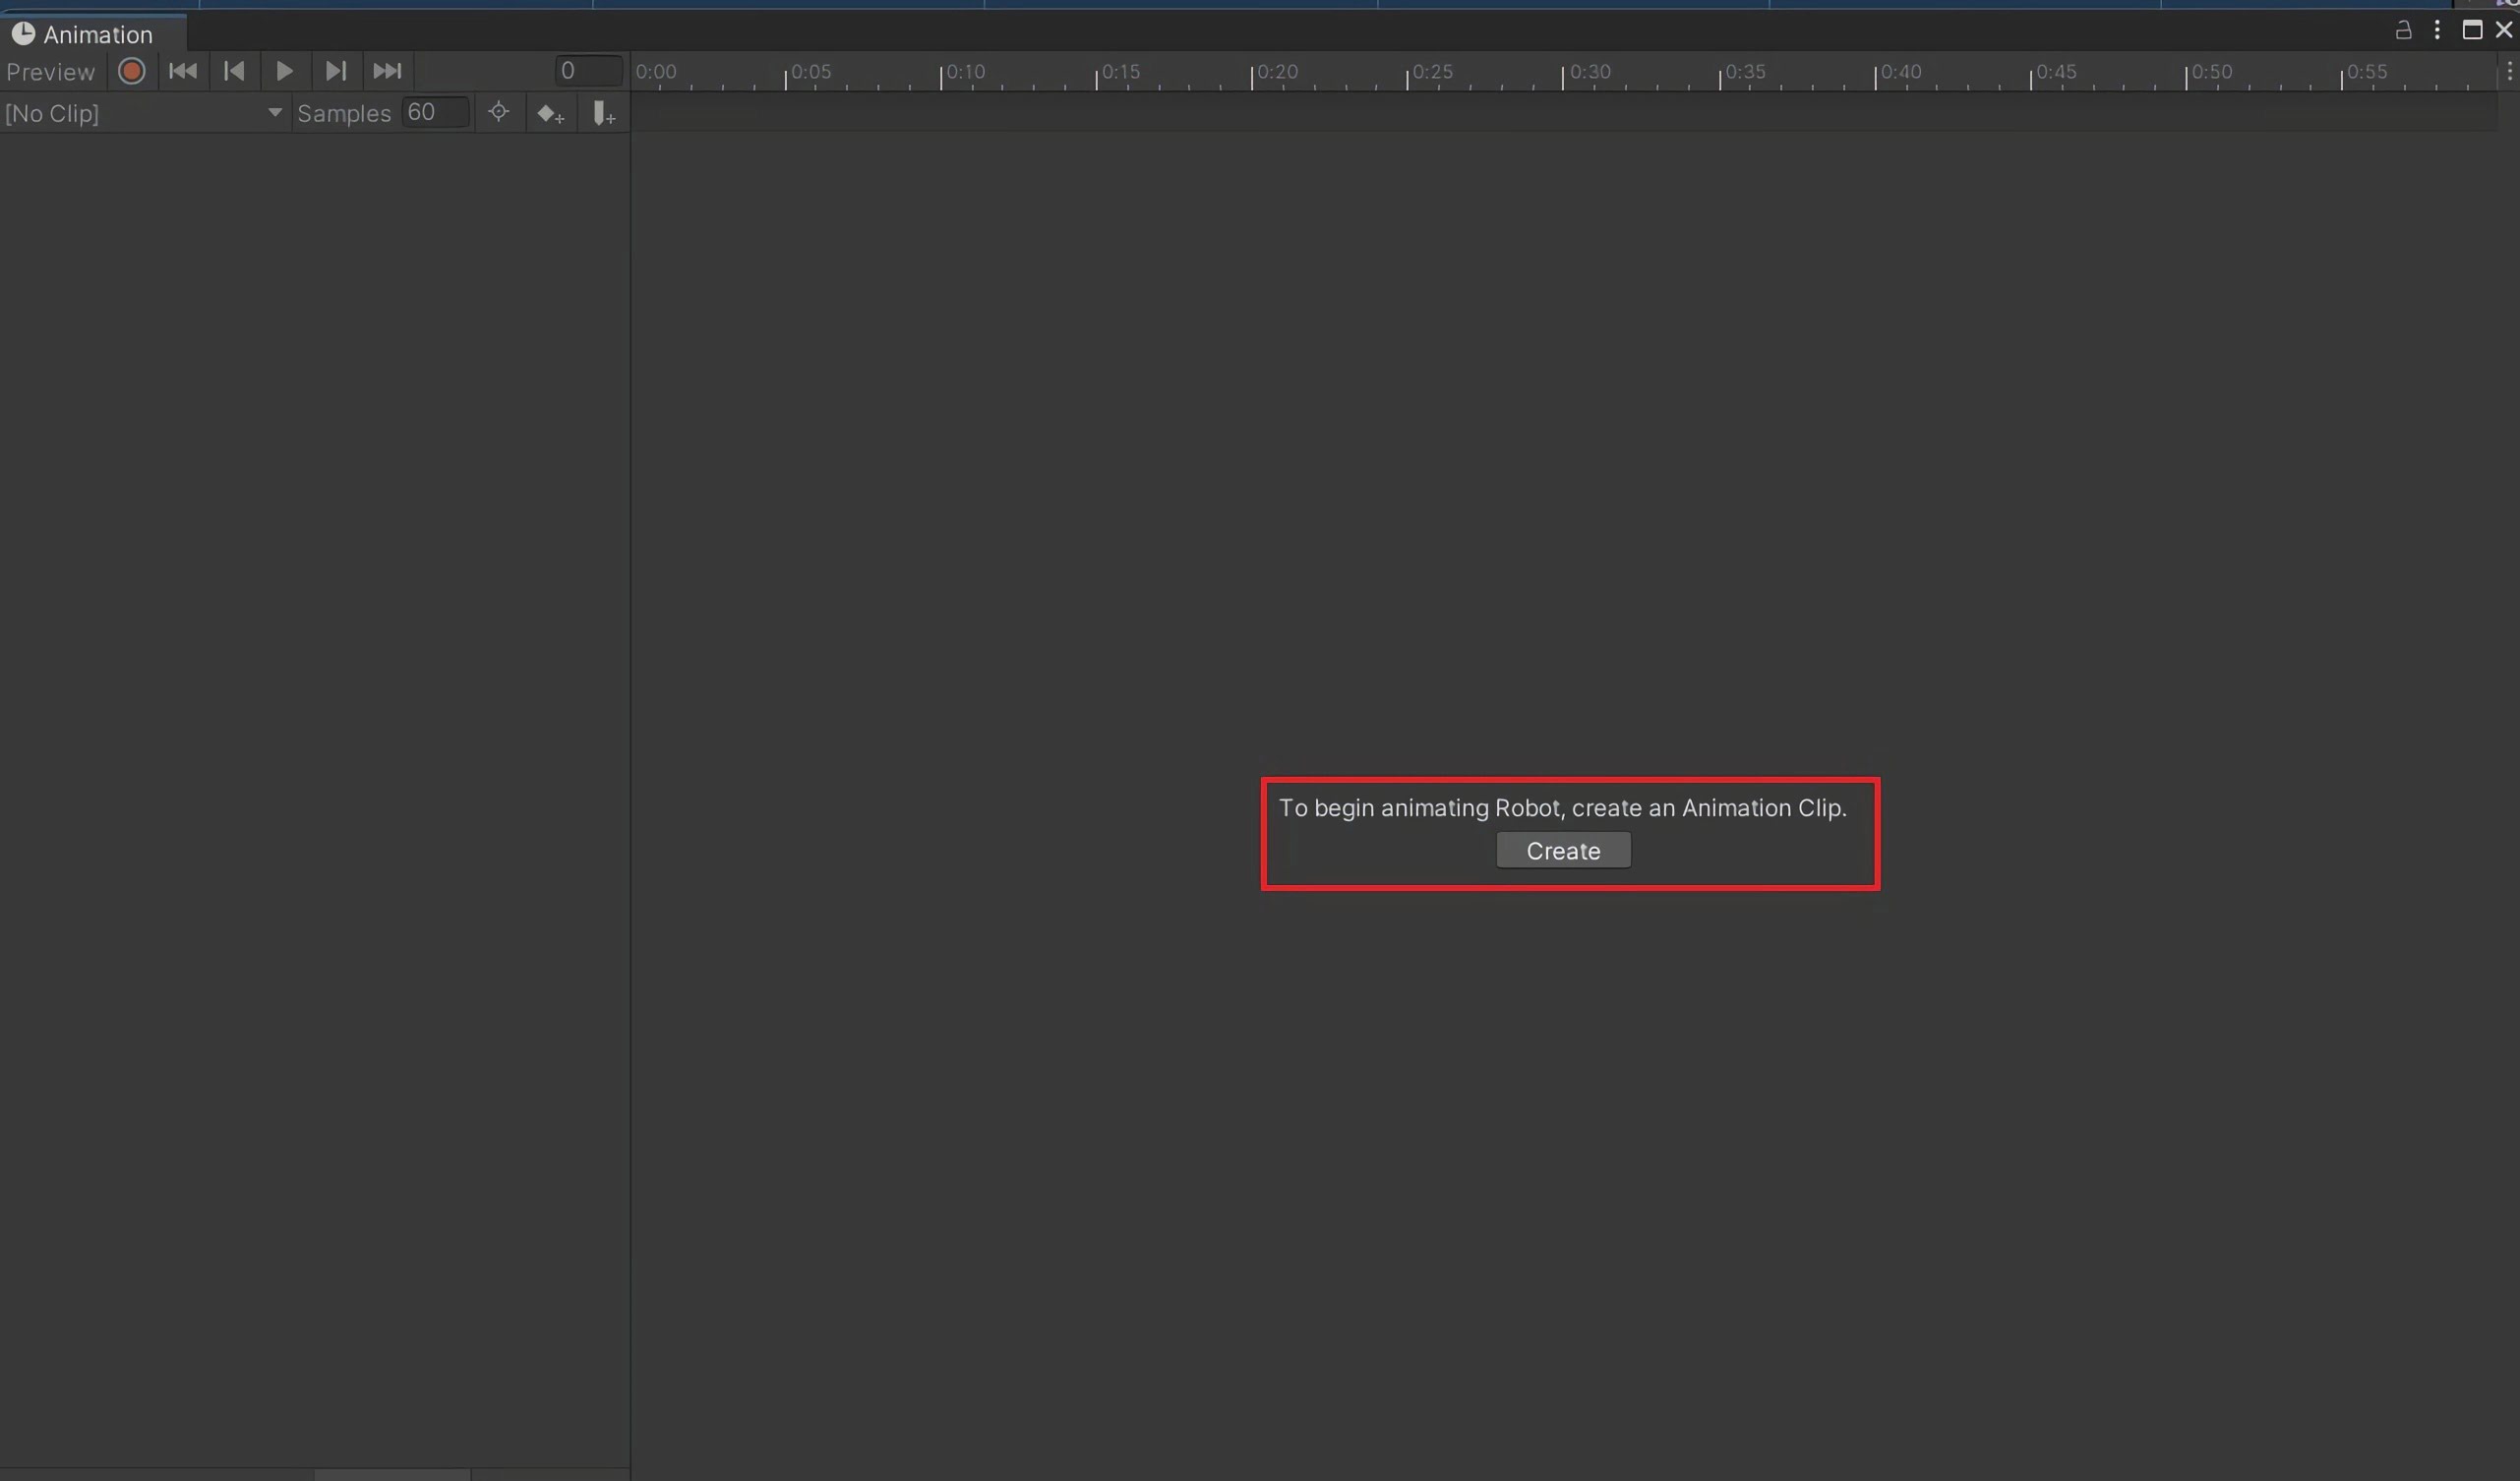
Select Create and save the animation in Assets -> Animations, name it RobotLeft.anim
Step 2 - Creating Animation
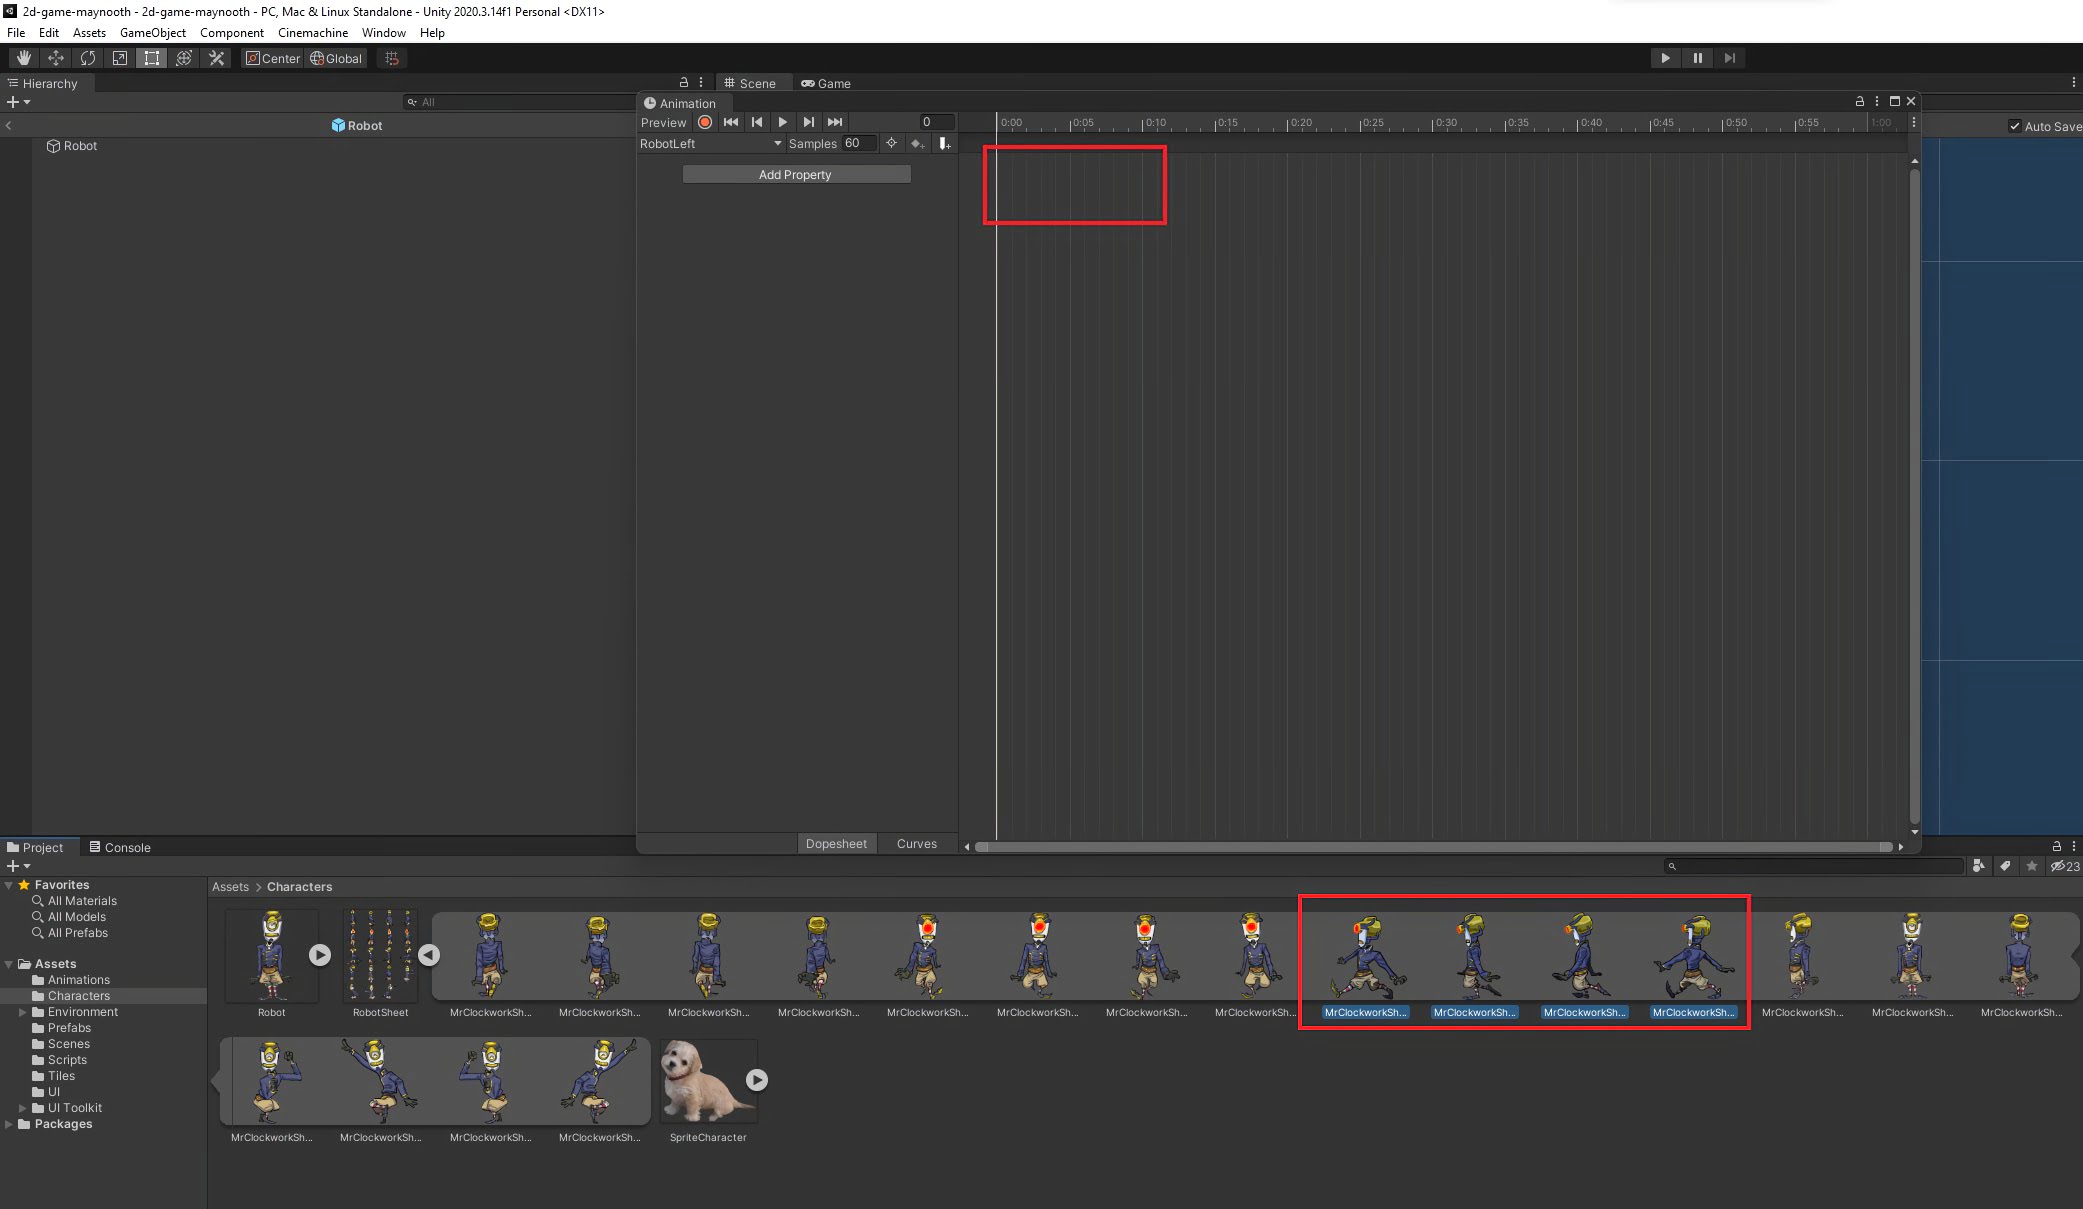
Import RobotSheet.png into Assets -> Characters.
Press the arrow to see all of the sprites.
Hold shift and click on the first and last of the Sprites that are walking left. Drag these into the animation window.
Make sure Show Sample Rate is switched on and then change Samples to 4.
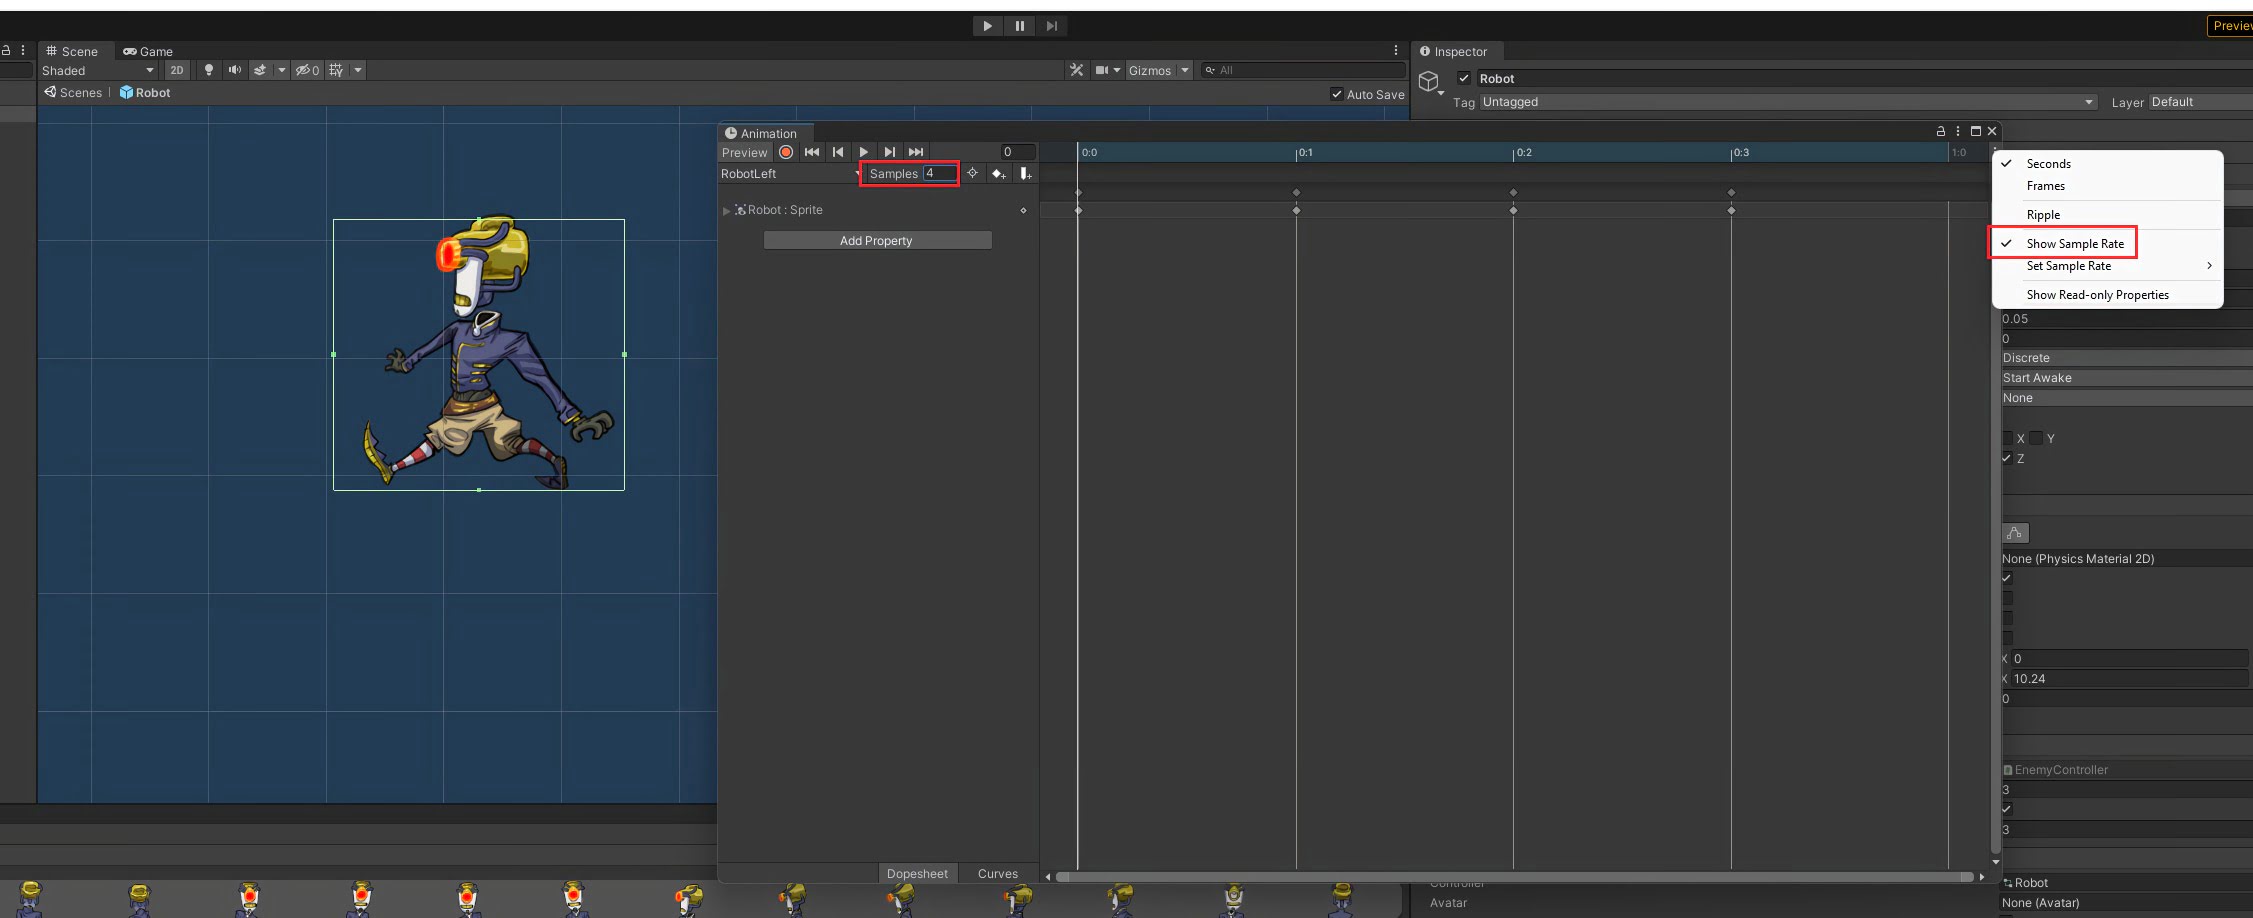
Press Play on the animation window to watch the animation play out!
To create the next Animation, click on RobotLeft in the top left of the Animation Window and then Create New Clip.
Name this Animation RobotRight.anim and save in Assets -> Animations.
Recreate the walking left animation.
Click Add Property, then Sprite Renderer and add Flip X.

The Robot can now walk to the right!
Challenge:
Add animations for walking up and walking down!
Step 3 - Building Controller
An Animator allows you to choose how animations go from one animation to the next.
To open the Animator, go to Windows -> Animation -> Animator.
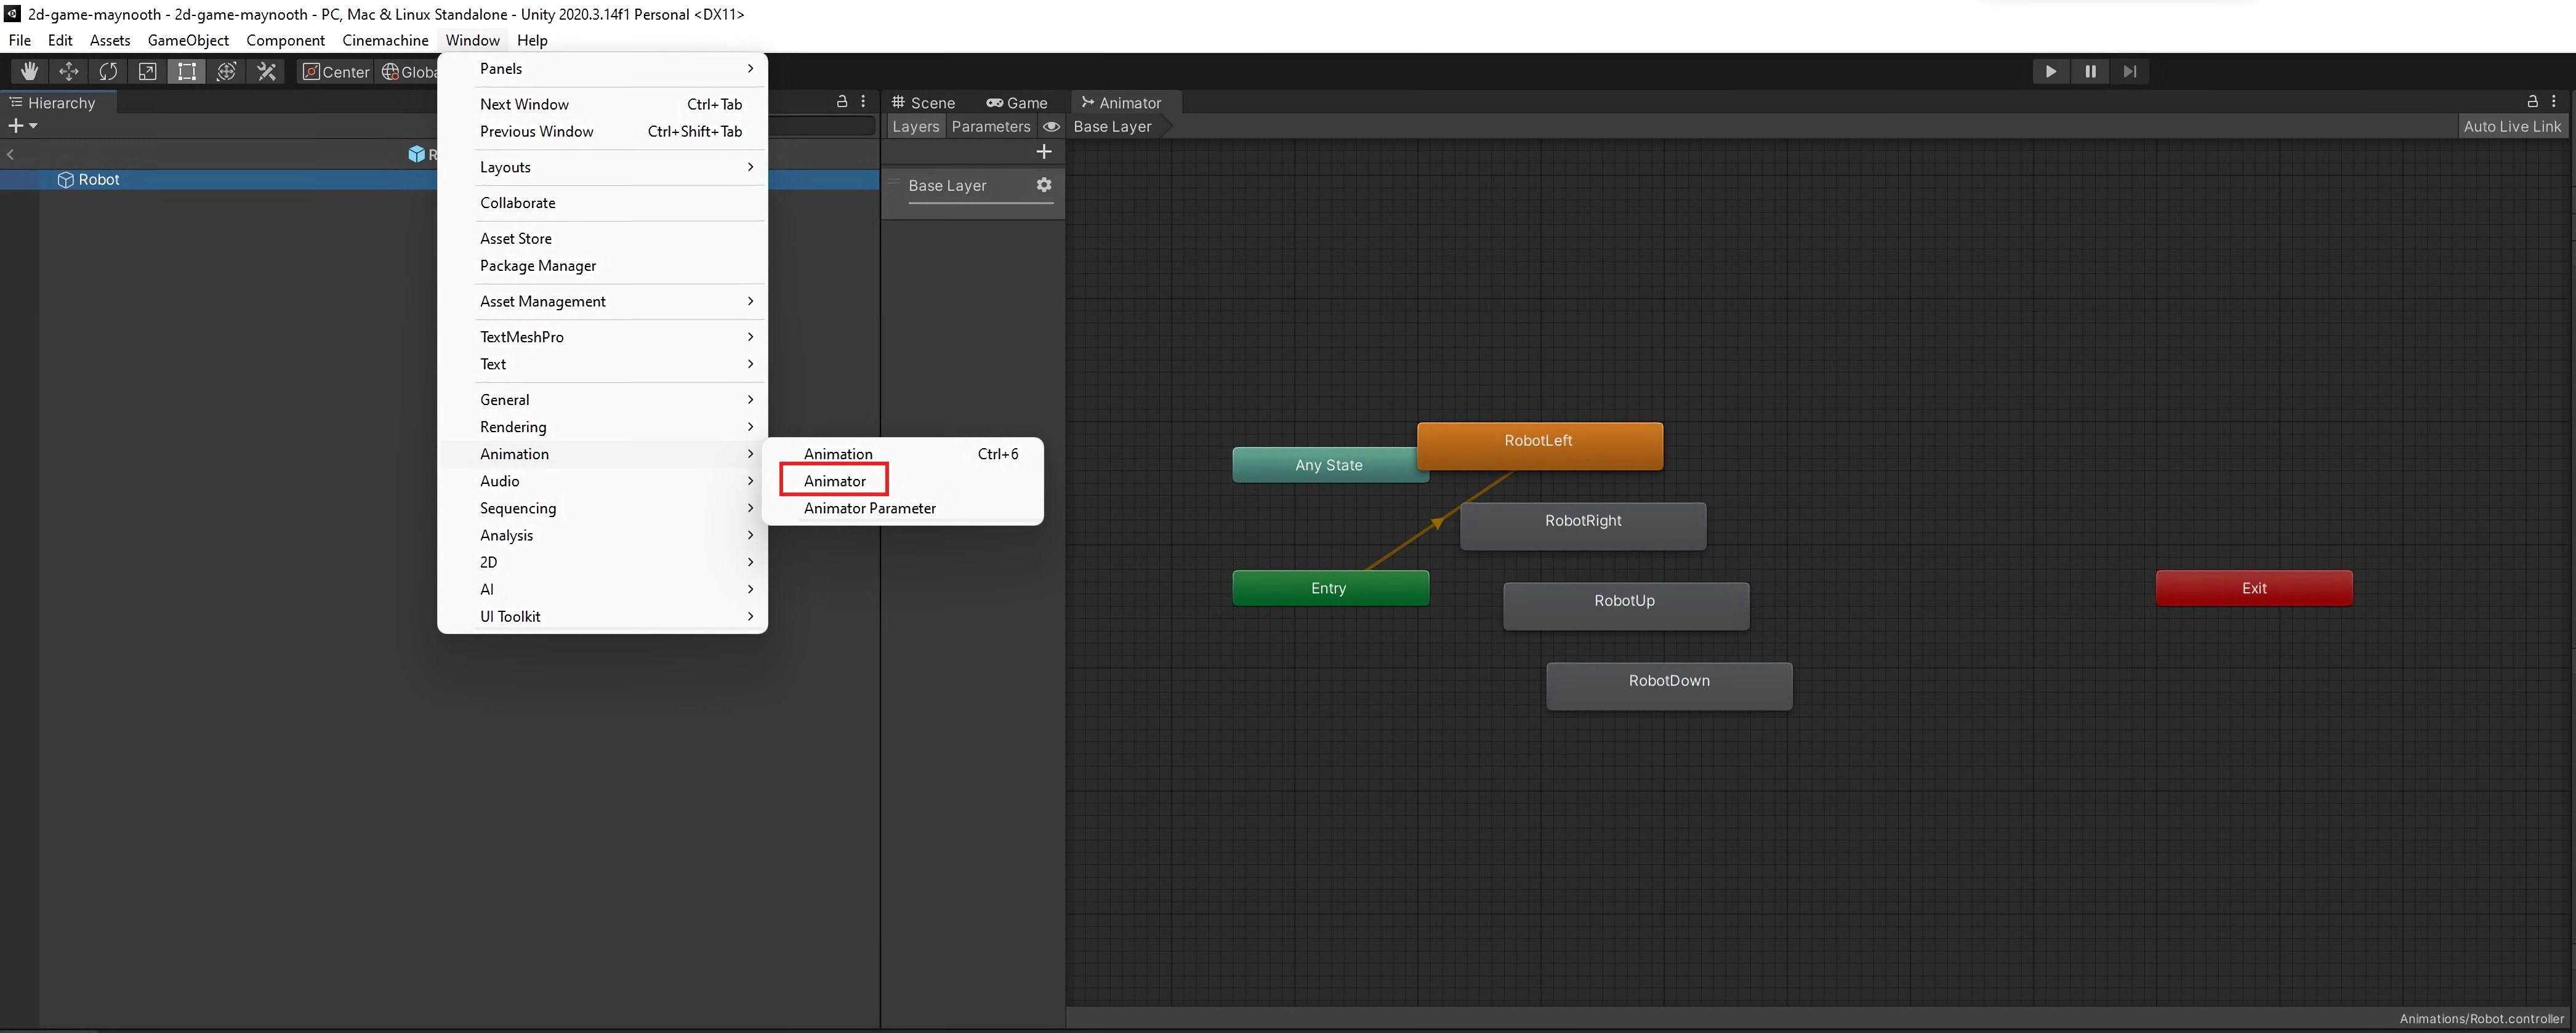
Right-click and delete the four Animations in the window.
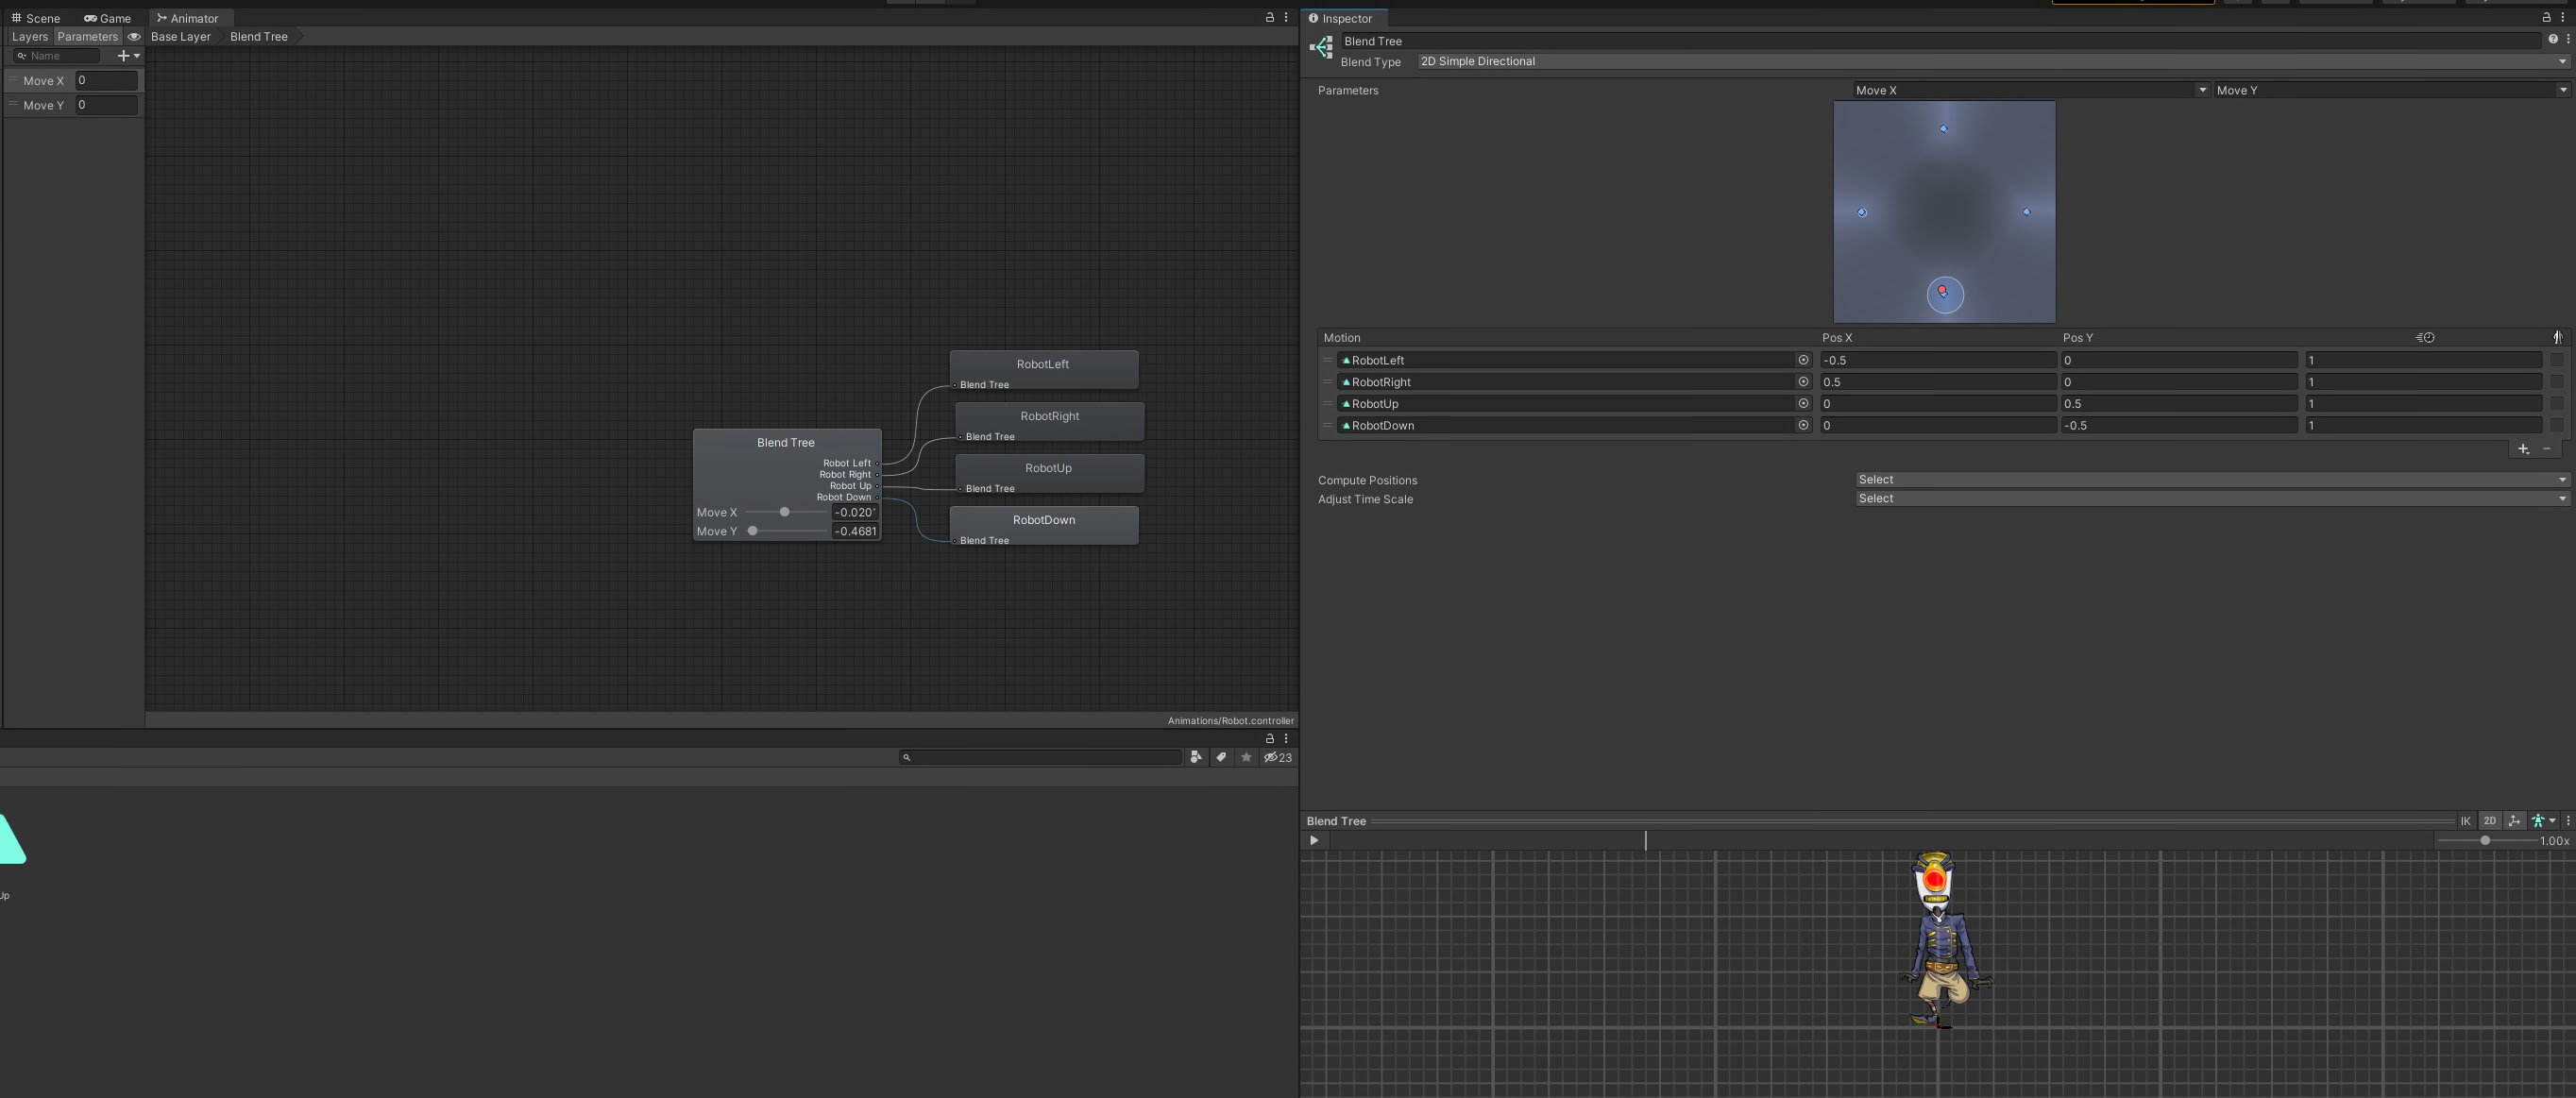
Right-click and select Create State -> From New Blend Tree.
Go to the Parameters tab on the left side of the Animator window and rename the Blend parameter to Move X.
Click the + icon, choose Float and name the new parameter Move Y.
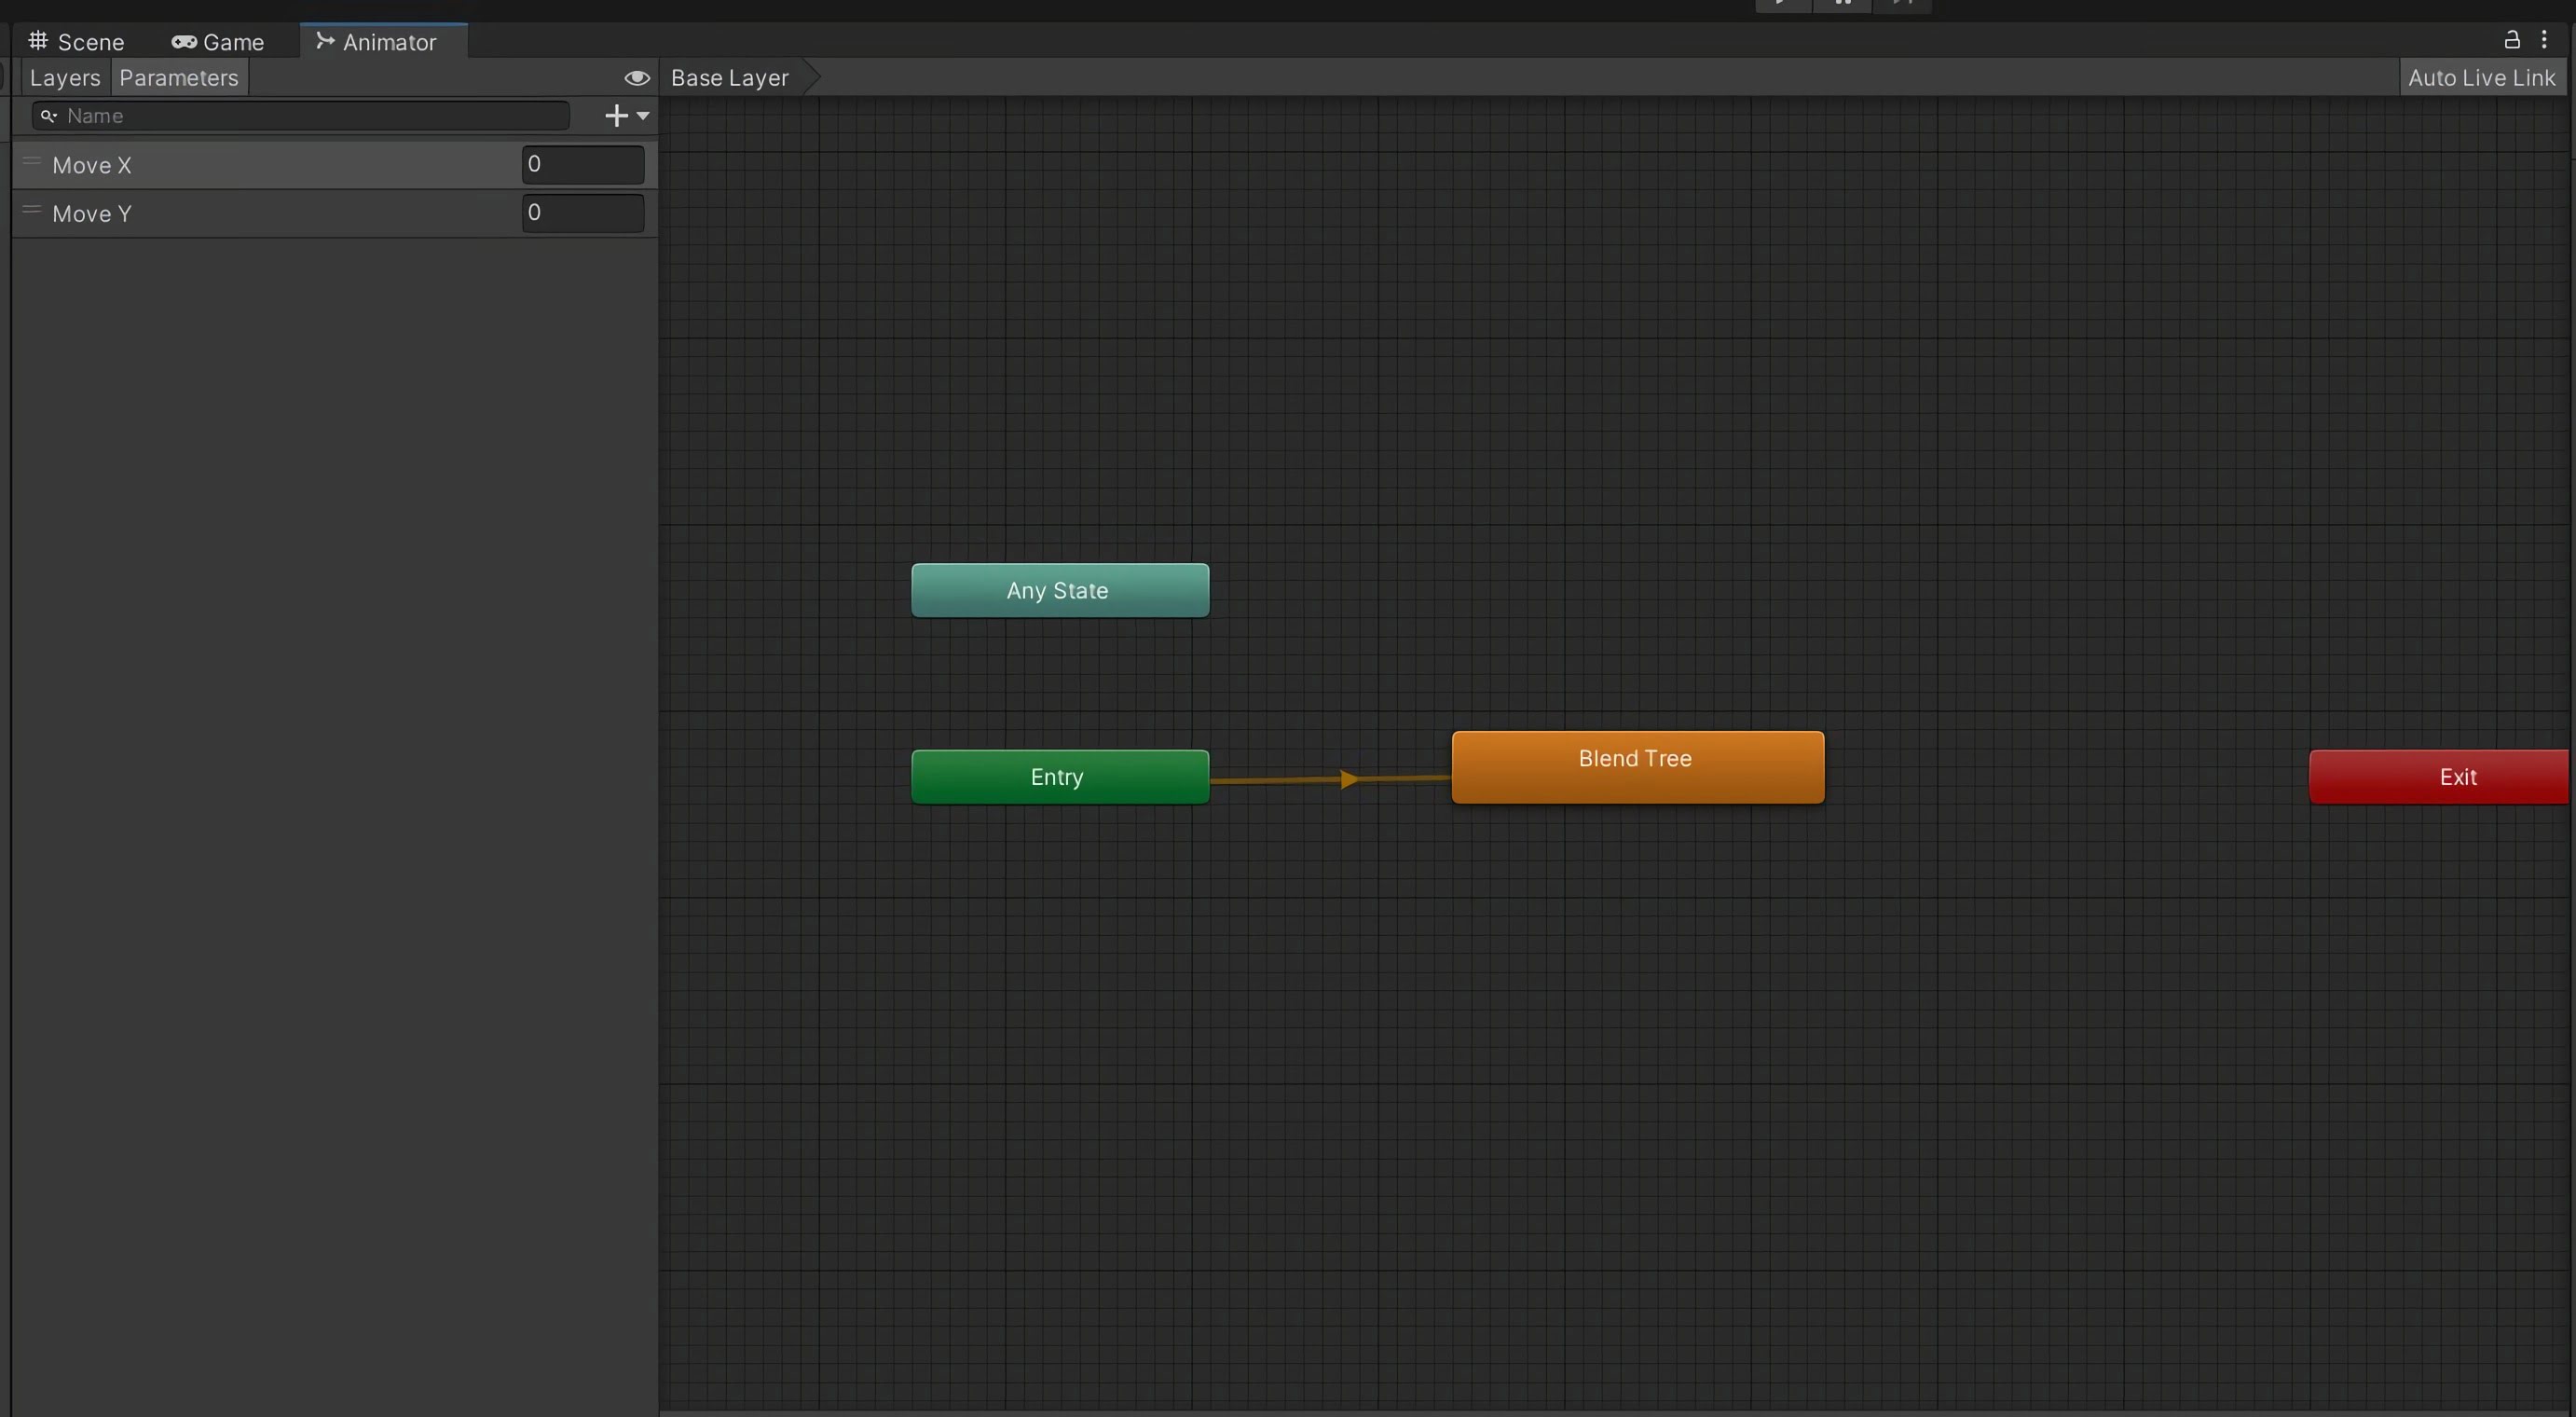
Double-click on the Blend Tree and then select it again. Change Blend Type to 2D Simple Directional. You can now select Move X and Move Y as Parameters at the top of the Inspector.
Click the + at the bottom of Motion and select Add Motion Field 4 times.
Drag-and-drop the four Robot animations into the four slots. Change Pos X and Pos Y to following:
| Motion | Pos X | Pos Y |
|---|---|---|
| RobotLeft | -0.5 | 0 |
| RobotRight | 0.5 | 0 |
| RobotUp | 0 | 0.5 |
| RobotDown | 0 | -0.5 |
Press Play just above the Animation preview and move the red dot around to watch the animation change depending on direction.
Step 4 - Modifying EnemyController script
We now need to modify our code to interact with the Animator component.
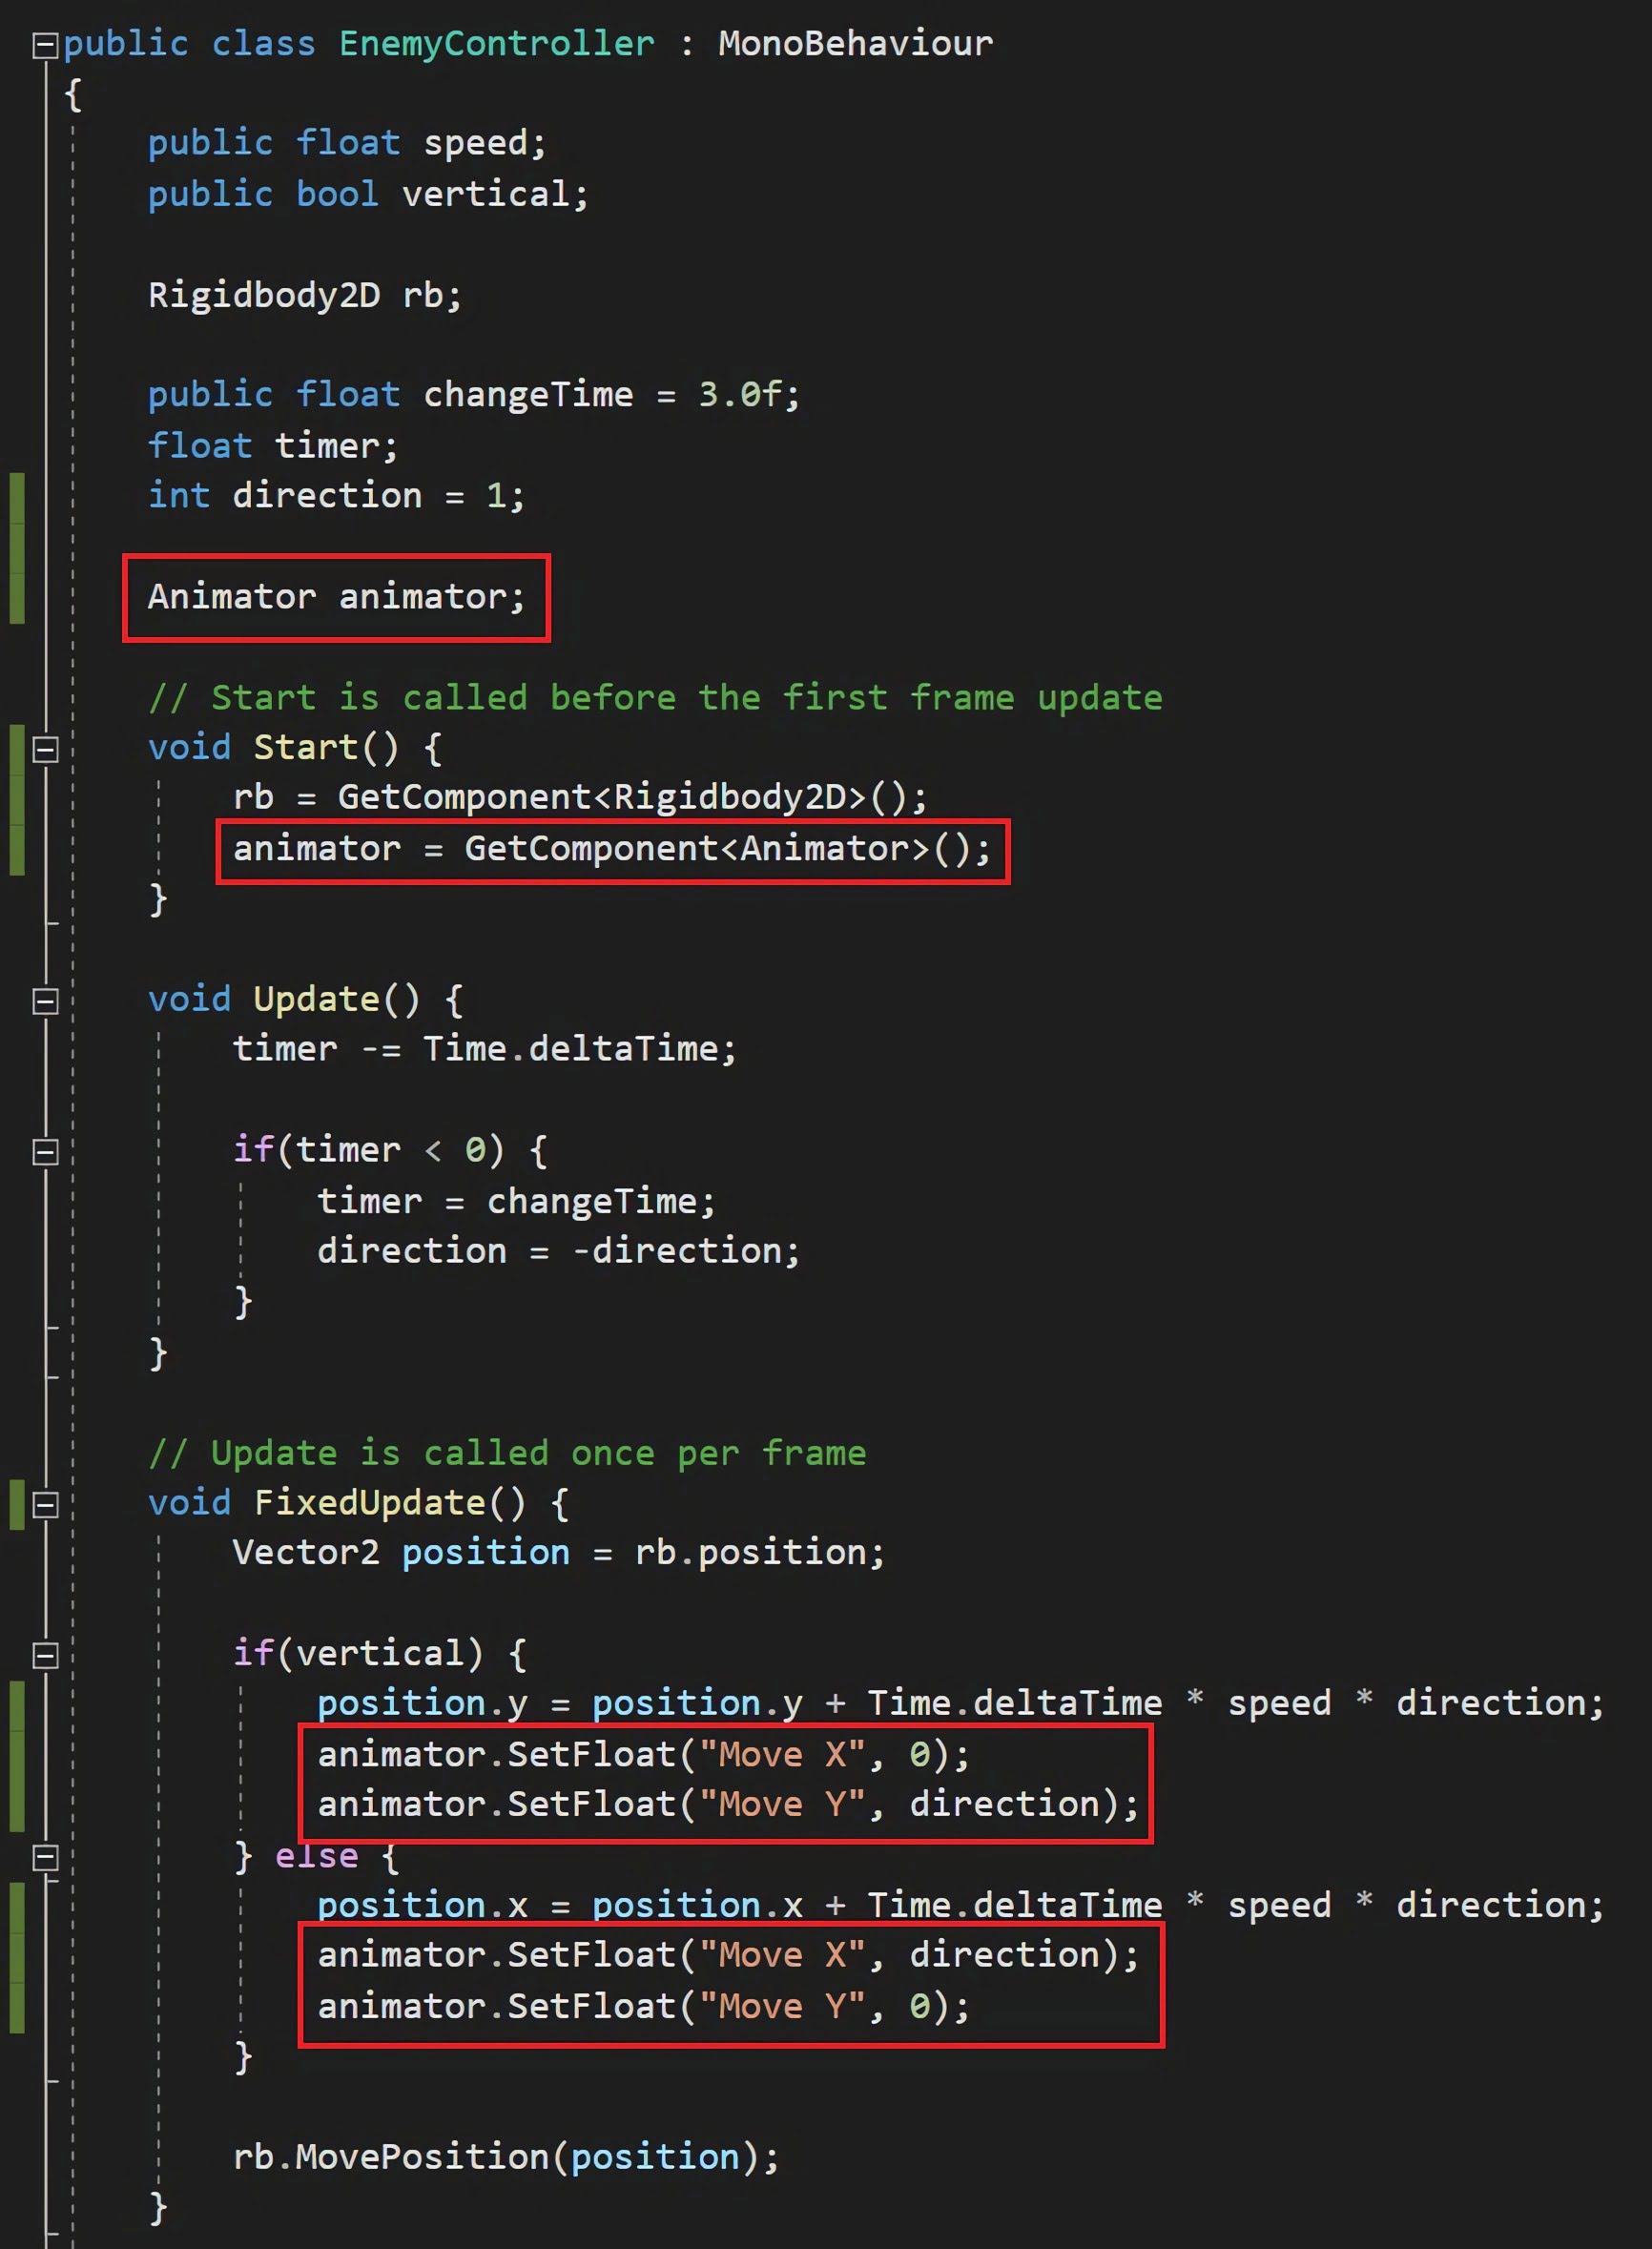
Open the EnemyController script in Assets -> Animations.
Declare an Animator variable:
Animator animator;
In void Start(), retrieve the Animator component:
animator = GetComponent<Animator>( );
Inside the if(vertical) statement:
animator.SetFloat("Move X", 0);
animator.SetFloat("Move Y", direction);
And then inside the else:
animator.SetFloat("Move X", direction);
animator.SetFloat("Move Y", 0);
These four lines of code pass instructions to the Animator to tell it which animations to play.
Created by: David Corish