Gaming in Unity
15. Unity 2D Game 11 - Projectile Action
This guide will show how to add a Projectile Action that will activate with Left-Mouse Click!
Step 1 - Creating Projectile
Create a new folder called VFX in Assets (Assets -> VFX).
Import Projectile.png.
Drag and drop Projectile into the Hierarchy window.
Scale it to your desired size.
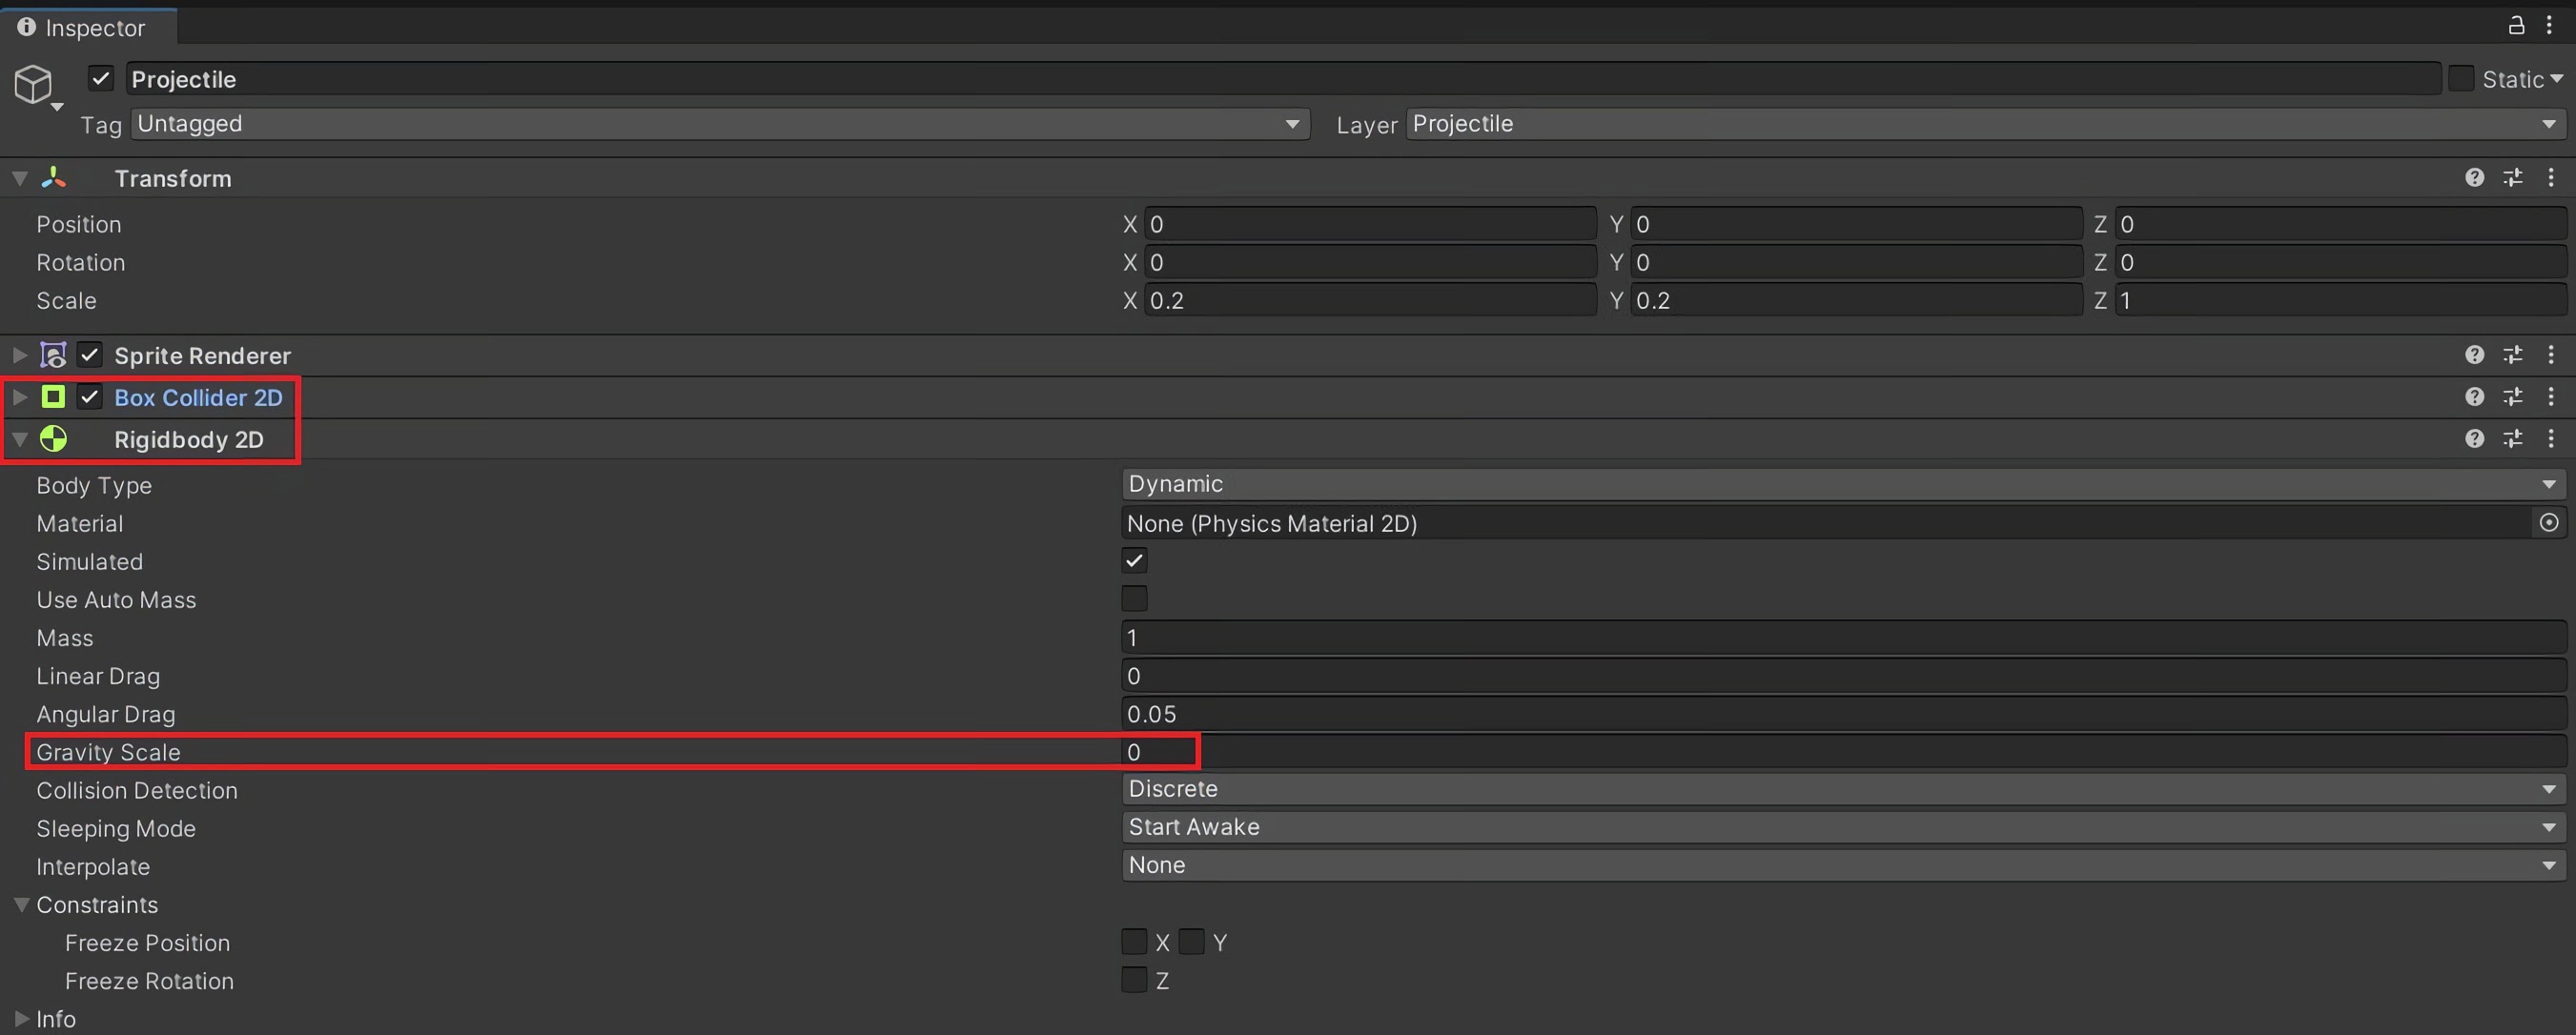
Add a BoxCollider2D and a Rigidbody2D.
Set Gravity Scale of Rigidbody2D to 0.
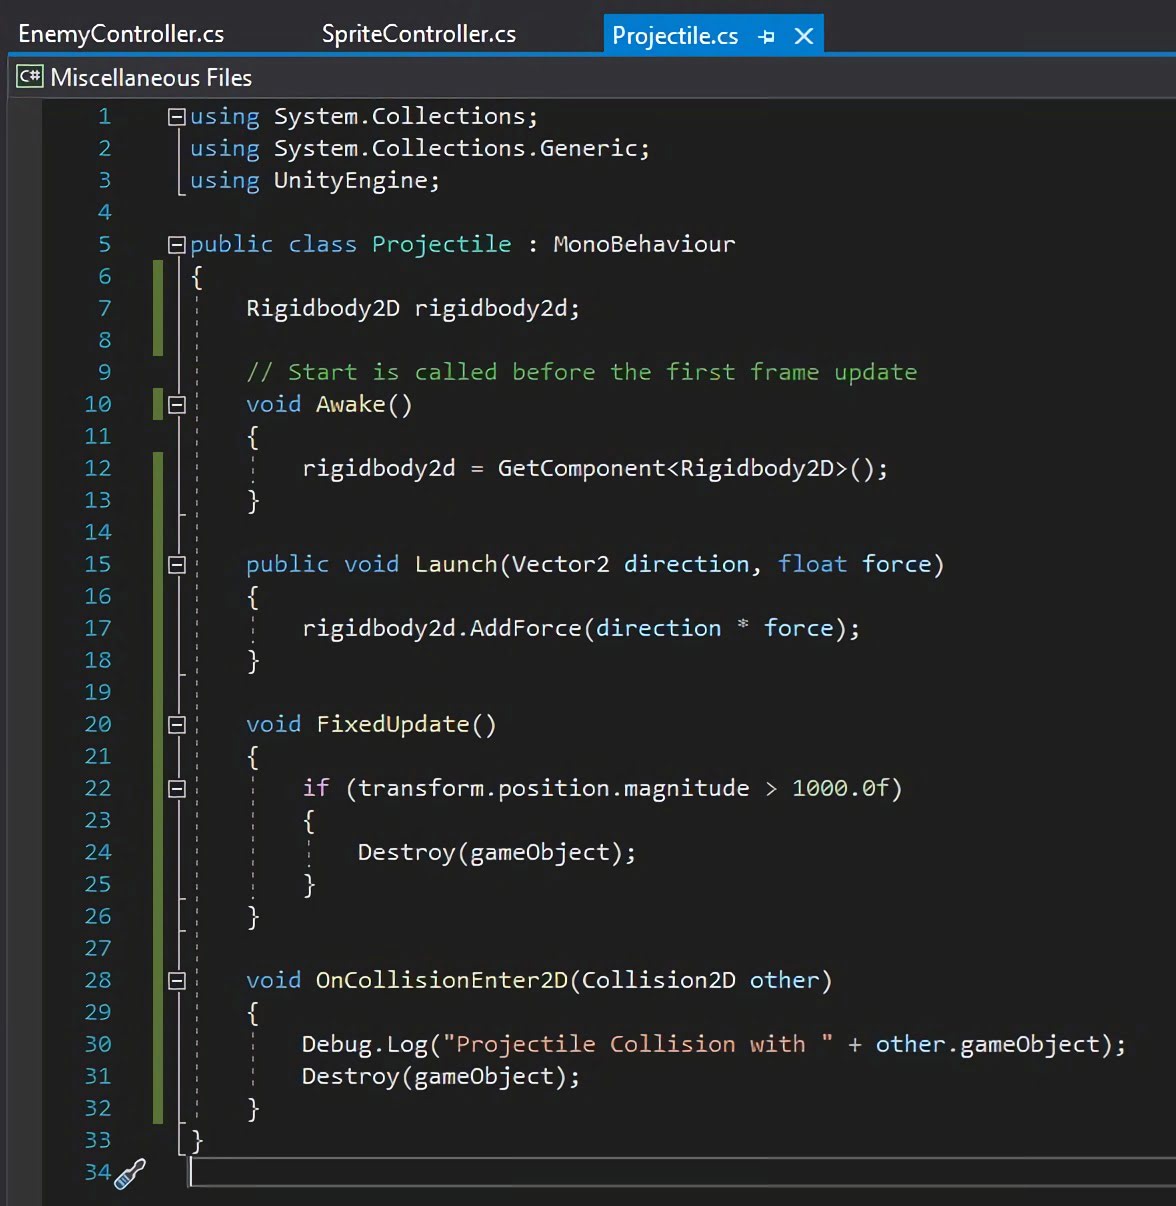
Create a new C# script called Projectile in Assets -> Scripts. Open this script.
Create a Rigidbody2d variable:
Rigidbody2D rb;
Rename void Start( ) to void Awake( ) to avoid some errors later.
Get Rigidbody2D component in void Awake( );
rb = GetComponent<Rigidbody2D>();
Next, we need to create a function for launching the projectile:
public void Launch(Vector2 direction, float force) {
    rb.AddForce(direction * force);
}
And now a function to detect collision:
void OnCollisionEnter2D(Collision2D other) {
    Debug.Log("Projectile Collision with " + other.gameObject);
    Destroy(gameObject);
}
We can also add a function to delete the Projectile if it gets too far away from the Character:
void FixedUpdate() {
    if (transform.position.magnitude > 1000.0f) {
        Destroy(gameObject);
    }
}
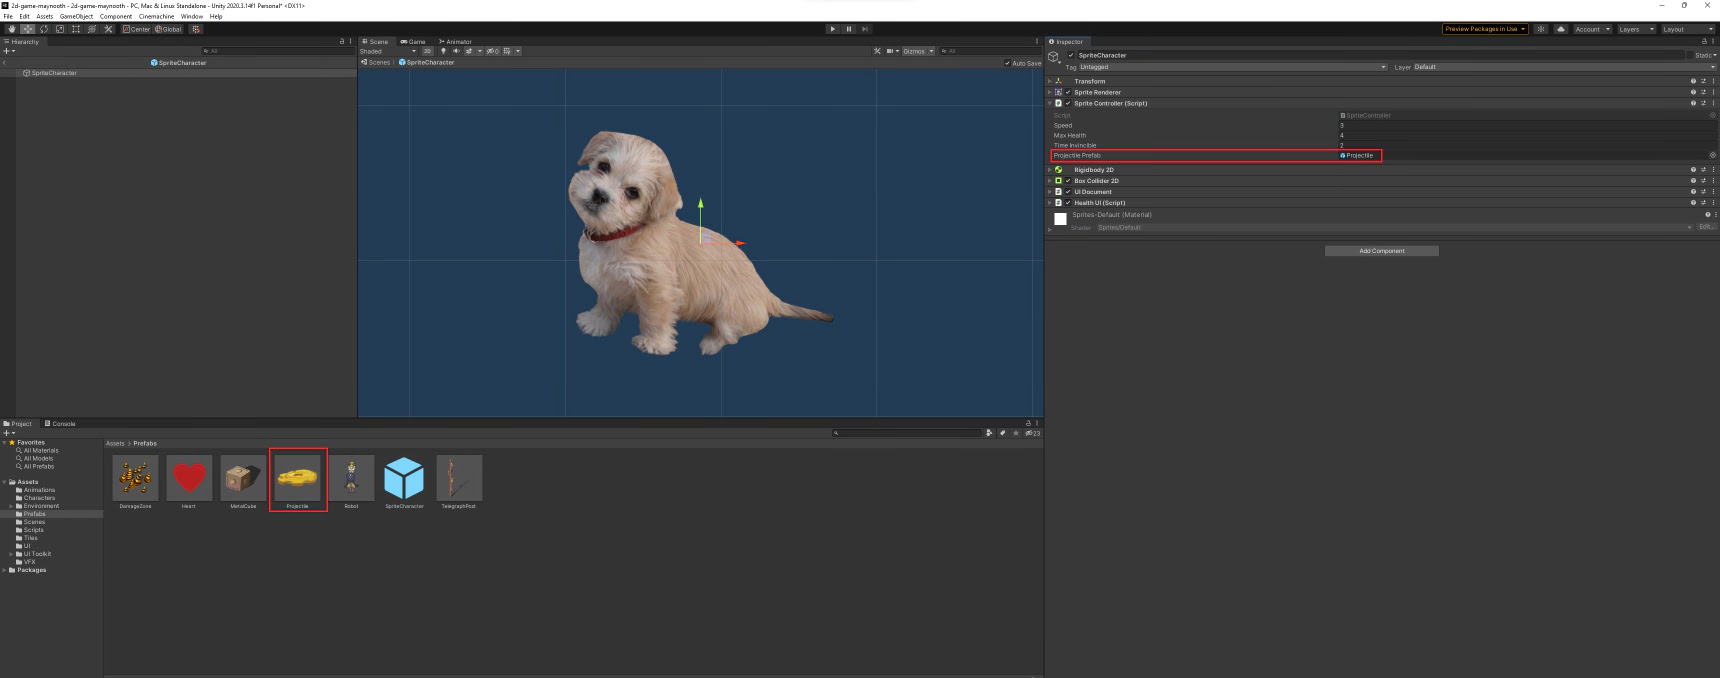
Add this script to Projectile in the Hierarchy and then drag Projectile into the prefabs folder. Delete it from the scene.
Step 2 - Modifying SpriteController Script
Open SpriteController script.
Create a public variable called projectilePrefab:
public GameObject projectilePrefab;
Drag and drop the ProjectilePrefab onto this slot on your character Prefab.
In the SpriteController script, create a Vector2 variable for recording the direction your character is facing:
Vector2 direction = new Vector2(1, 0);
Add a method for launching the projectile:
void Launch( ) {
    GameObject projectileObject = Instantiate(projectilePrefab, rigidbody2d.position + Vector2.up * 0.5f, Quaternion.identity);
}
This places the Prefab projectile at the position of your character.
Add the following two lines:
Projectile projectile = projectileObject.GetComponent<Projectile>();
projectile.Launch(direction, 300);
These two lines activate the Launch function written in Projectile.cs.

In void Update( ), we need to add code to determine the position of the mouse in relation to our character as well as code to detect left mouse click:
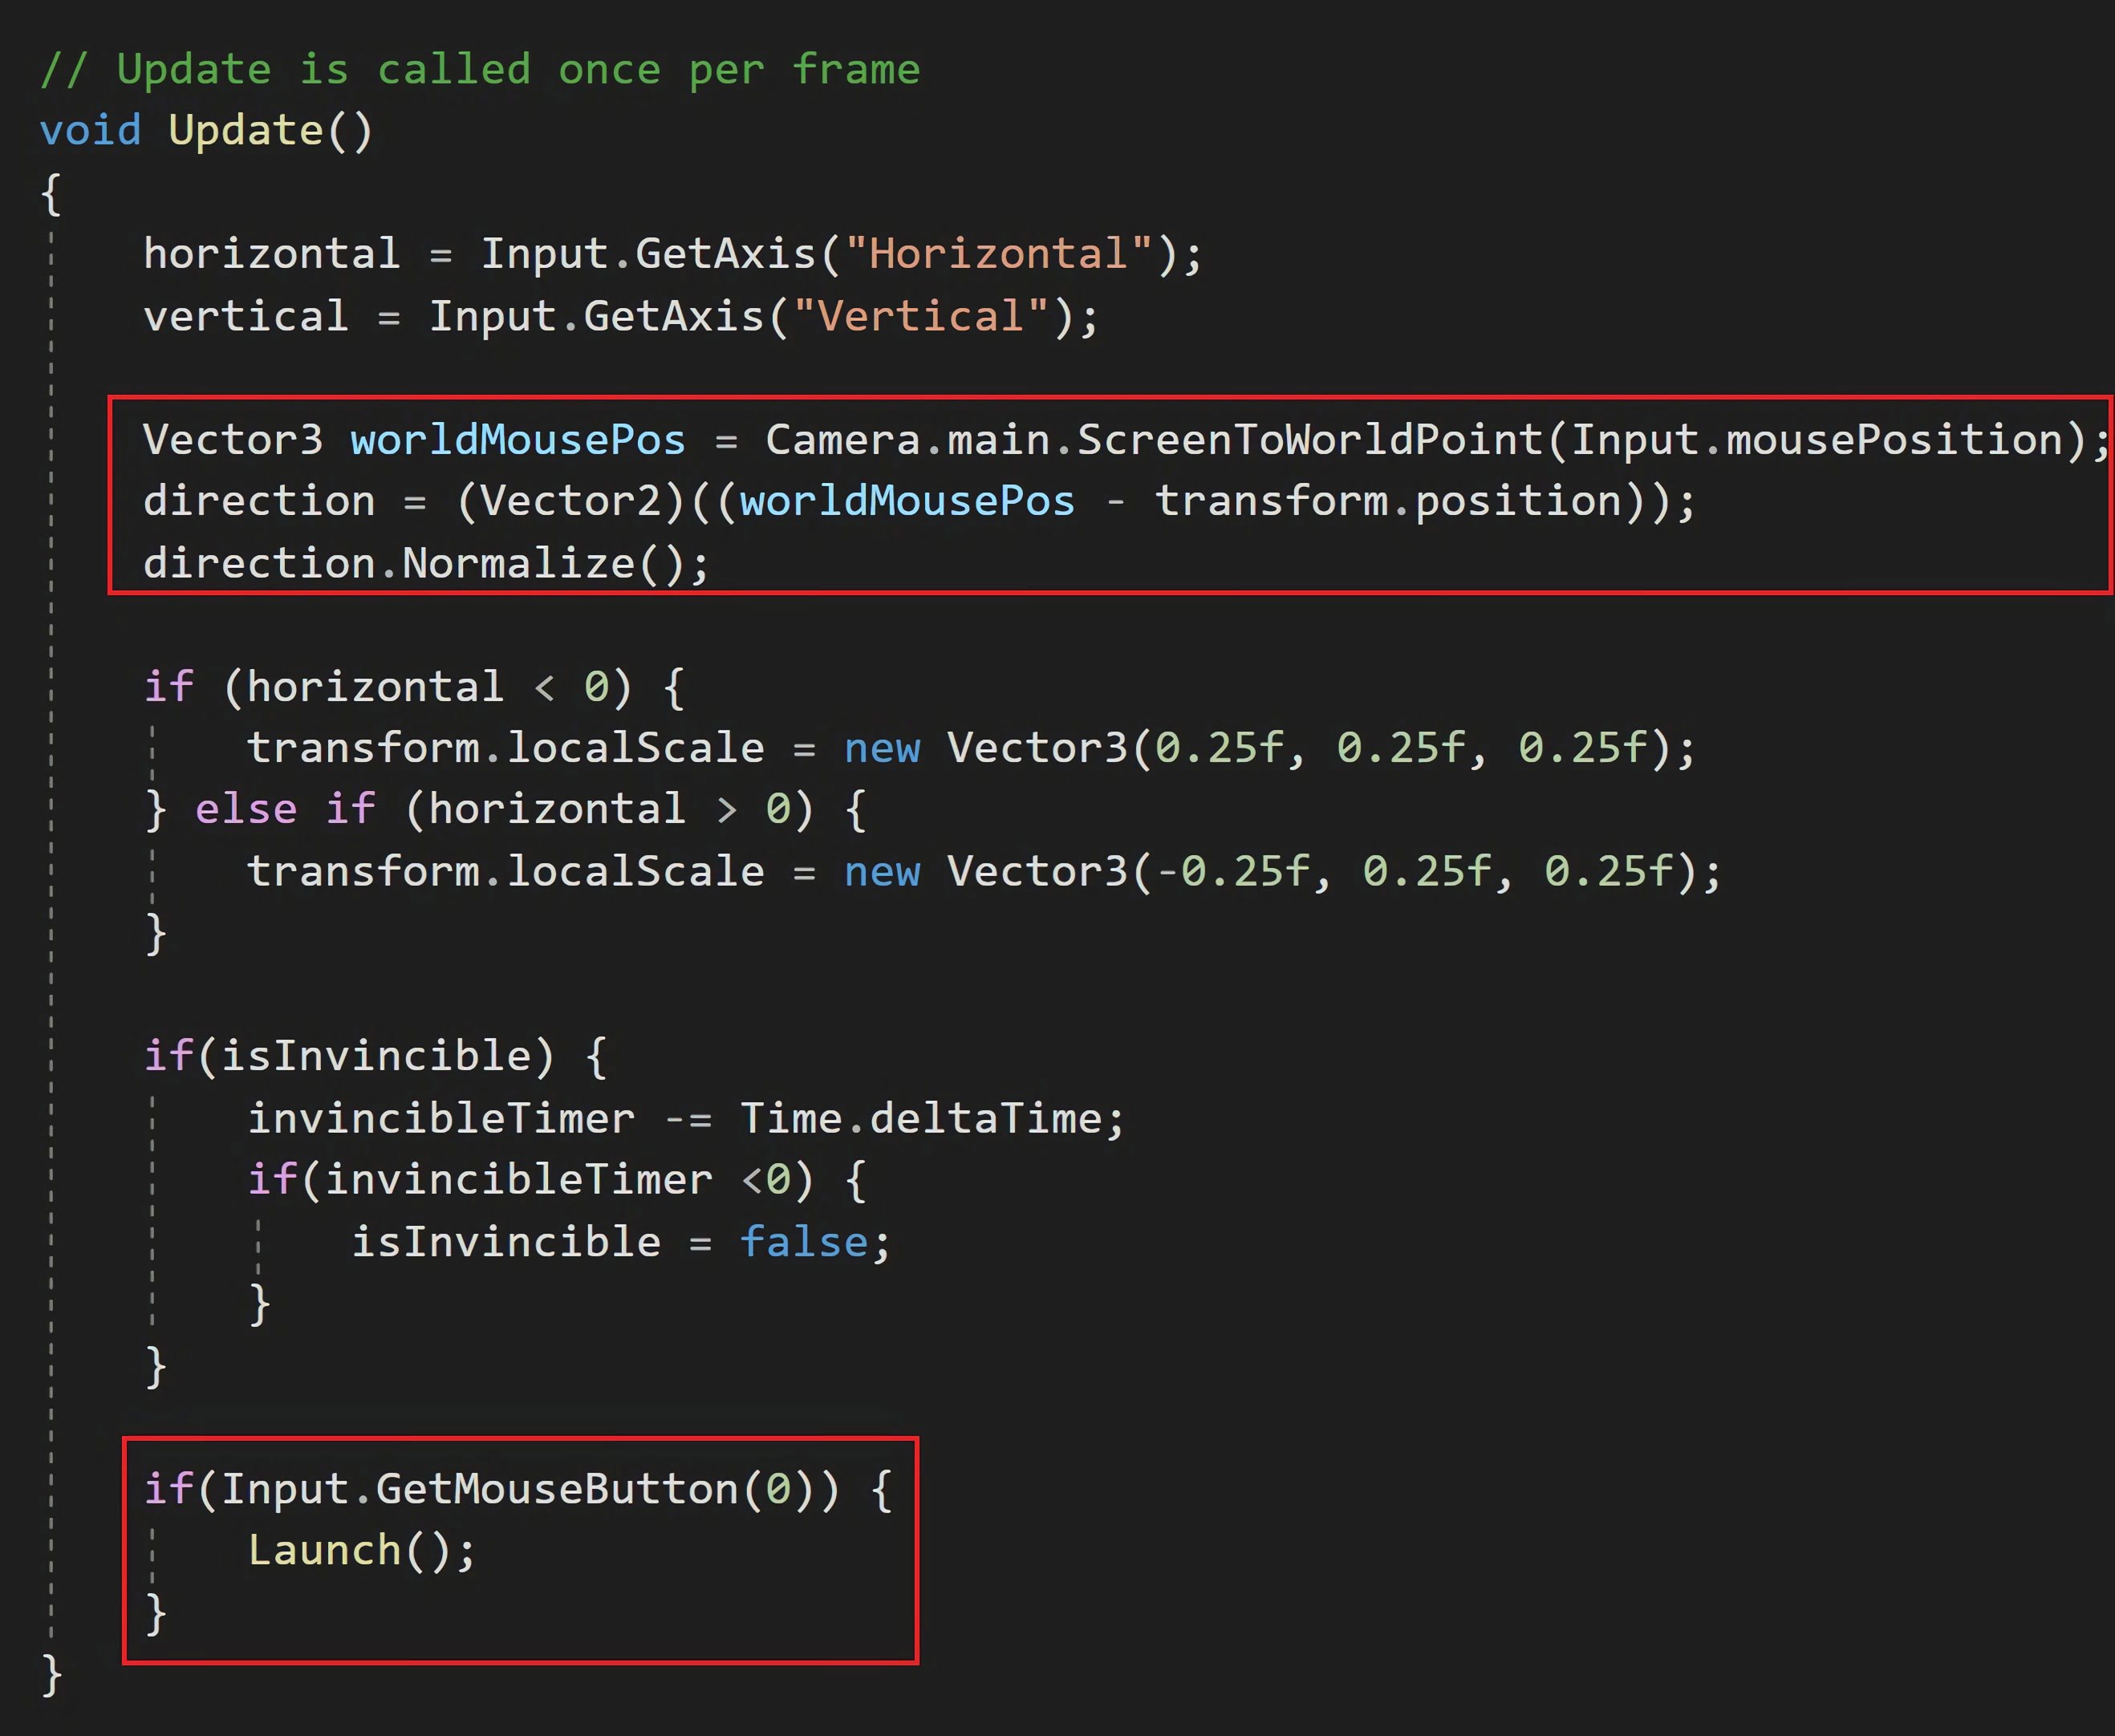
Press Play and then press left mouse button while in-game. You'll notice the Projectile doesn't appear and there's an error message:
"Projectile Collision with UnityEngine.GameObject".
Step 3 - Fixing Layering
To fix this error message, we need to create separate Layers for our Character and Projectile.
Click on your Character prefab and then click the small arrow beside Layer in the top-right of the Inspector.
Click Add Layer.
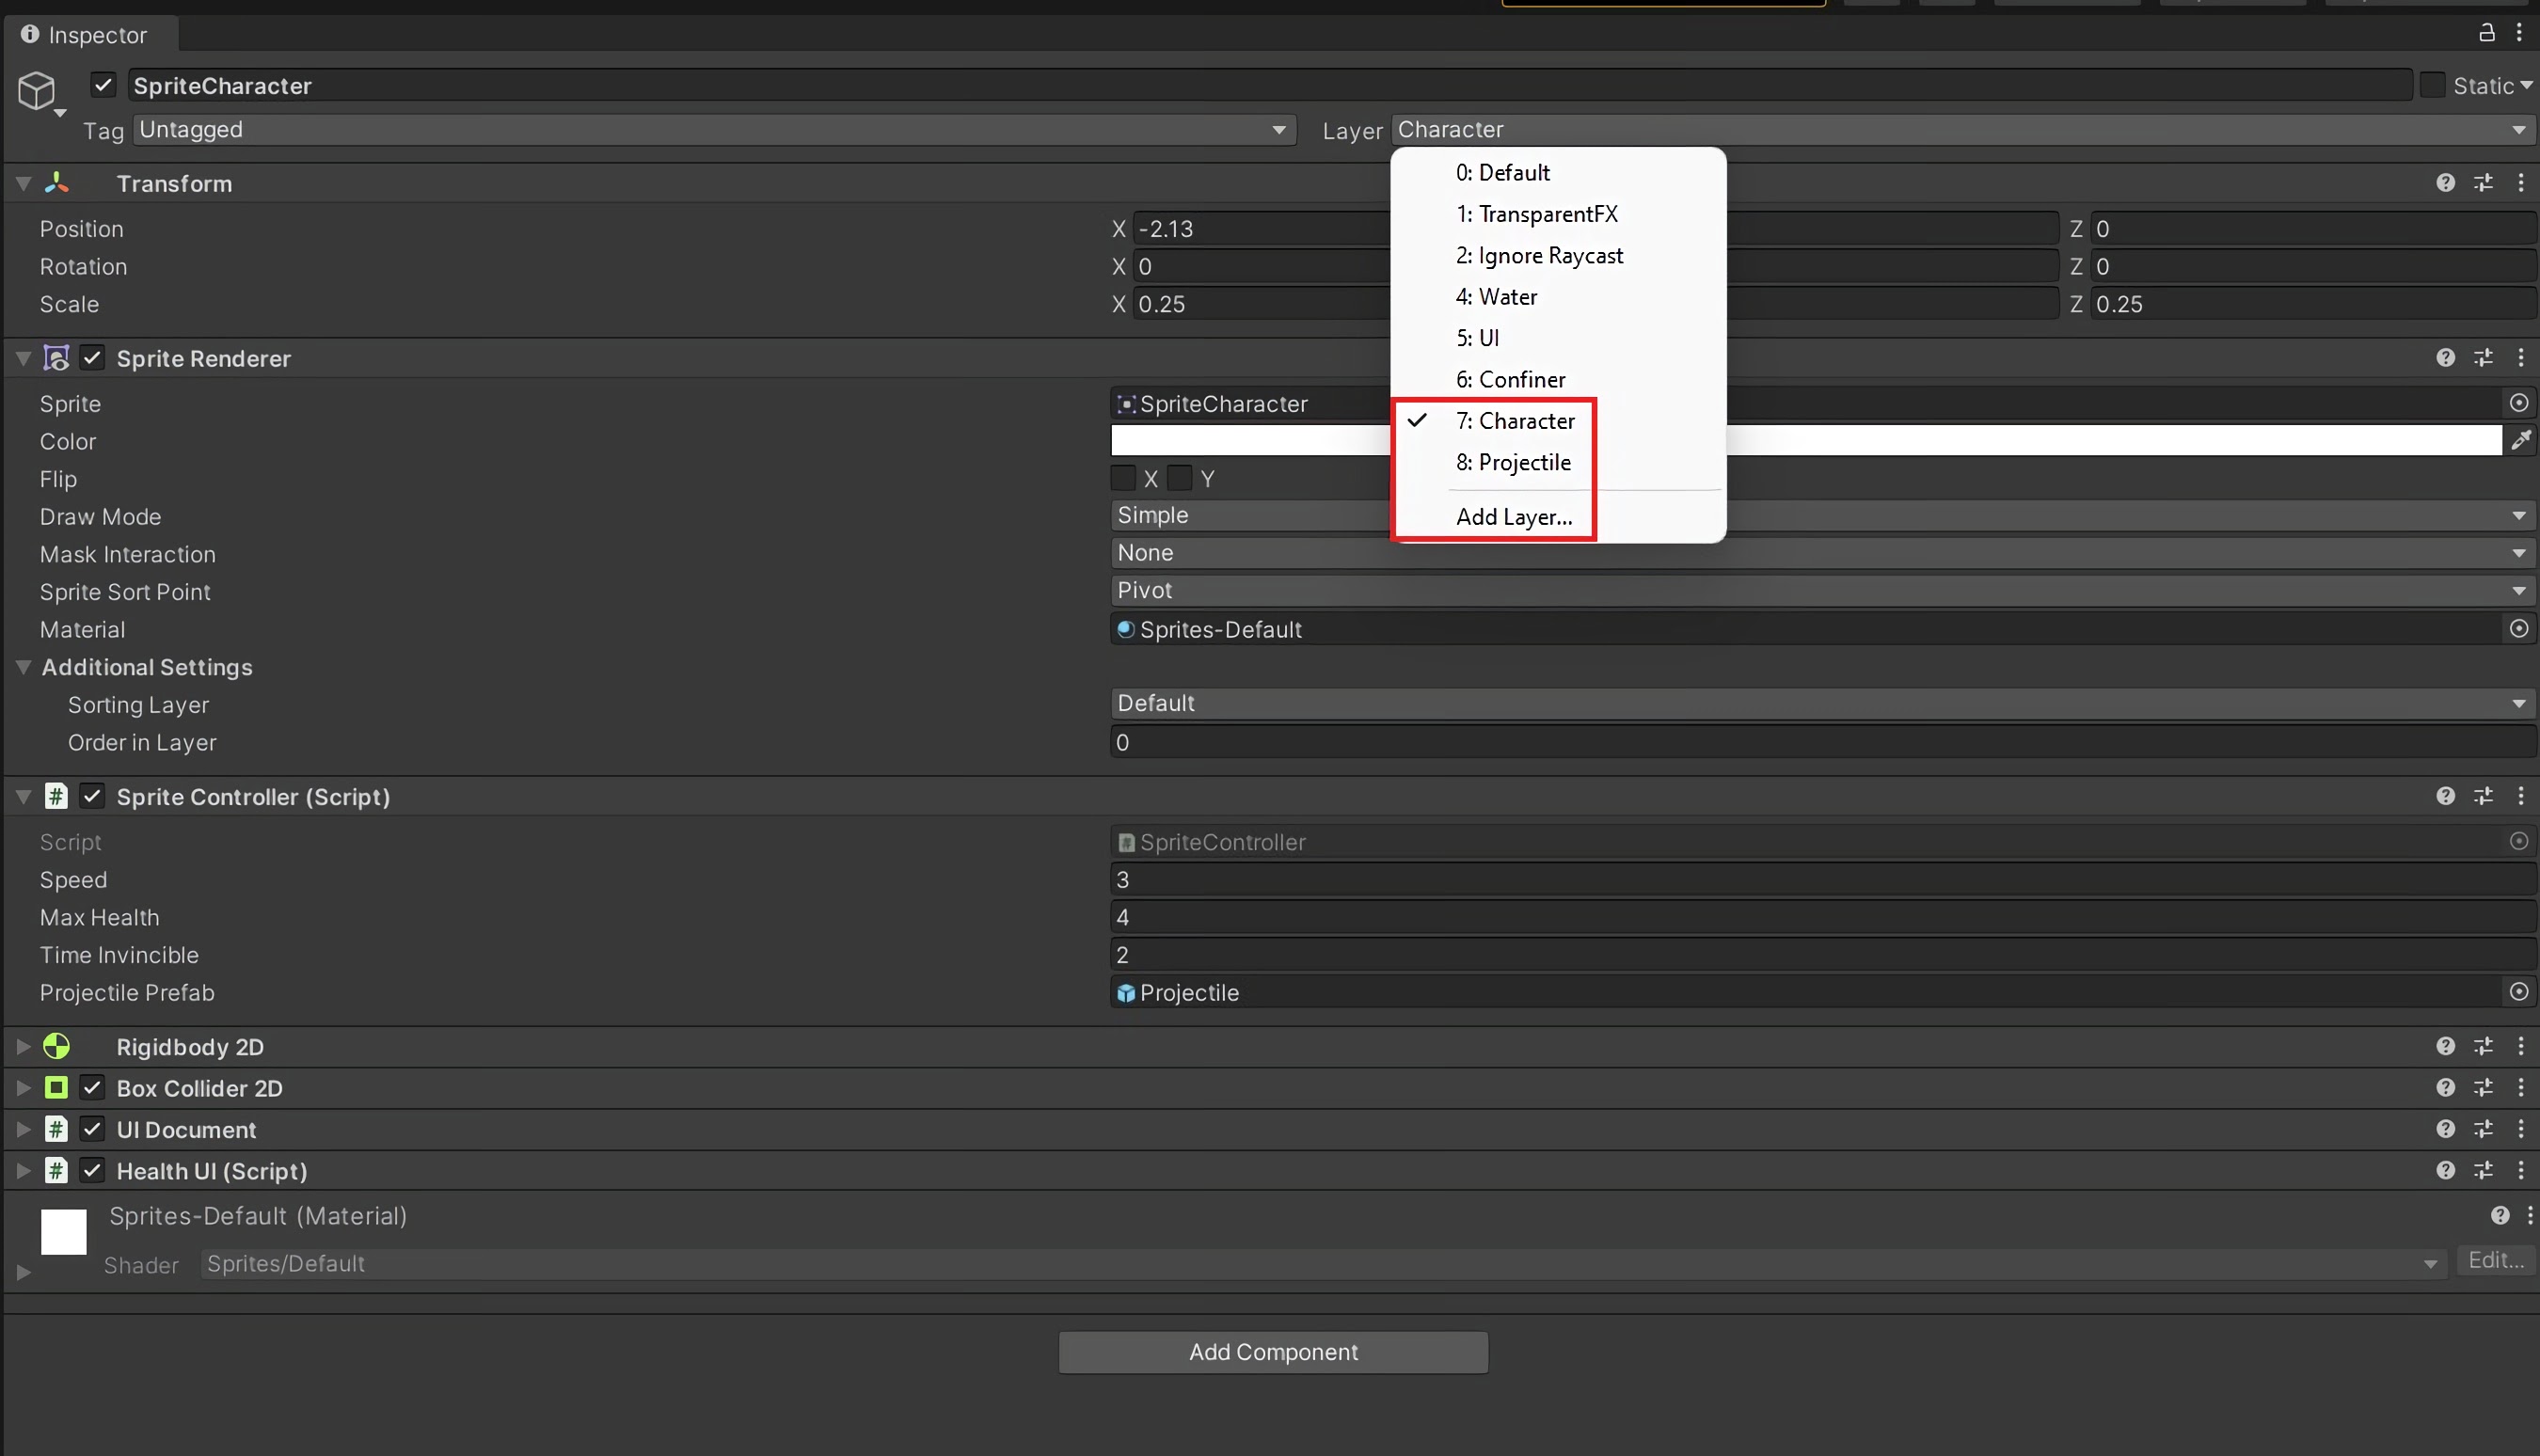
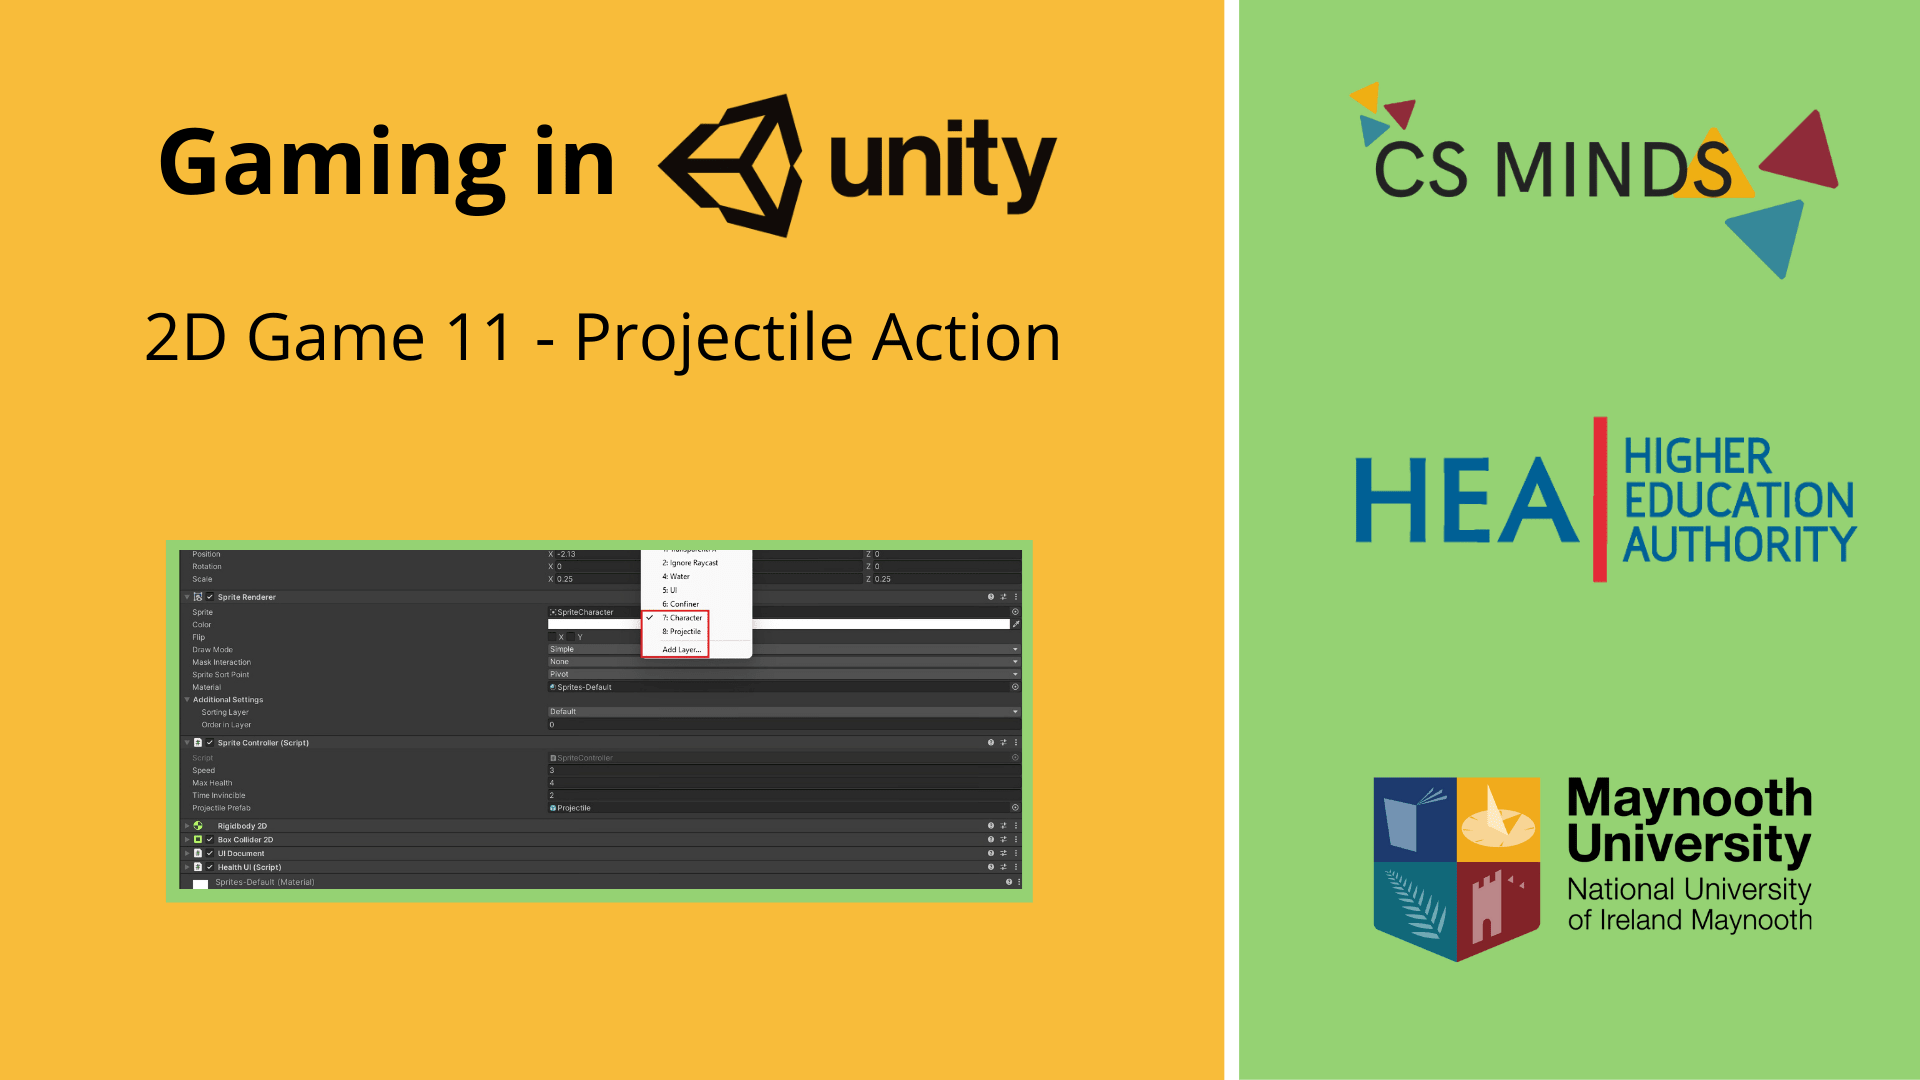
Create a layer called Character. Select your Character prefab and change its layer from Default to Character.
Create a layer called Projectile. Select your Projectile prefab and change its layer from Default to Projectile.
In the top left, open Edit -> Project Settings.
Go to Physics 2D and scroll to the bottom.
Uncheck the box that overlaps Character and Projectile (and Character and Confiner).

Return to the Unity Editor and press Play. You should now be able to press left mouse click to launch a projectile!
Created by: David Corish