Gaming in Unity
06. Unity 2D Game 2 - World
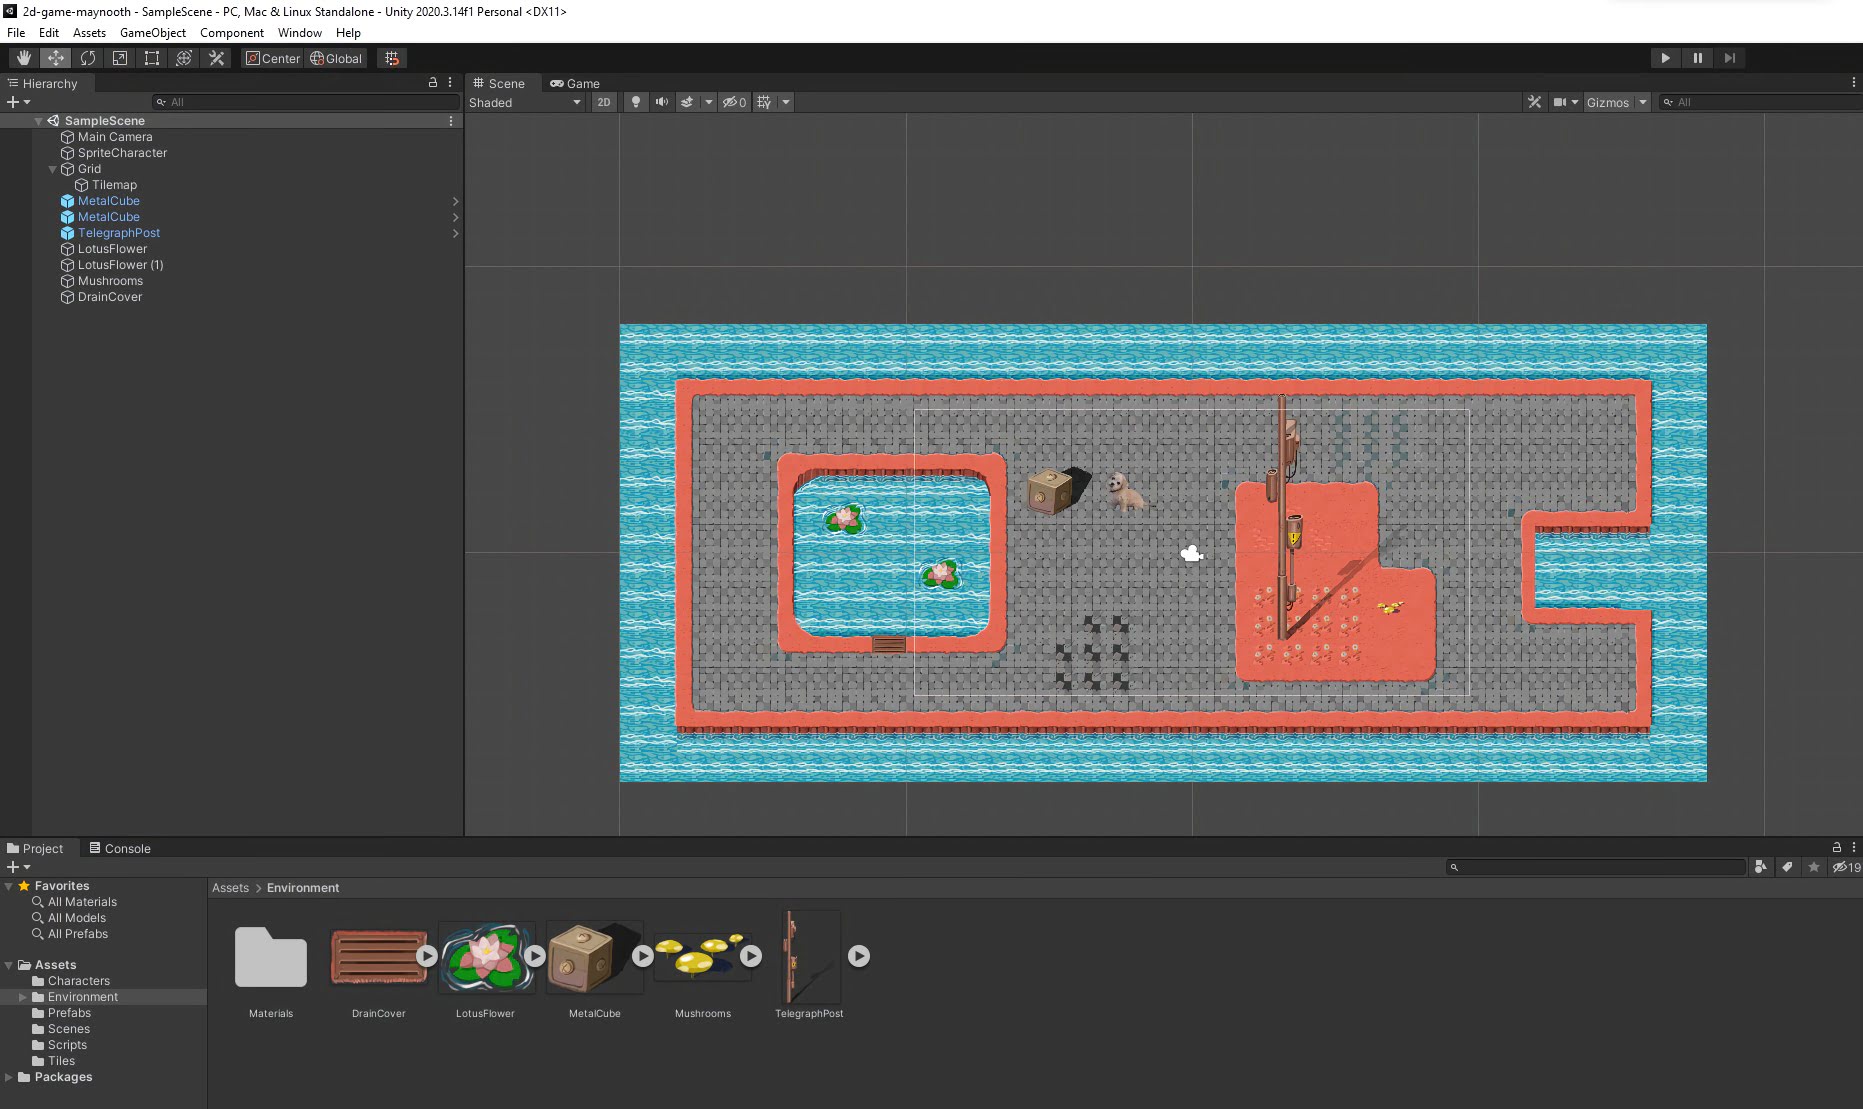
By using Tilemaps, making a level is like painting!
Step 1 - Creating a Tilemap
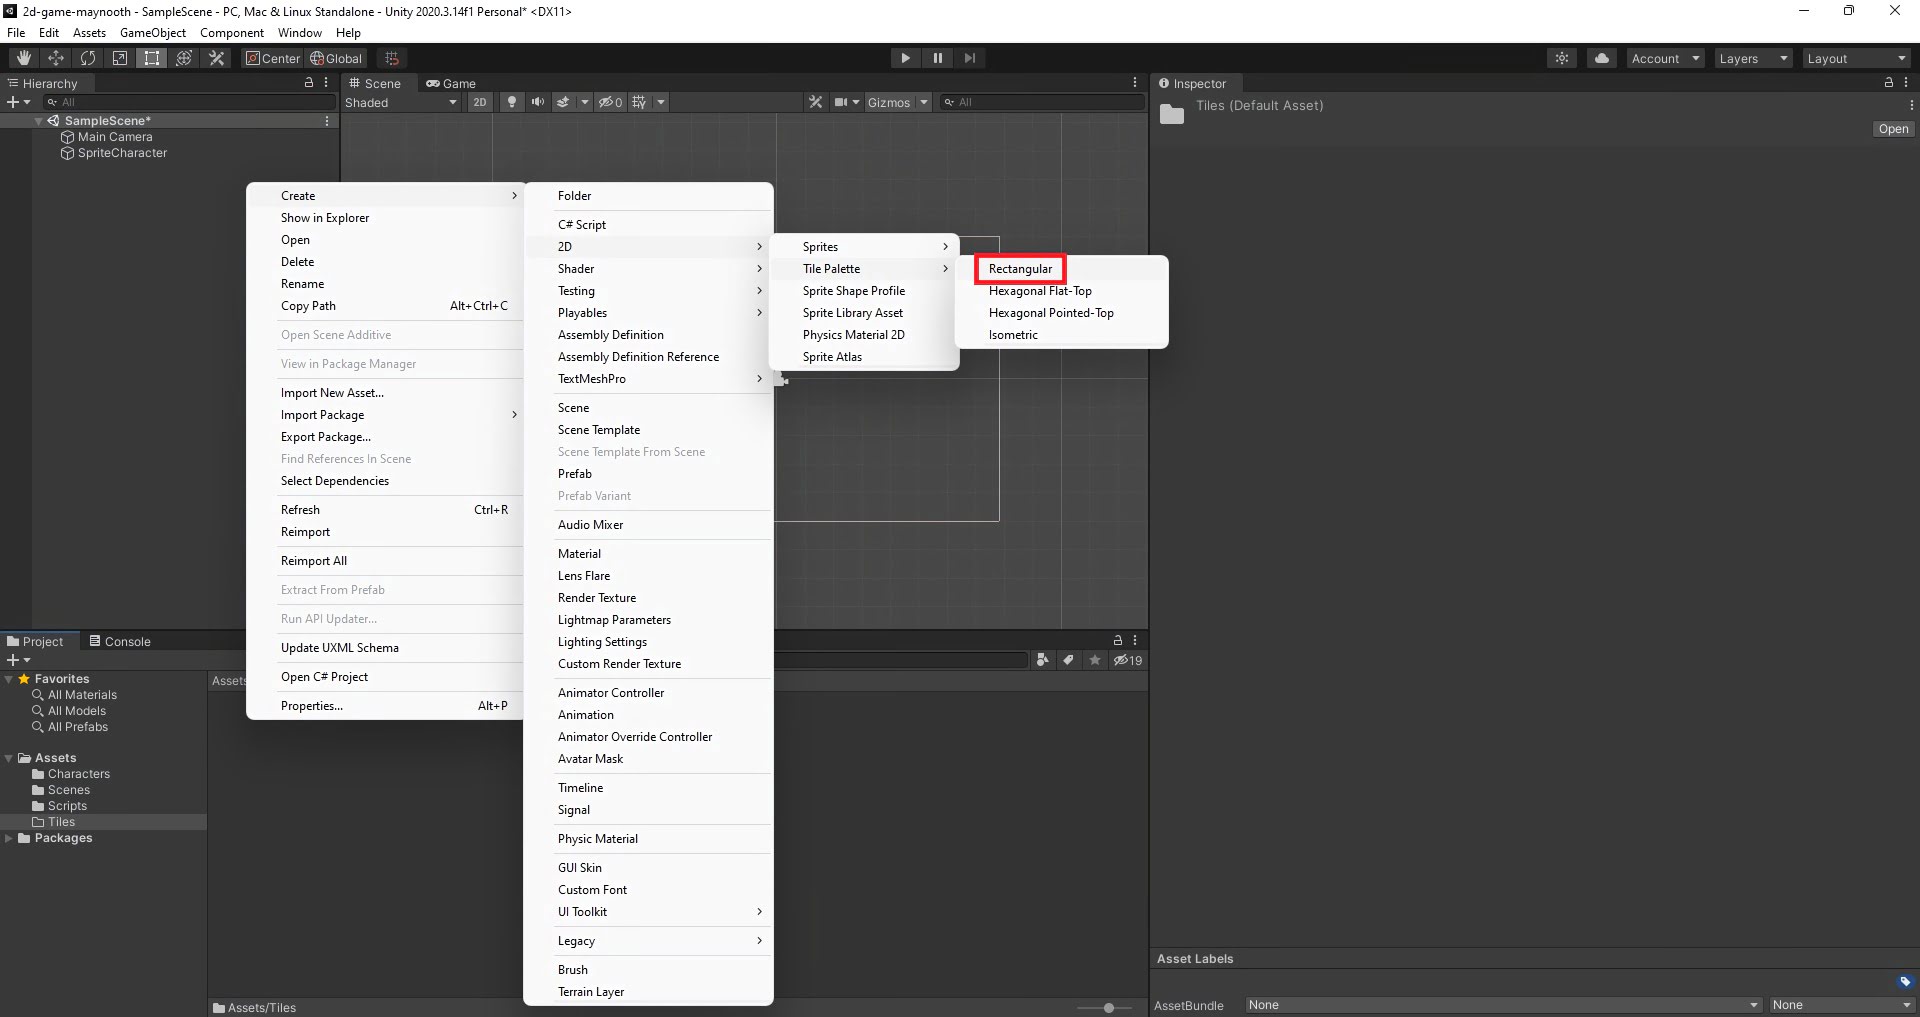
To create a Tilemap, right-click in the Hierarchy window and select 2D Object -> Tilemap -> Rectangular

Create a new folder in the Assets window and call it Tiles. Open this folder.
We must now create a Tile Palette.
To create a Tile Palette, right-click in the Assets window and select Create -> 2D -> Tile Palette -> Rectangular
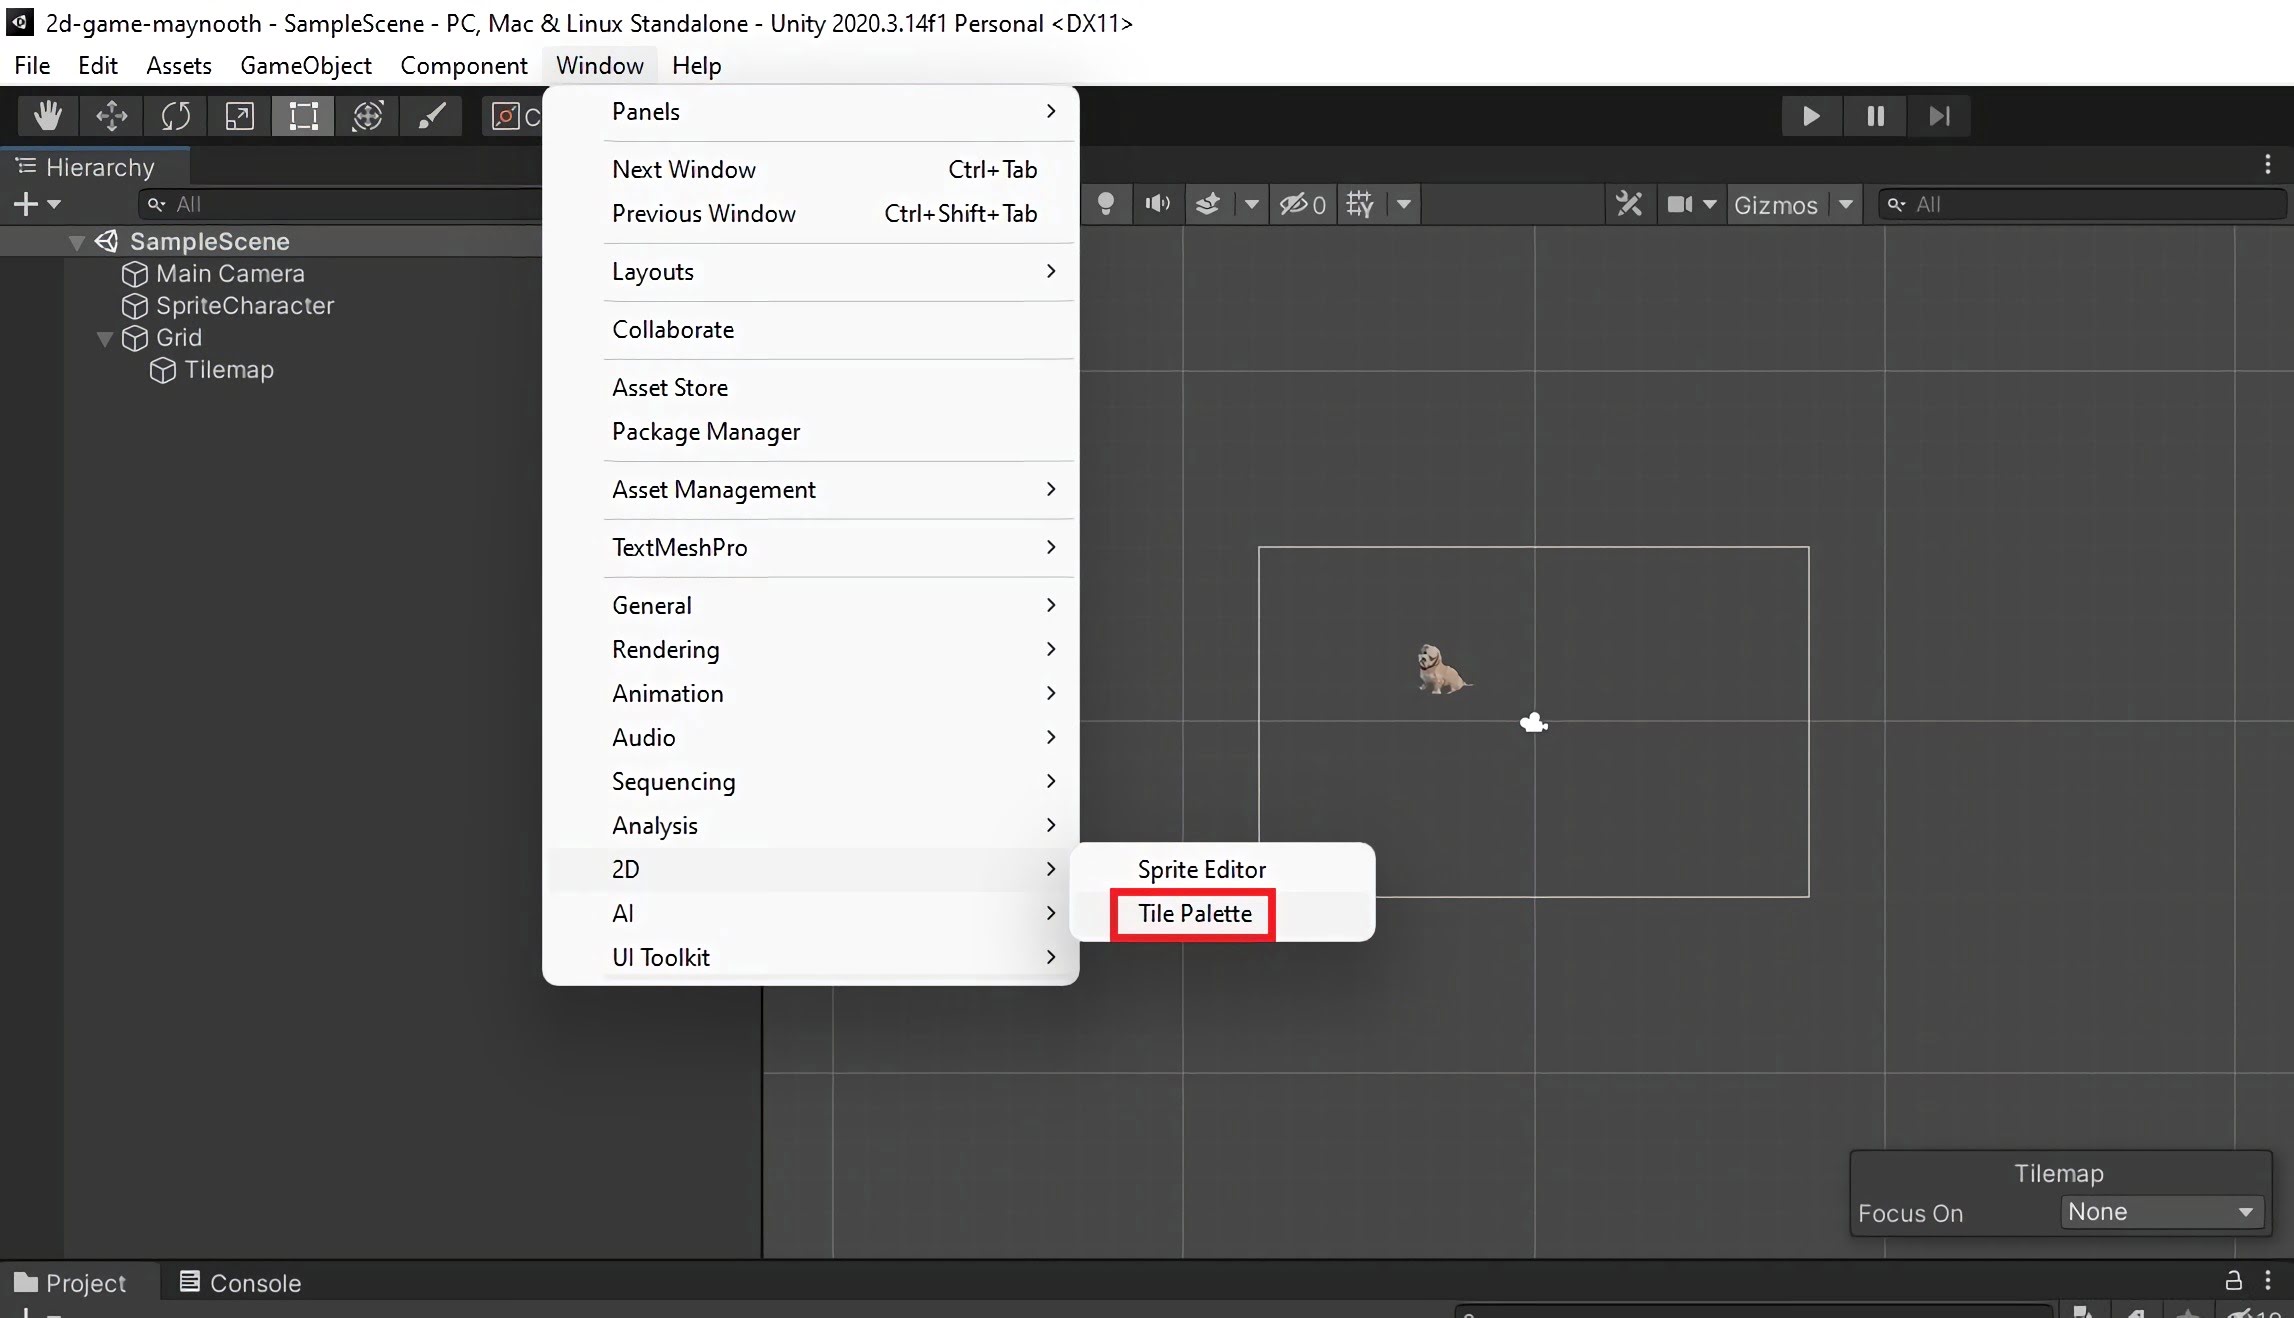
Once you've created your Tile Palette, you need to open the Tile Palette window.
To do this, select Window -> 2D -> Tile Palette.
I usually place this window next to the Hierarchy for convenience.
Step 2 - Adding Tiles
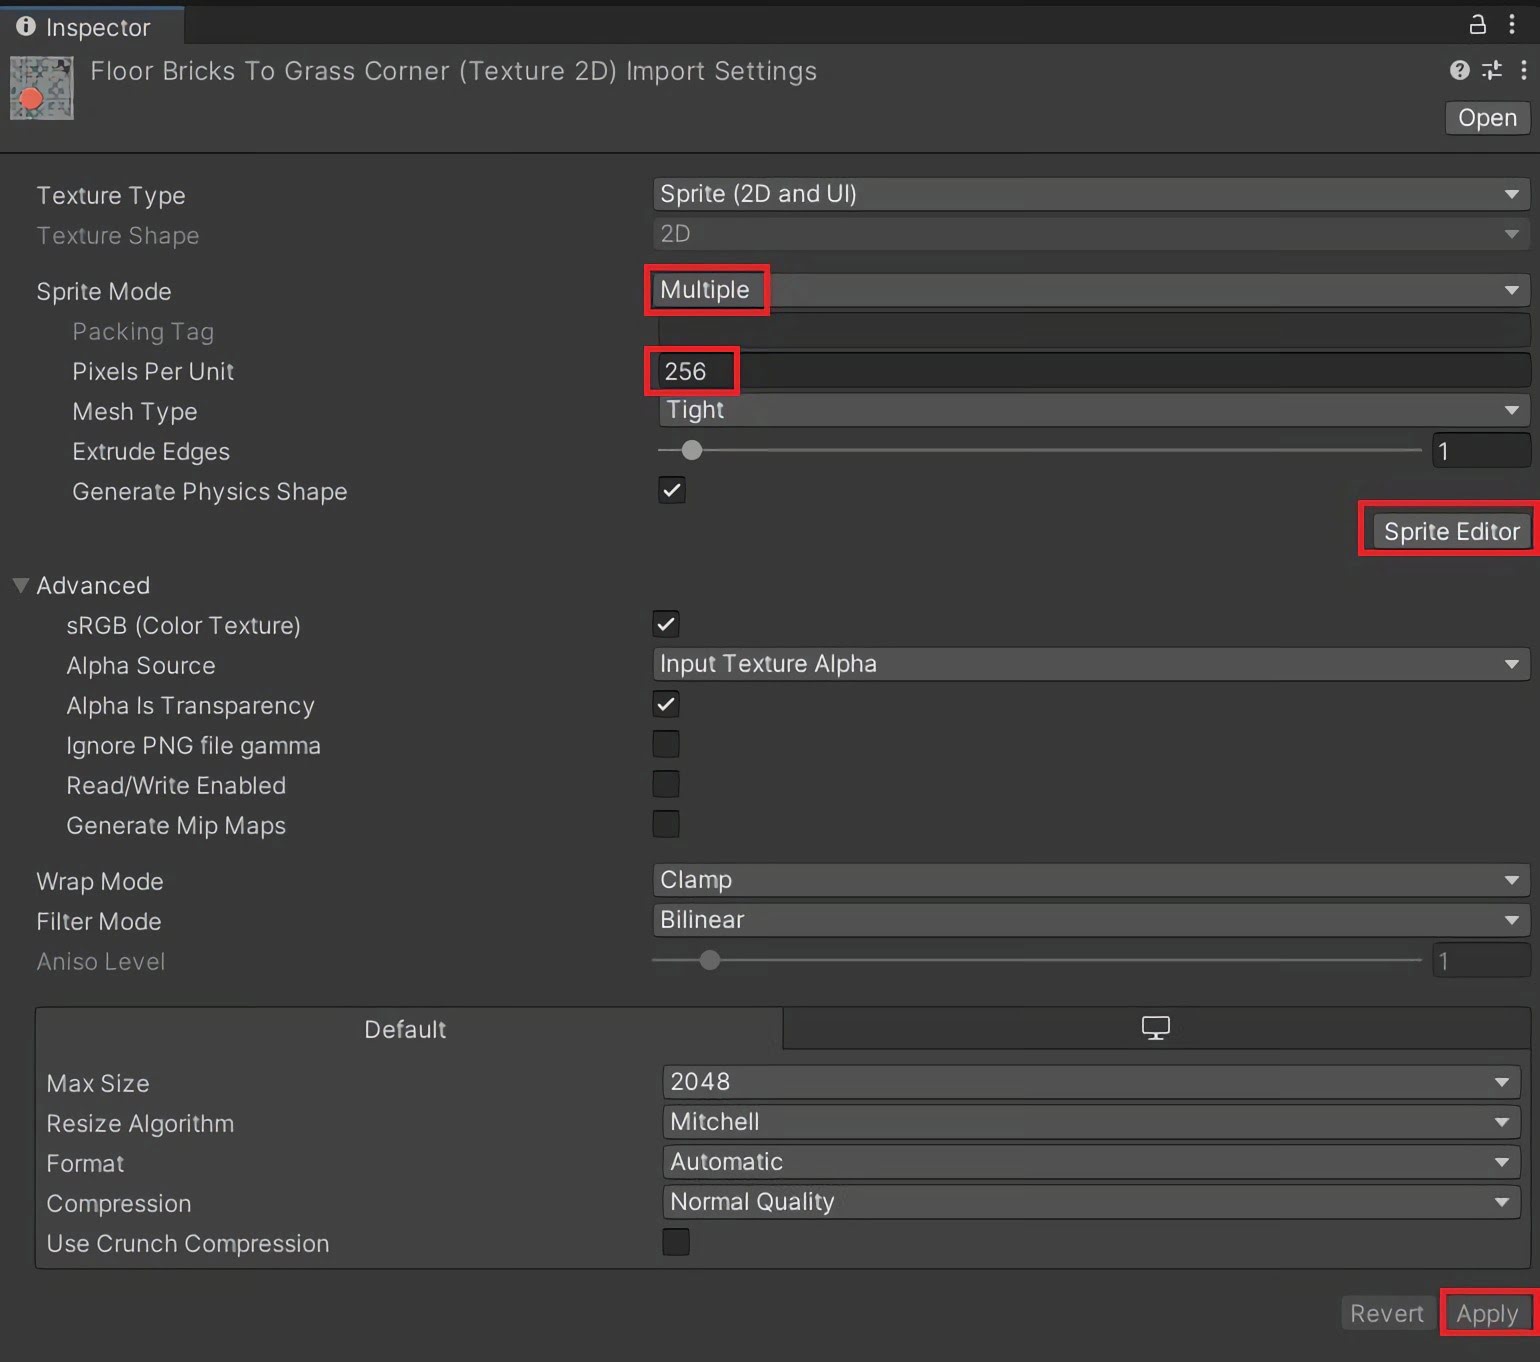
Drag and drop FloorBricksToGrassCorner.png into Assets -> Tiles.
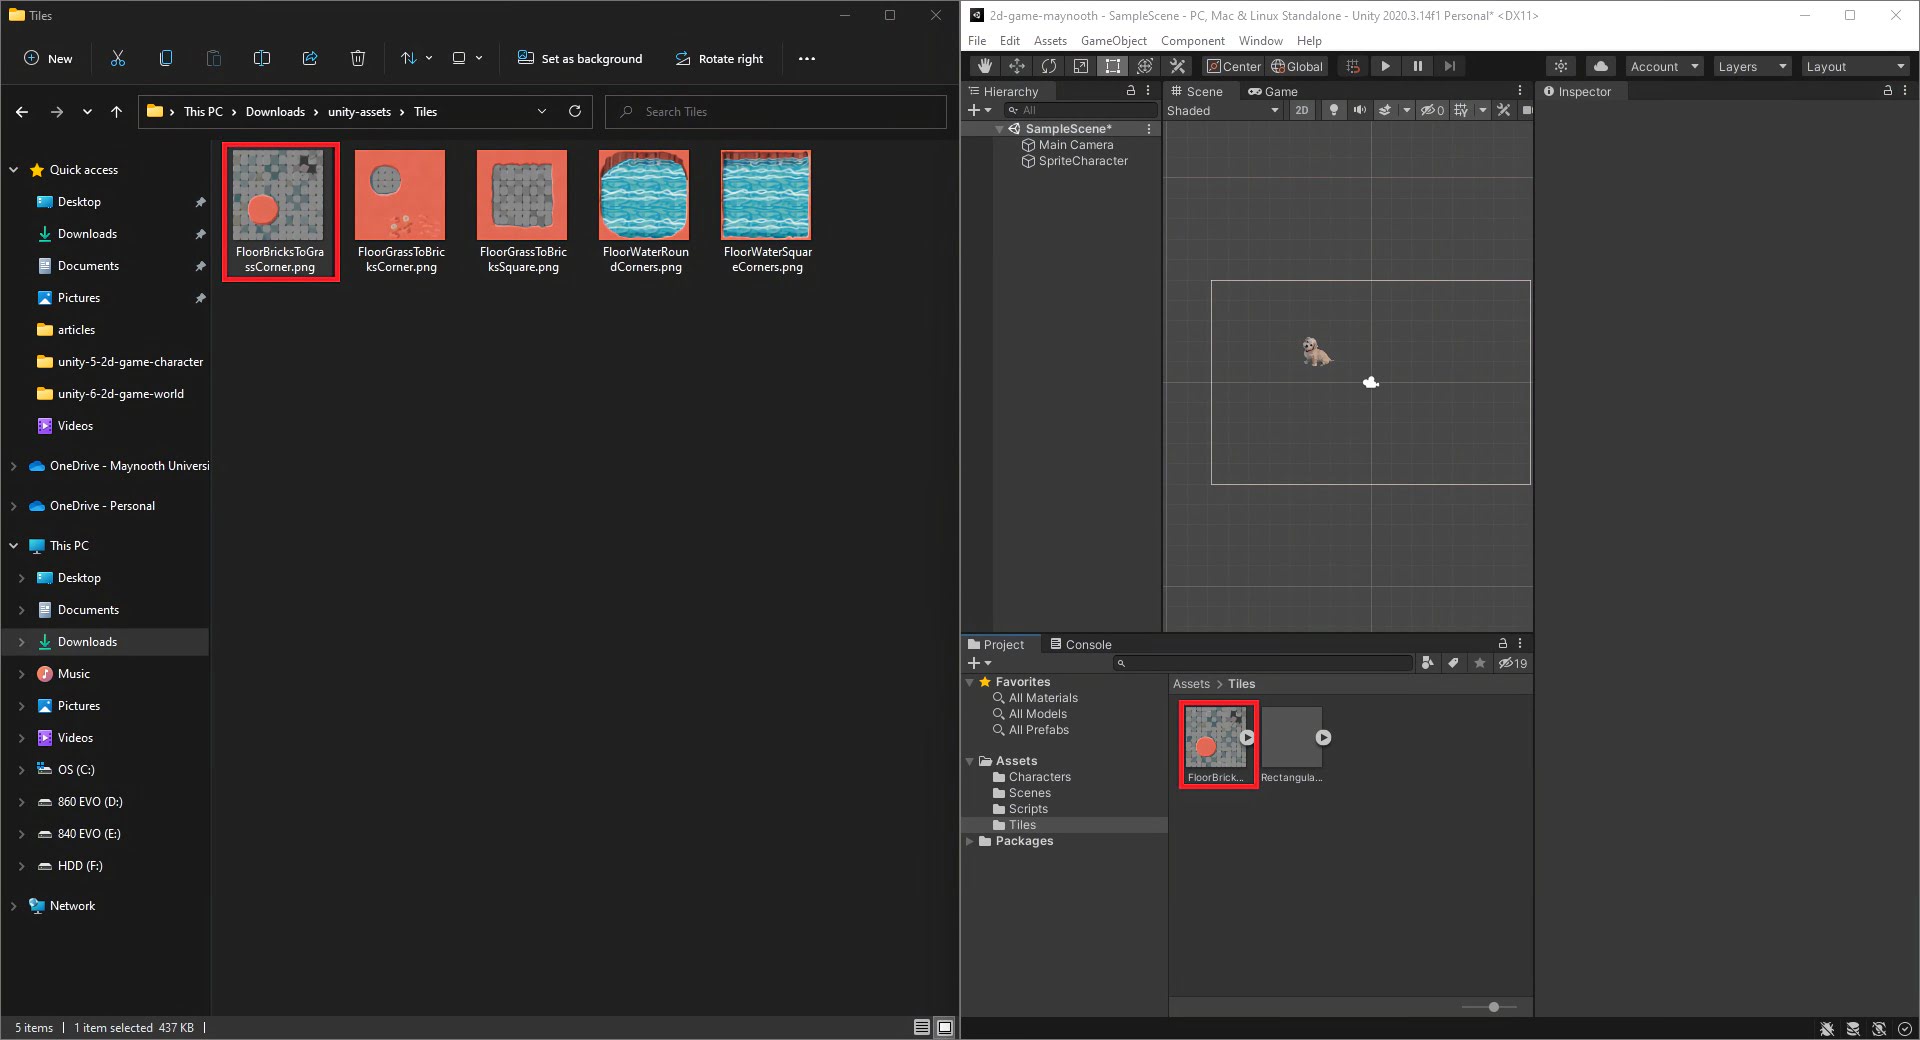
This image contains 9 different sprites. To use these, click on FloorBricksToGrassCorner.png. Change Sprite Mode to Multiple and change Pixels Per Unit to 256 (tiles are 256 pixels wide). Click the Apply button.
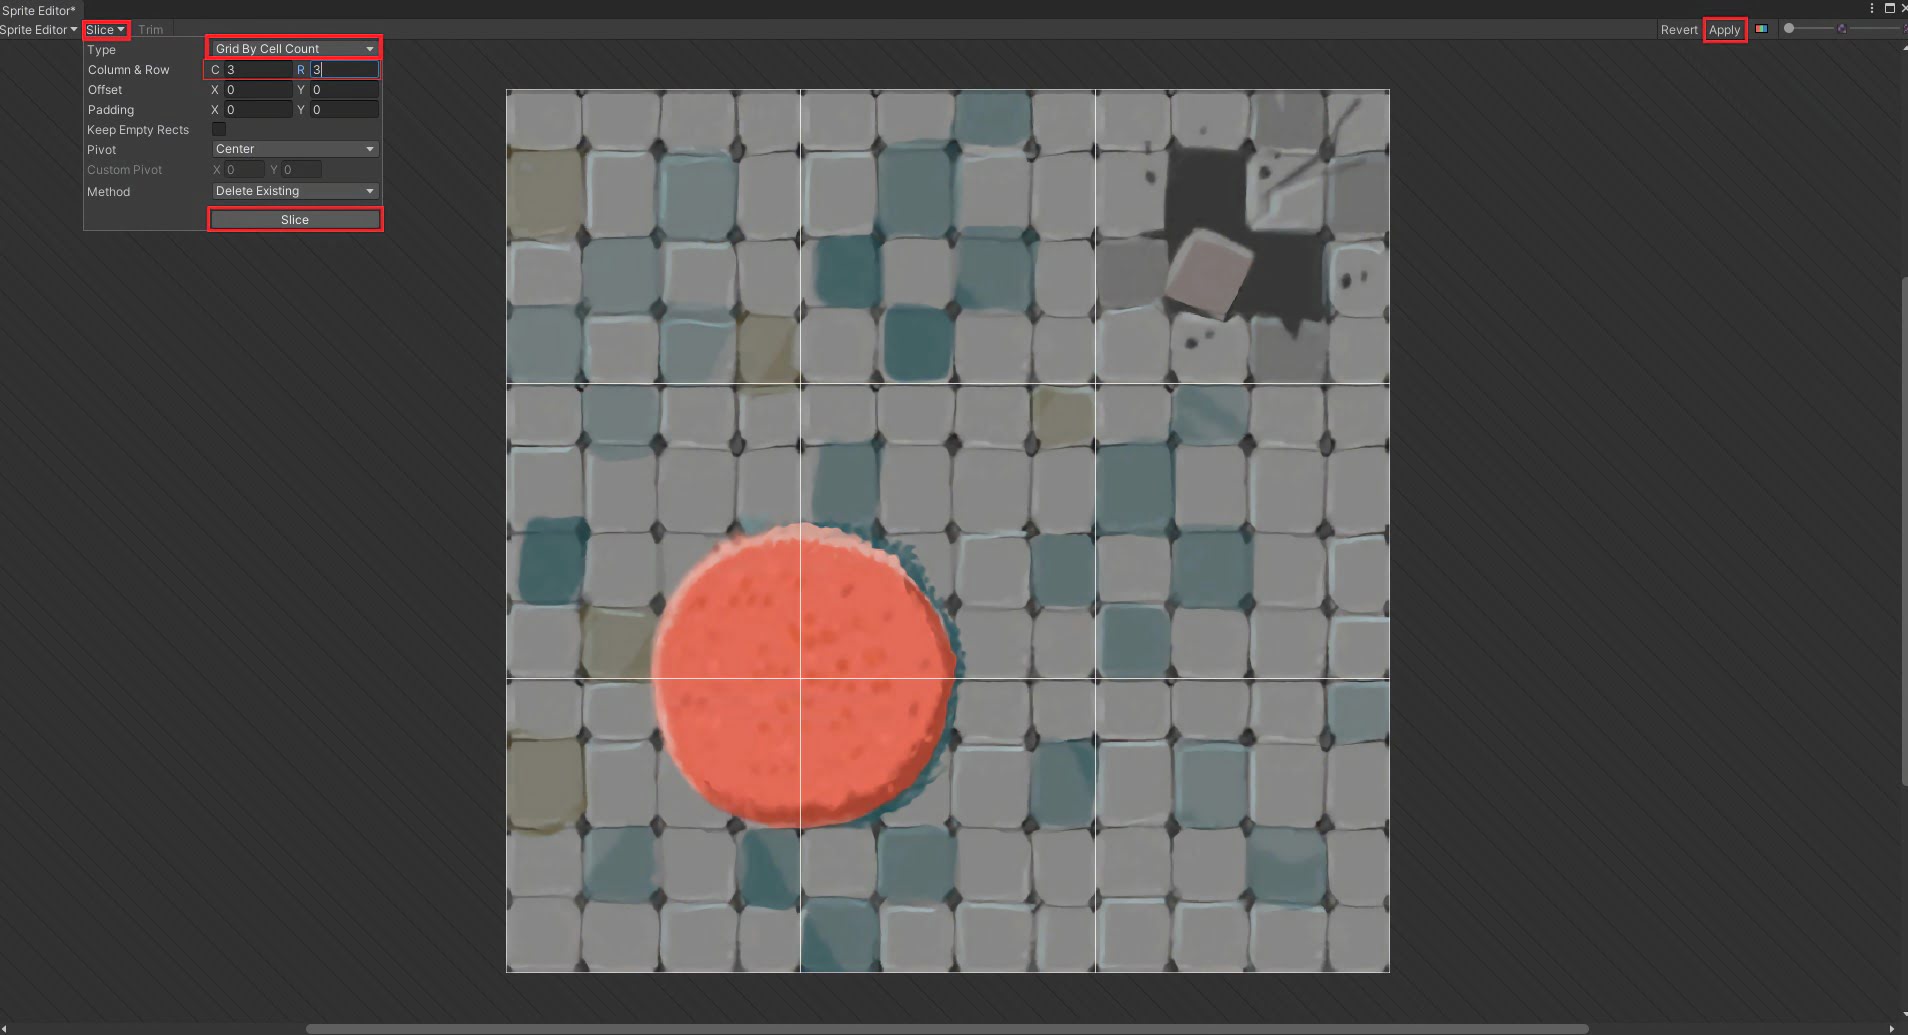
In the Inspector, click the Sprite Editor button.
In the Sprite Editor, click the small arrow to the right of Sprite Editor. Set Type to Grid by Cell Count. Set Column & Row to 3. Click Slice.
After clicking Slice, press Apply.
By doing this, 9 separate sprites are created!
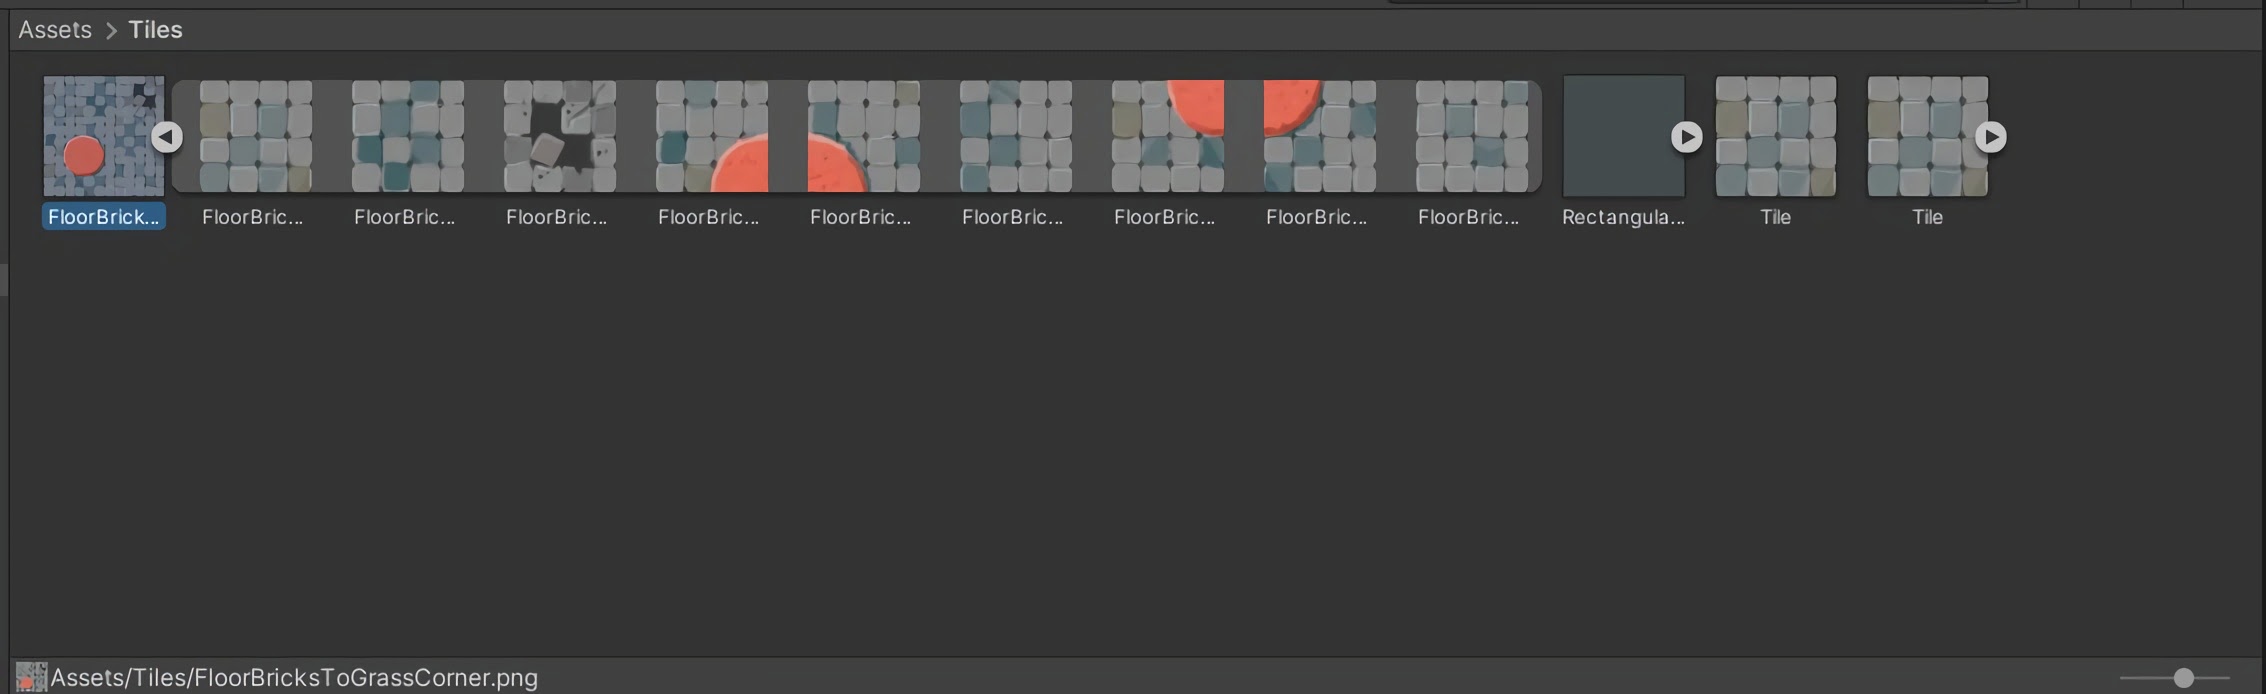
Drag this into your Tile Palette.
Repeat step 2 for any further sprites you want to use in your world!
Step 3 - Painting Your World
Drag your Tile Palette to be next to the hierarchy.
Click on a Tile in the Tile Palette to select it.
Click in the Scene view to paint the world with your selected tile!
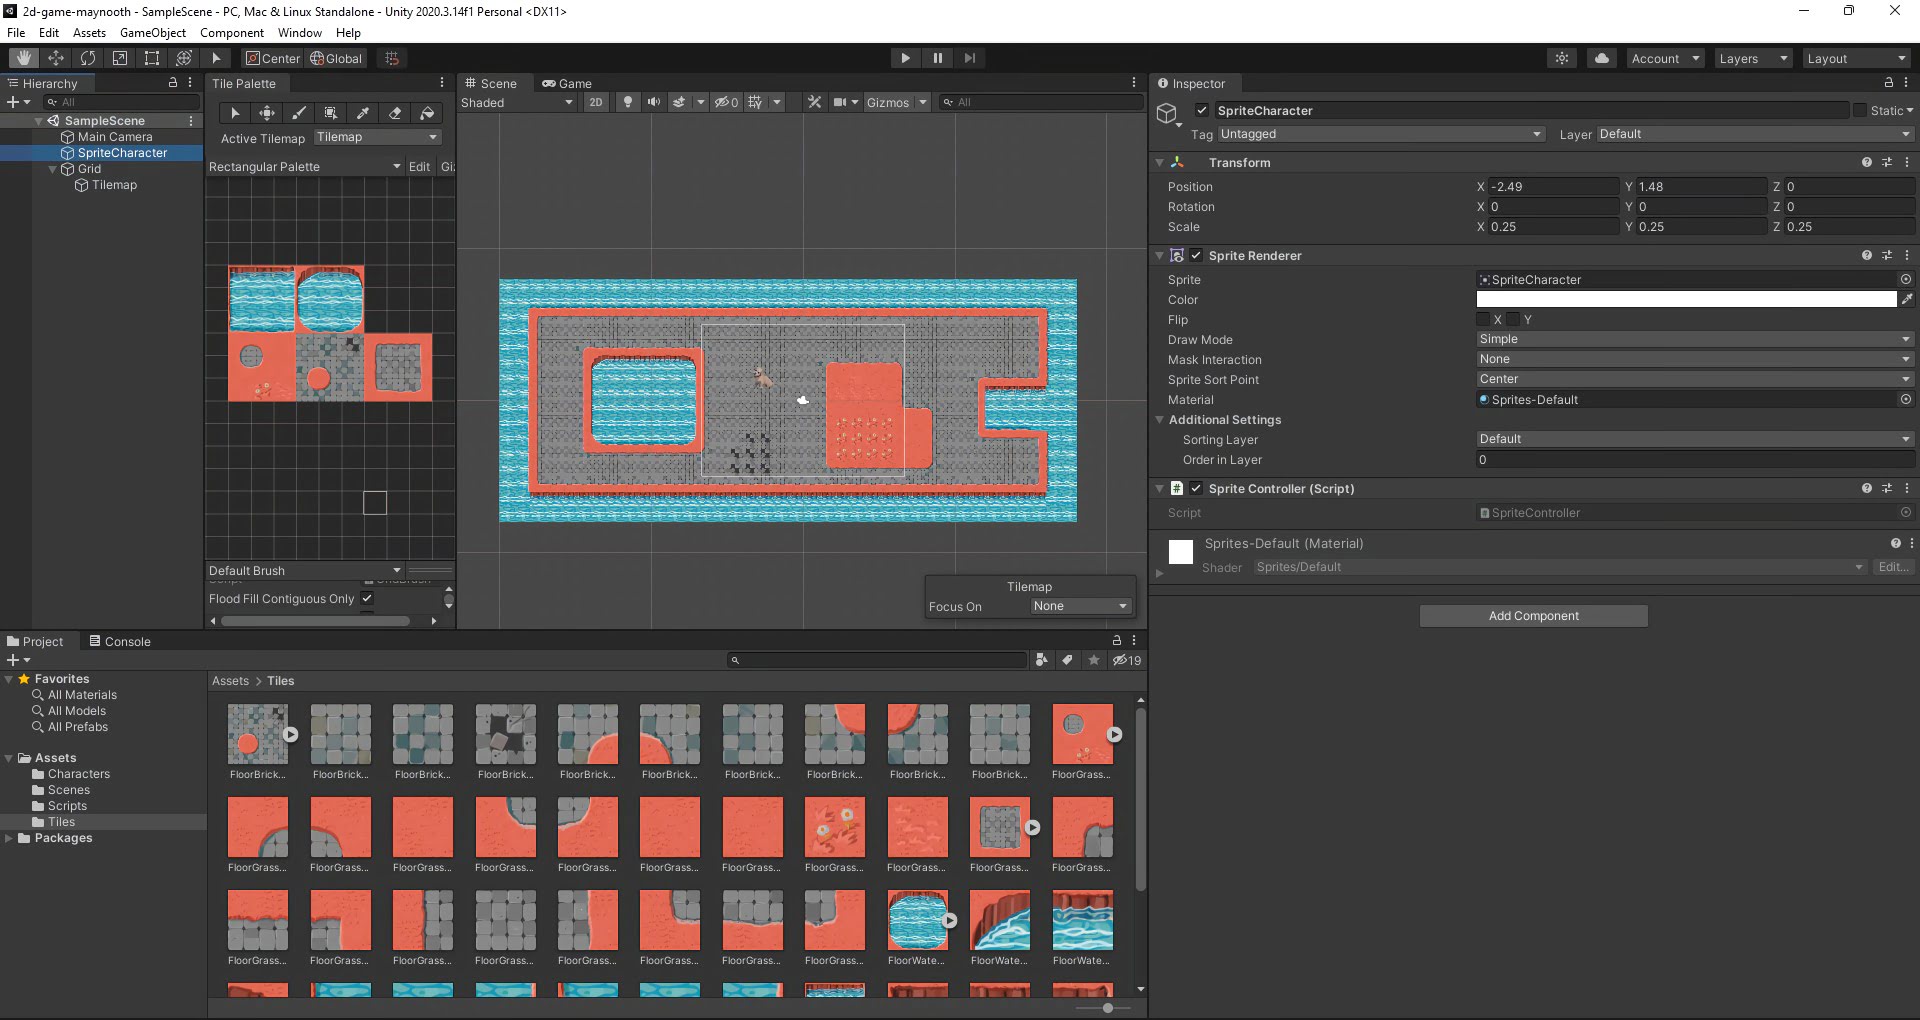
You may notice that SpriteCharacter no longer appears.
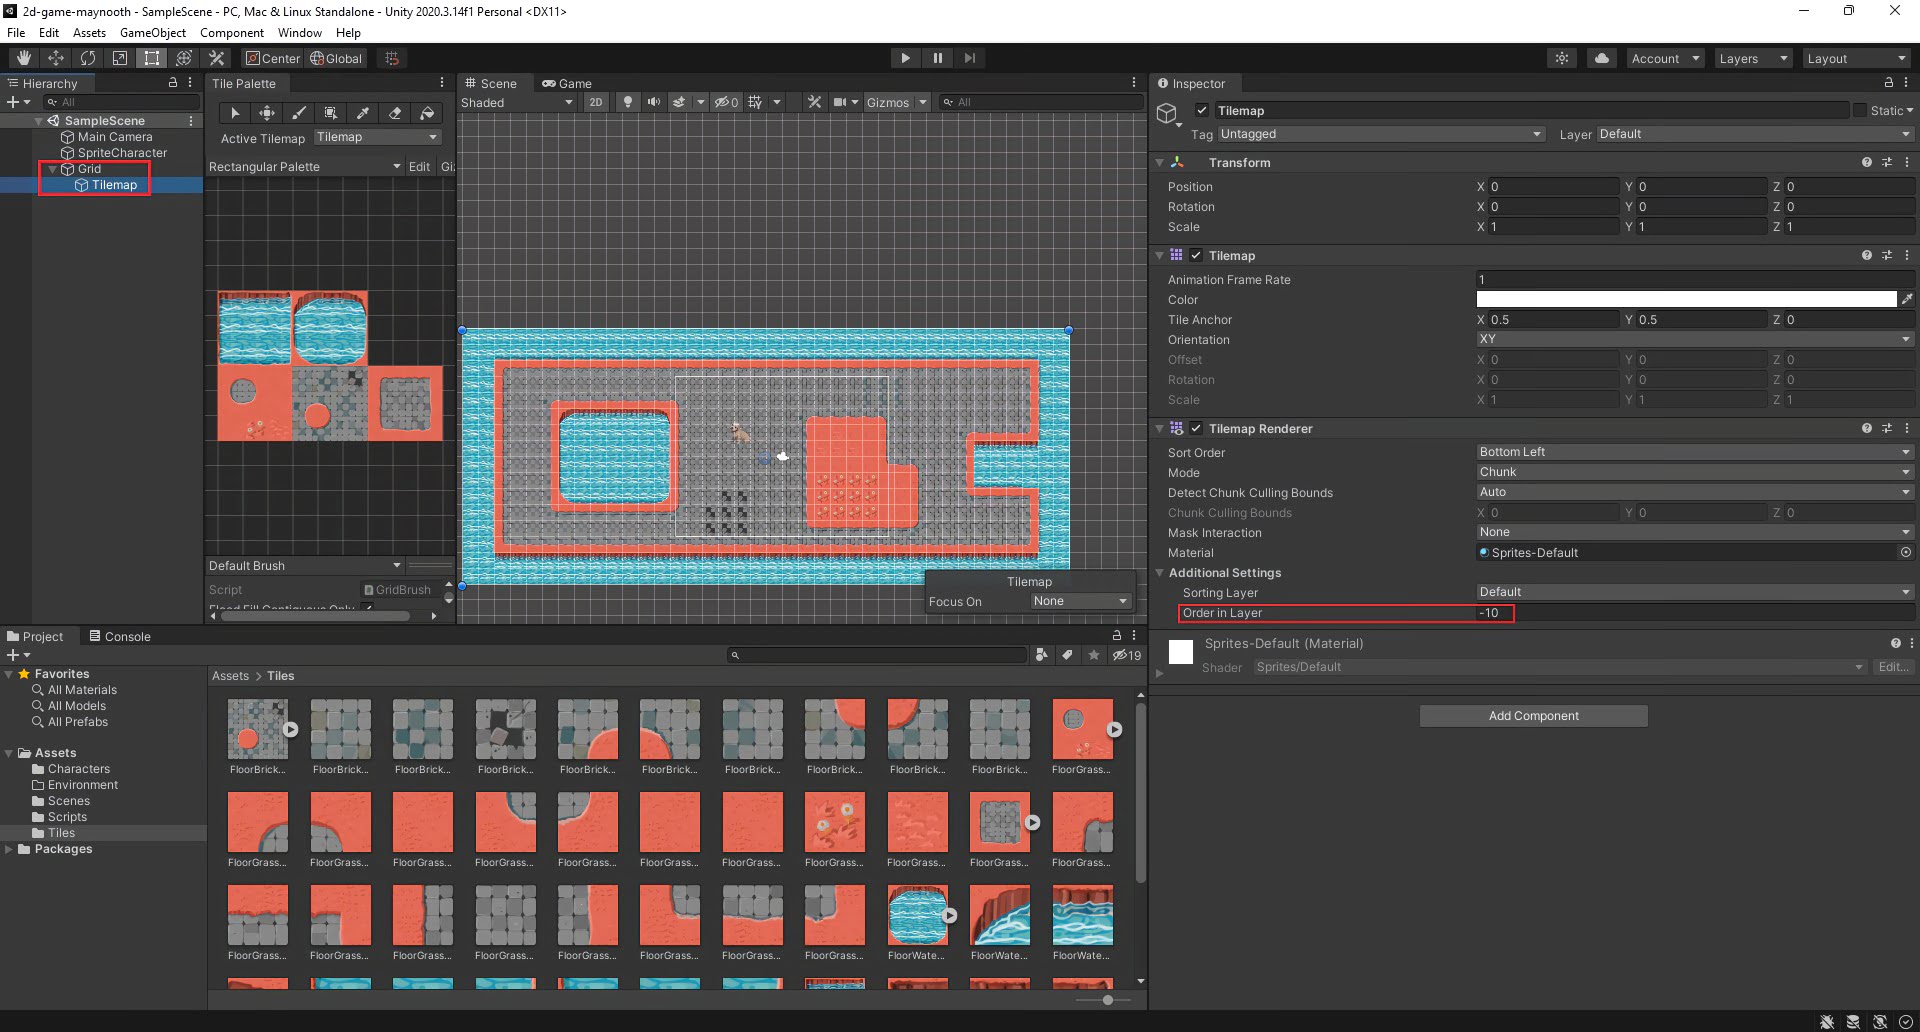
To fix this, go to the Hierarchy and select the Tilemap object.
Change the Order in Layer field to -10. This will mean the Tilemap will appear behind SpriteCharacter.
Click Play above Scene and move SpriteCharacter through the world using the arrow keys!
Step 4 - Adding GameObjects
Create a new folder in Assets and call it Environment.
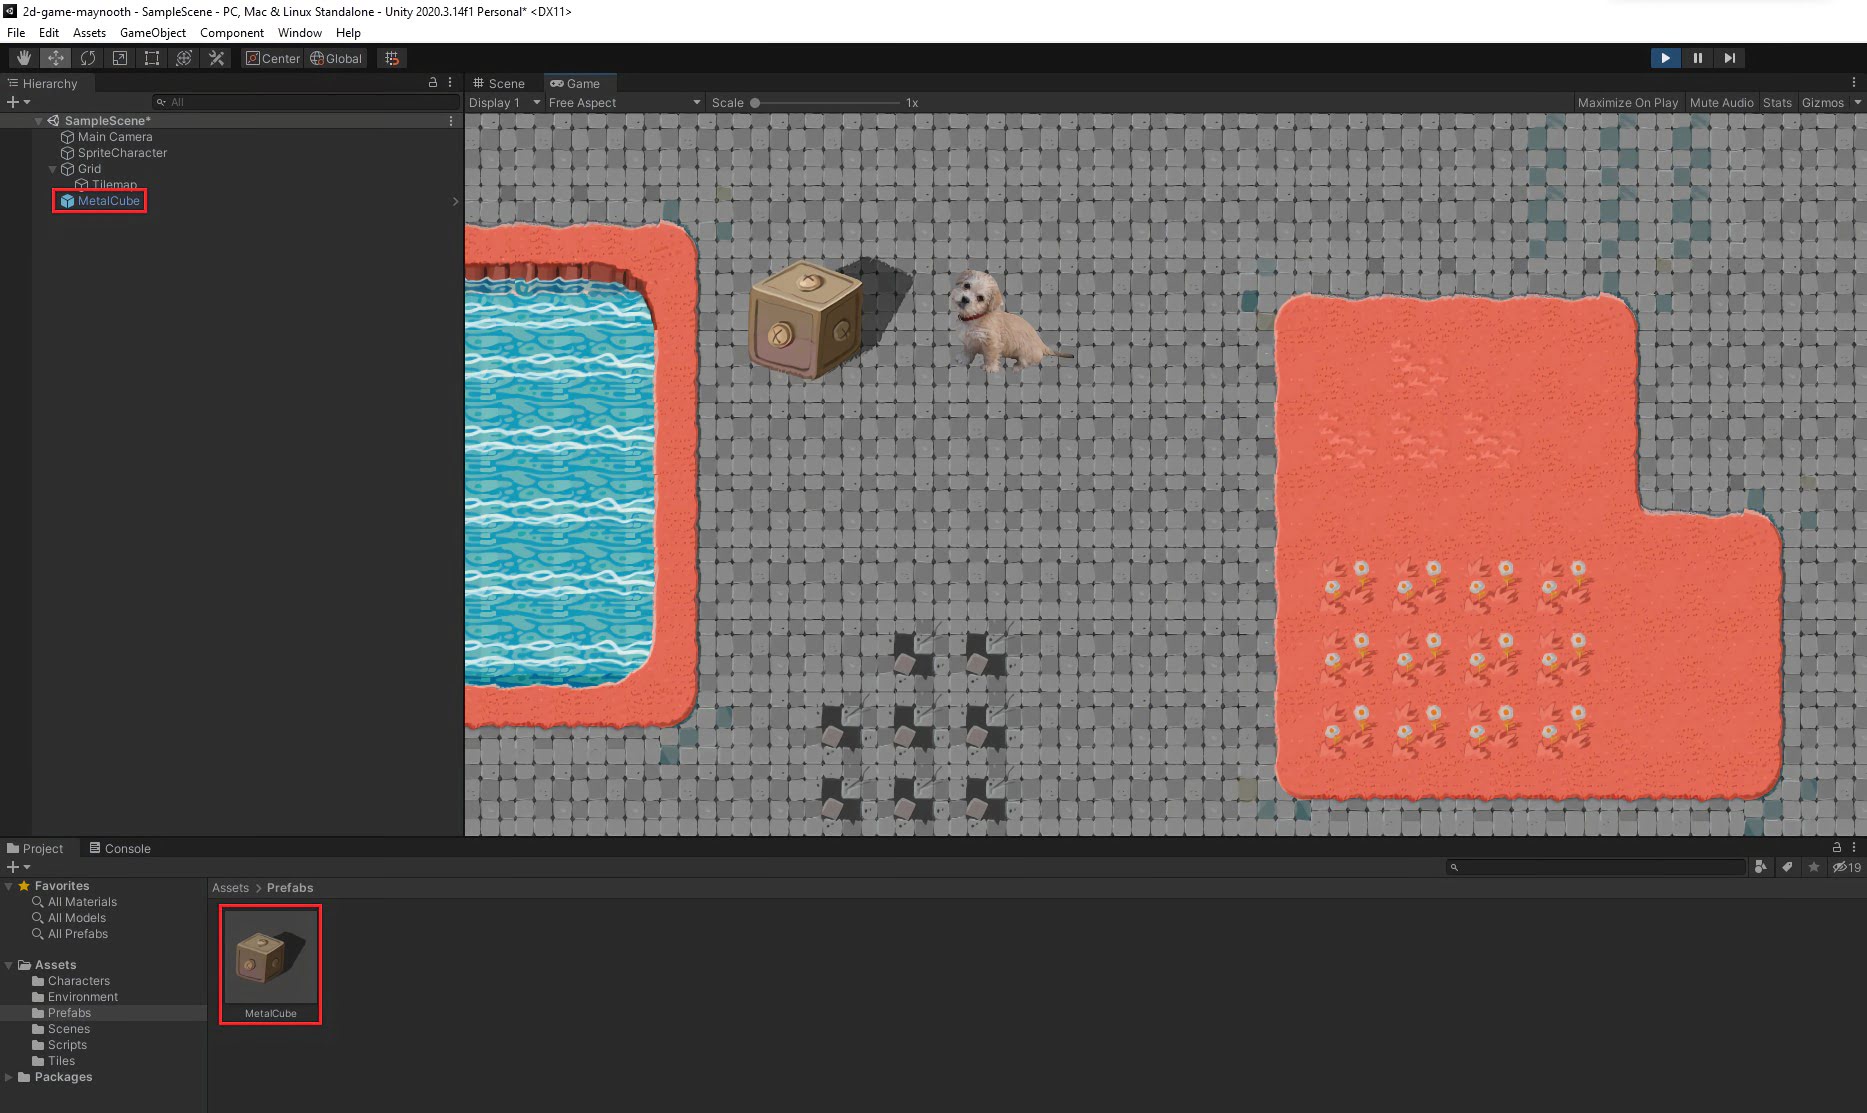
Drag and drop MetalCube.png into Assets -> Environment.
Drag MetalCube into the hierarchy.
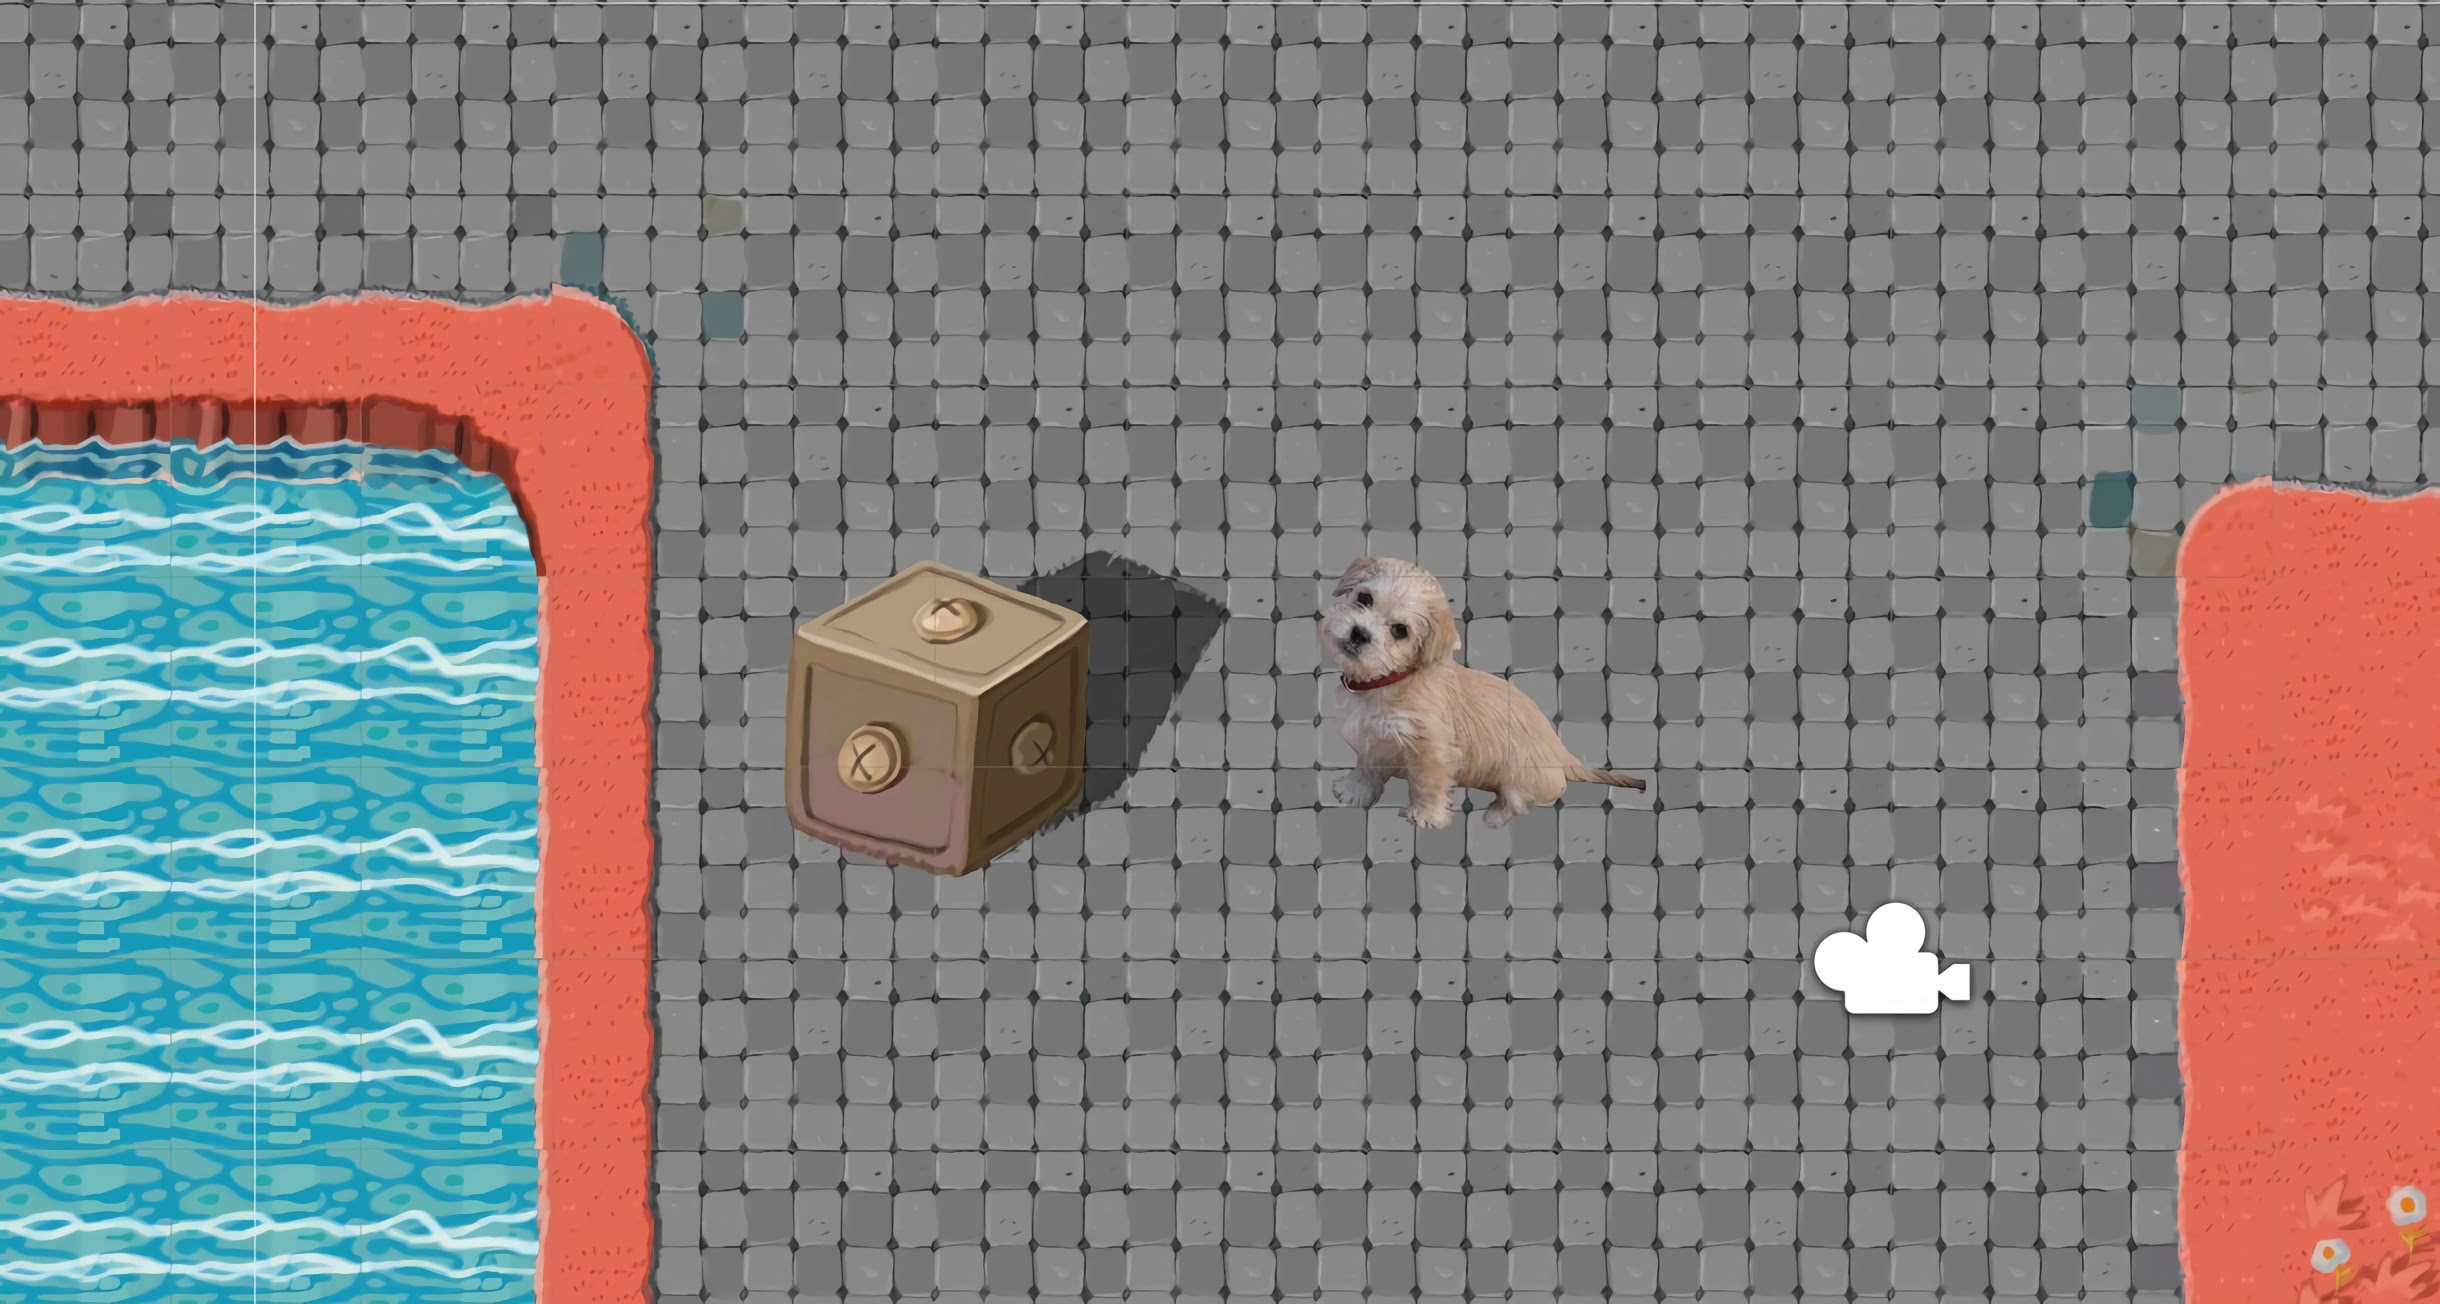
Place the MetalCube within your scene.
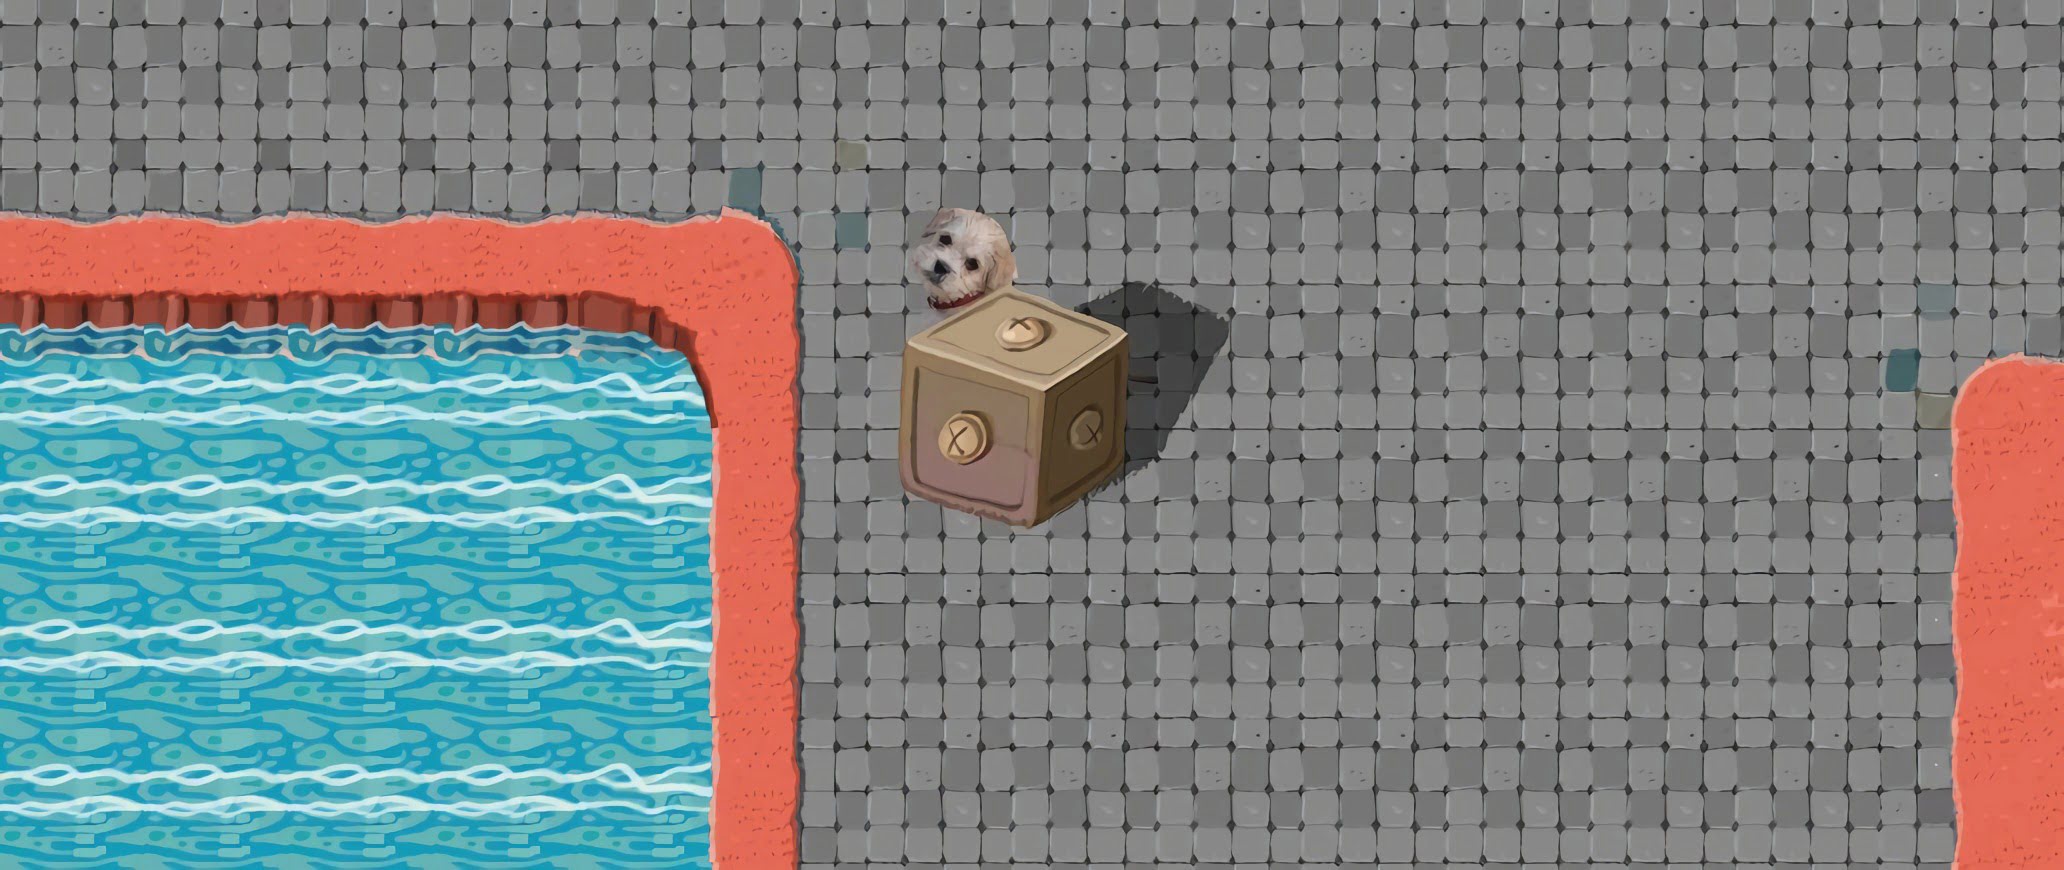
Click play and move SpriteCharacter around the MetalCube!
You will notice that moving SpriteCharacter onto the MetalCube will hide the MetalCube.
To fix this, click Edit -> Project Settings.
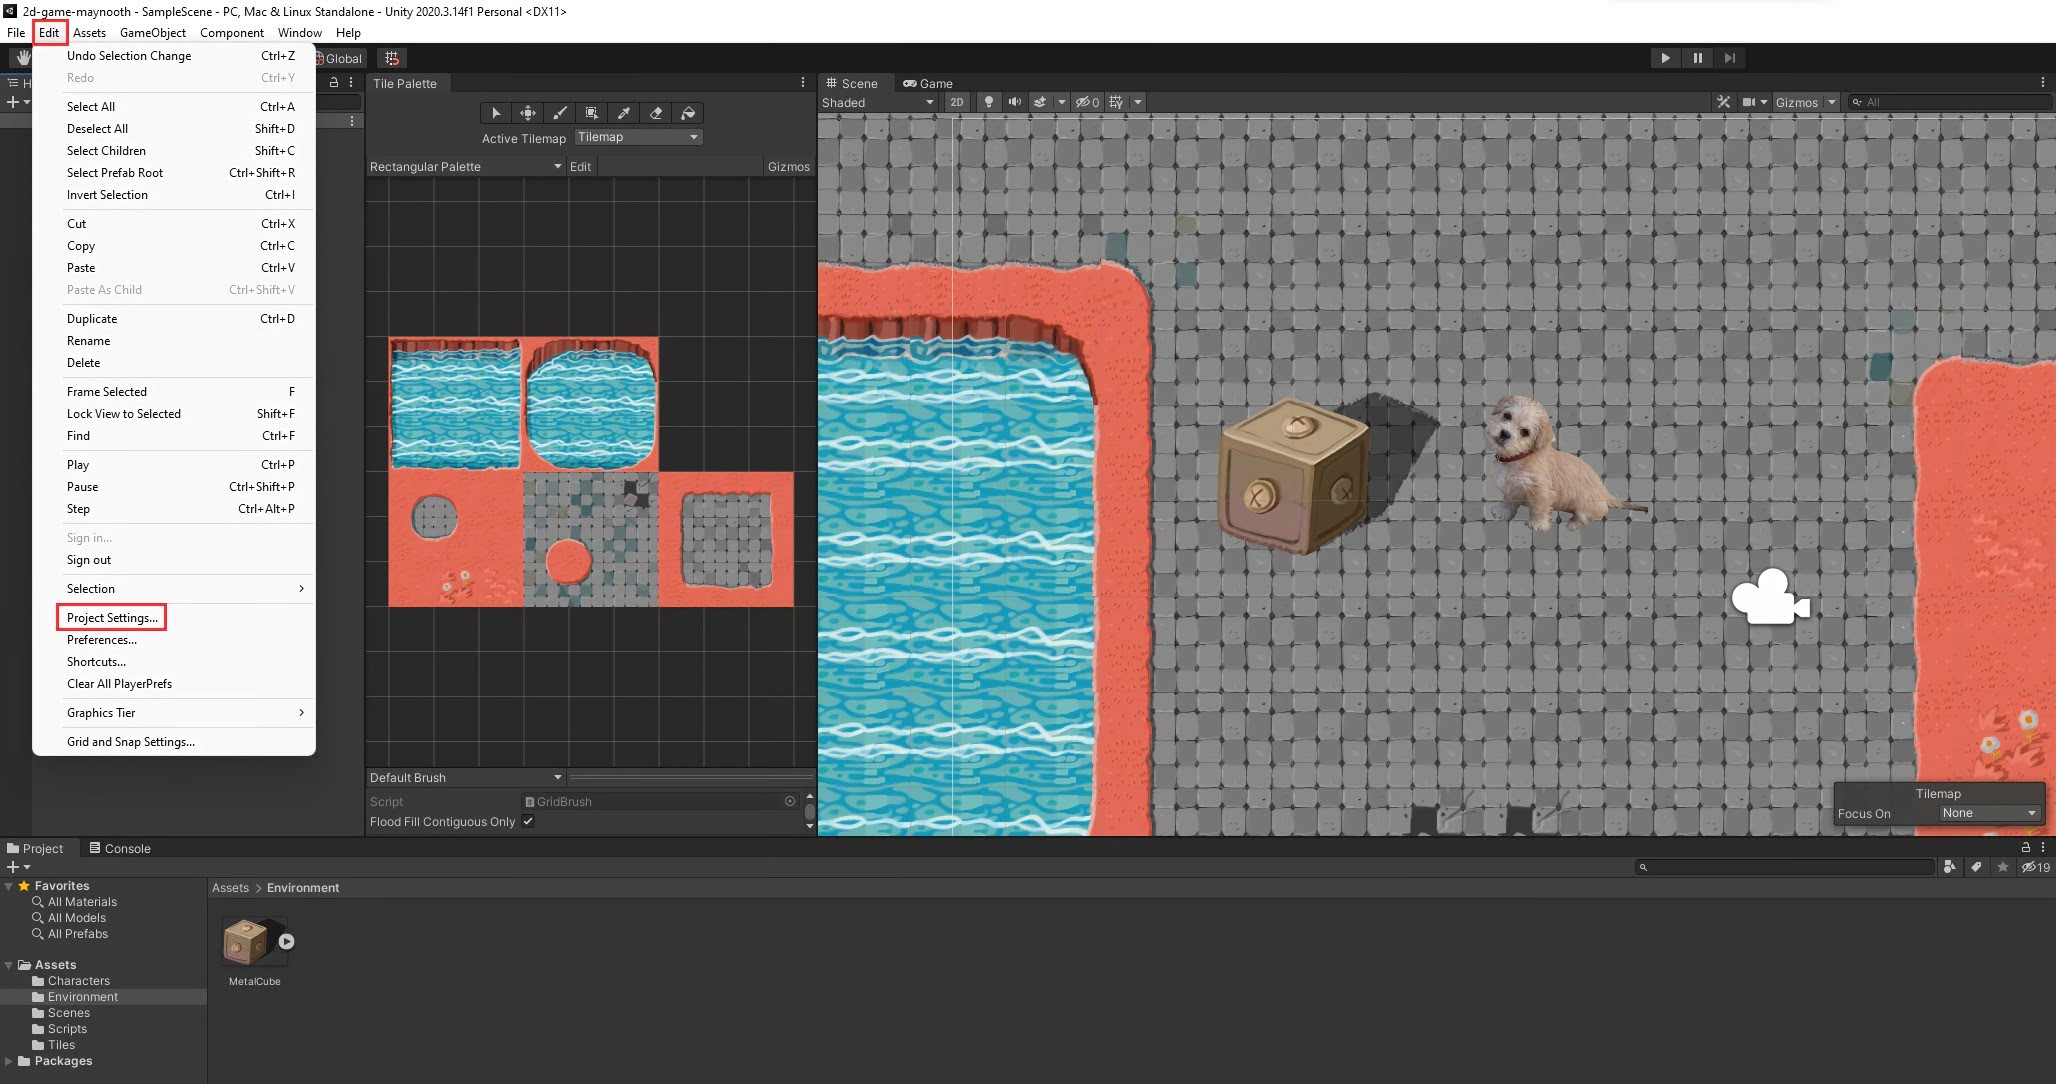
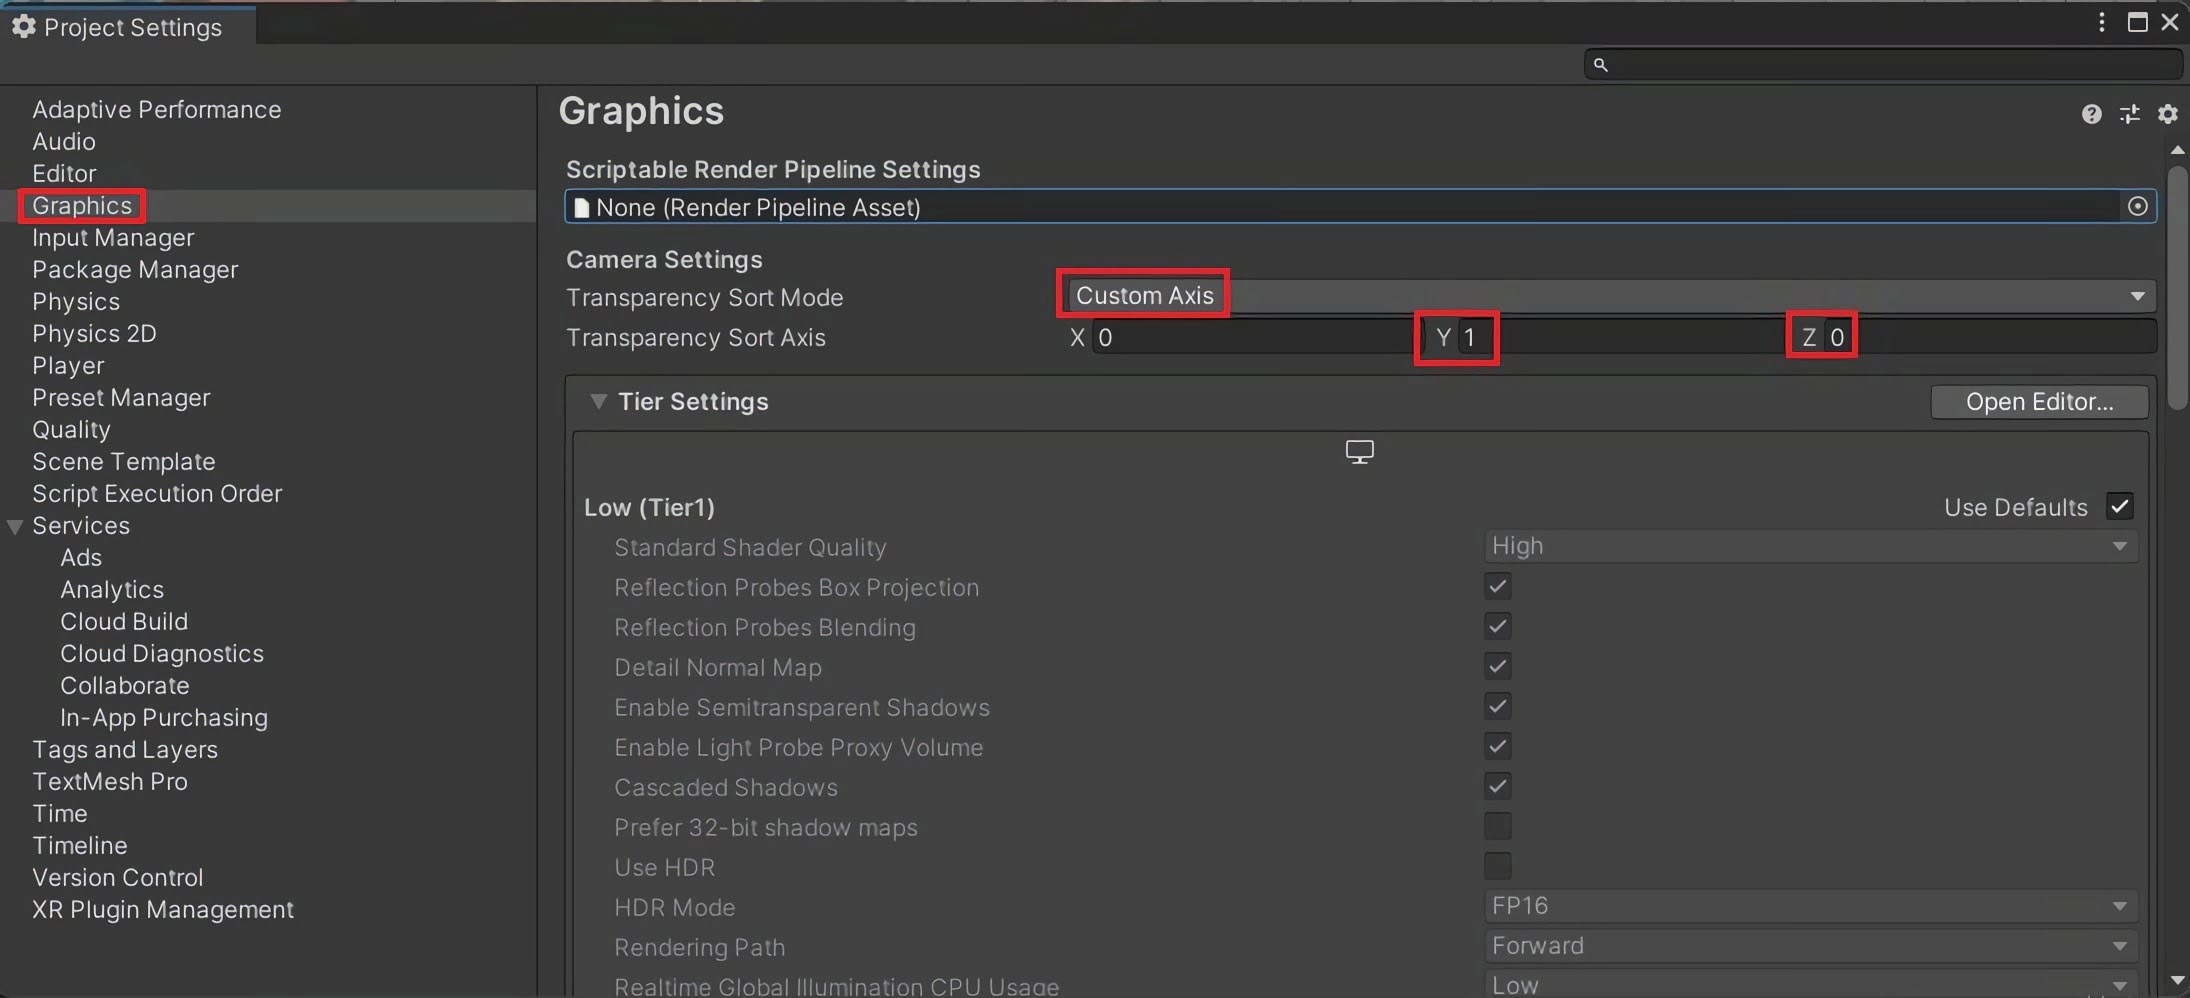
Click Graphics.
Change Transparency Sort Mode to Custom Axis.
Change the Transparency Sort Axis Y coordinate to 1 and the Z coordinate to 0.
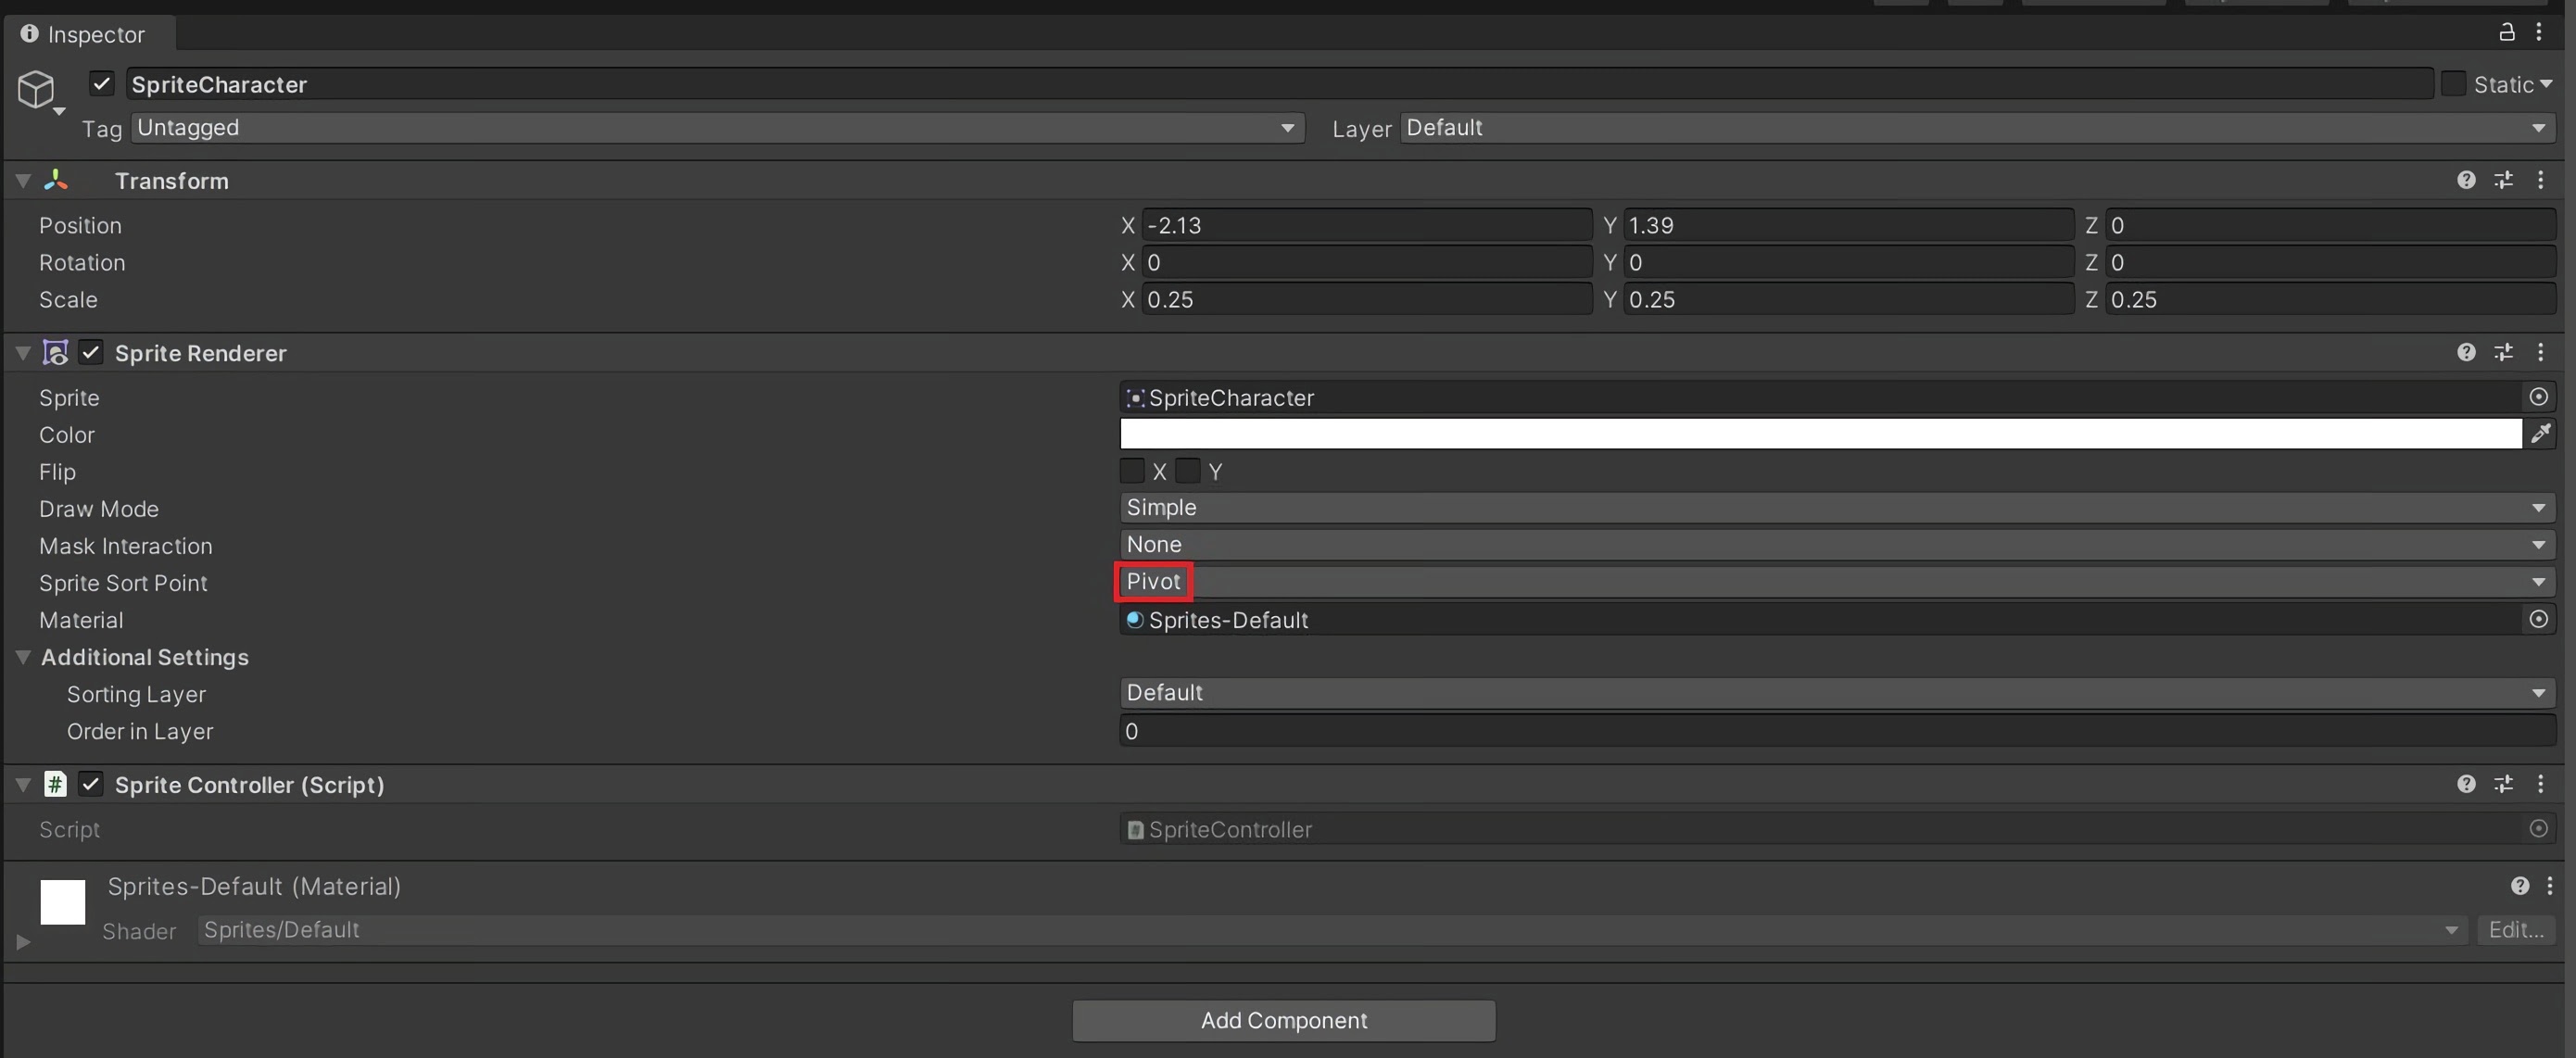
The Pivot of a Sprite is the point at which it rotates around.
We need to change the Pivot of SpriteCharacter and MetalCube.
First, click SpriteCharacter in the Hierarchy.
Change Sprite Sort Point to Pivot.
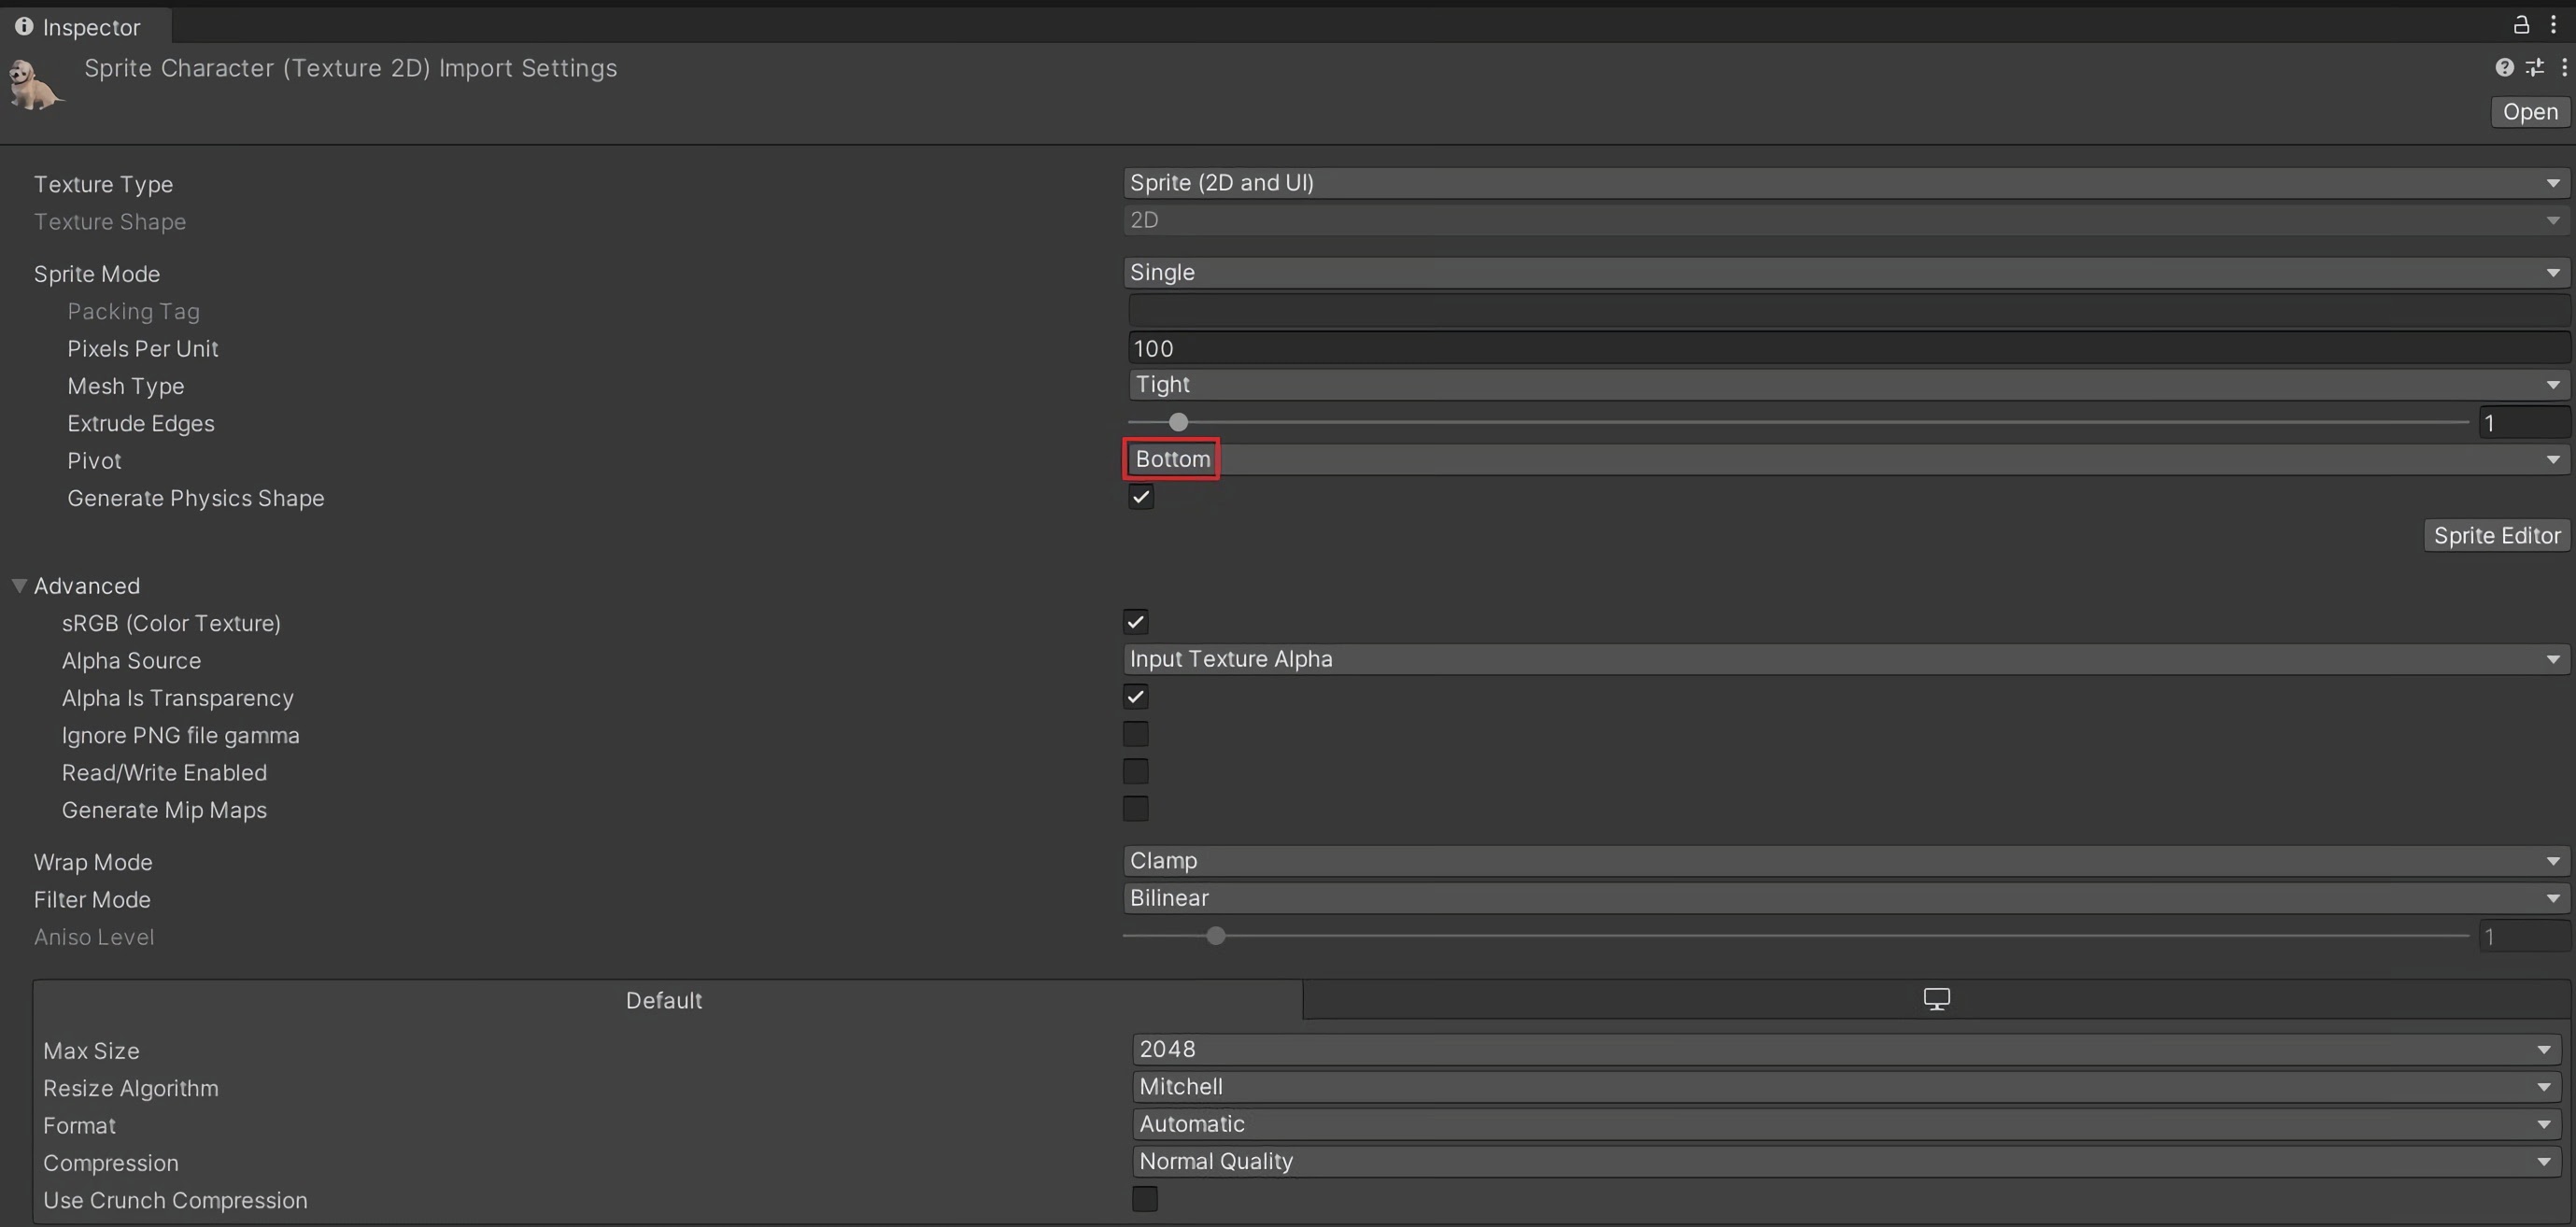
Click SpriteCharacter in Assets.
Go to the Inspector and change Pivot to Bottom. (You can also set the Pivot to a custom position using the Sprite editor).
Click the Apply button.
Repeat these steps for MetalCube (change sort point to pivot and change pivot to bottom).
SpriteCharacter will now appear behind the MetalCube!
Step 5 - Creating Prefabs
It would be annoying to have to repeat these steps for every MetalCube you add. To avoid repeating work, we can create a Prefab.
Create a new folder in Assets and call it Prefabs.
Drag and drop MetalCube from the Hierarchy to Assets -> Prefabs.
Now you can drag this MetalCube from Prefabs into the Scene to create a new MetalCube with the same settings! Prefabs help save a lot of time and avoid duplicating your work.
Repeat these steps for any other GameObjects you want to add to your world!
Created by: David Corish